Particle Traces are conceptually similar to an injected dye stream in the flow. They are a very powerful way to visualize flow movement.
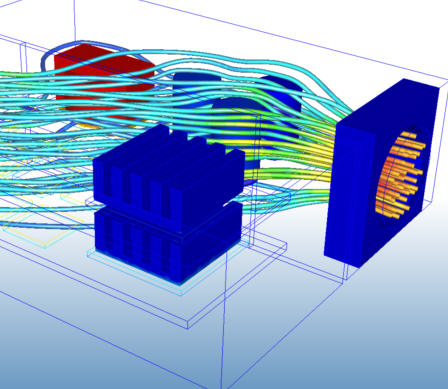
By default, particle traces do not have mass, so their movement is only influenced by the flow. To cause traces to behave more like a physical substance within a flow system, enable Mass.
Creating Particle Traces
To create a set of Particle Traces
- Create a results plane, and open the Trace dialog.
- Select a Seeding method.
- Click Add points.
- Click points on the Plane (or drag the grid).
- Click Add trace set.
Seeding methods:
Pick on plane
To select seed point locations, left click on the Plane.

Key-in
Key in the exact X,Y, and Z coordinates. Separate each coordinate with a comma. (Do not surround the coordinates with brackets or parentheses.) These coordinates do not have to be on the Plane.
Rectangular grid
Draw a rectangle on the active Plane by clicking three locations: the top two corners and a lower corner:

Specify the number of grid points in the Width and Height fields.
Grid Spacing Option
The Grid Spacing option bases the trace seed distribution on the vector density grid spacing. Use this to create a uniform distribution of traces throughout the entire results plane. This method is useful when computing Erosion.
To enable the Grid spacing option:
- On the Traces dialog, select Rectangular grid as the Seeding method.
- Check Use grid spacing.
To adjust the Grid spacing density:
- Enable vectors on the results plane.
- On the Vector settings tab of the Plane Control dialog, drag the Grid spacing slider.


Circular grid
Draw a circle on the active Plane by first clicking on the center of the circular grid, and then dragging the circle to the desired radius and clicking again:

Specify the number of points in the radial and circumferential directions in the Width and Height fields, respectively.
Trace Appearance
To view, sort, and modify traces
- To view the trace list, click the Trace list... button.
- To sort traces, click the column headers.
- To modify trace appearance, right click on Set, and select Set properties....
Select the desired trace type from the Appearance menu:
Cylinders
Spheres

Lines
Points

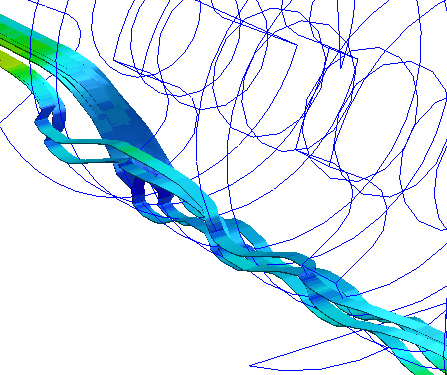
Ribbons
Comets
Additional attributes
- Control the size of the trace with the Width setting. Increasing the width for cylinders, spheres, and points, makes the diameter bigger. Increasing the width for lines makes them appear as ribbons.
- Control the length of the trace with the Max Steps setting. The default of 5000 is adequate for most traces. Increase this value for very finely meshed models if traces stop mid-way through the model.
- Toggle the display of the result on the trace with the Show Result control.
Animation
- To start the animation click Start. Click Pause to stop.
- To "grow" traces as the animation occurs, check Incremental.
- To restore traces to their original, state click Reset.
- Vary the speed of the animation with the Speed control.
Deleting Particle Traces
- To delete individual particle traces, select the trace from the list, and click Delete.
- To delete a group of traces, select the group name and click Delete.
- Delete all traces by clicking Delete All.
- If a trace animates very slowly, it may pass through a stagnation region. Sort by residence time, click the trace with the highest residence time, and click the Delete button.
Residence Time
The time that a trace takes to traverse through the model is its residence time, and is listed for each trace. Residence time can vary based on the flow, the geometry, and if the particle has mass.
A trace with a relatively longer residence time than the rest will affect animation. Such a trace will animate very slowly followed by a very rapid animation of the others.
Related Links