Car Paint has components for a paint layer with embedded metal flakes, a clear-coat layer, and a Lambertian dirt layer.
Car Paint is available as both a mental ray material and shader; both have identical parameters, and support the following unique characteristics of real-world car paint:
- The lowest surface, applied directly to the car body, is a thin layer of pigment. The properties of this layer are such that the perceived color changes depending on the viewing angle as well as the incident angle of the incoming light.
- Tiny metal flakes are suspended within this layer. The flakes reflect light and can be seen glittering on a sunny day, due to individual flakes reflecting sunlight directly at the observer.
- On top of this is a clear-coat layer, which can be more or less reflective and more or less glossy, depending on the quality of the layer and any added wax coating. Most notably, this layer tends to exhibit a pronounced Fresnel effect, reflecting more light at glancing angles.
- An optional, topmost Lambertian dirt layer can help give an "unwashed" look.

Shortcut Map Buttons
You can assign a map or shader to every parameter or “component” of the Car Paint material/shader. The small map buttons to the right of the color swatches and numeric controls open the Material/Map Browser, where you can select a map or shader for that component. These buttons are shortcuts: You can also use the corresponding buttons on the Maps rollout. If you have assigned a map or shader to one of these color components, the button displays the letter M. An uppercase M means that the corresponding map is assigned and active. A lowercase m means that the map is assigned but inactive (turned off).
Interface
Diffuse Coloring rollout
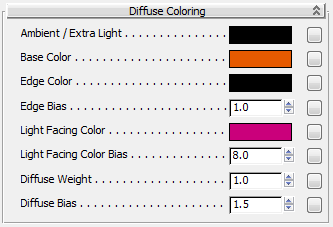
- Ambient / Extra Light
-
Click the color swatch to choose the ambient light component.
Note: This parameter is treated differently from the ambient/ambience parameter pair of many other base shaders in that it is influenced by the additional Diffuse Coloring parameters, and hence represents incoming light, rather than the object's "ambient color."Click the map button to assign an Ambient Color map. This button is a shortcut: You can also assign an Ambient Color map on the Maps rollout.
- Base Color
-
Click the color swatch to choose the base diffuse color of the material.
Click the map button to assign a Diffuse Color map. This button is a shortcut: You can also assign a Diffuse (Base) Color map on the Maps rollout.
- Edge Color
-
Click the color swatch to choose the color seen at glancing angles (that is, edges), which tends to appear much darker than the Base color. For deep metallic paints seen on sports cars, it tends to be almost black.
- Edge Bias
-
The falloff rate of the color towards the edge. Higher values make the edge region narrower; lower values make it wider. The useful range is 0.0 to approximately 10.0, where the value 0.0 turns the effect off. Default=1.0.

Color shift due to view angle, shifting between a red base color and a blue edge color (atypical colors chosen for demonstration purposes) with varying Edge Bias values
- Light Facing Color
-
Click the color swatch to choose the color of the area facing the light source.
- Light Facing Color Bias
-
The falloff rate of the color towards the light. Higher values make the colored region facing the light smaller/narrower; lower values make it larger/wider. The useful range is 0.0 to approximately 10.0, where the value 0.0 turns the effect off. Default=8.0.

Color shift due to view angle, shifting between a red base color and a green light facing color (atypical colors chosen for demonstration purposes) with varying Light Facing Color Bias values
- Diffuse Weight
-
The overall level of the Diffuse Coloring parameters. Default=1.0 (no adjustment).
- Diffuse Bias
-
The falloff of the diffuse shading. Higher values push the diffuse peak towards the light source, and lower values flatten the diffuse peak. The useful range is approximately 0.5 to 2.0, where 1.0 represents standard Lambertian shading. Default=1.5.
Flakes rollout
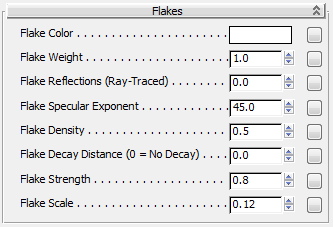
- Flake Color
-
Click the color swatch to choose the color (reflectivity) of the flakes, which by default is white, the typical flake color.
- Flake Weight
-
A scalar multiplier for the flake color. Default=1.0.
- Flake Reflections (Ray-Traced)
-
The amount of ray-traced reflection in the flakes, which allows glittery reflections of, for example, an HDRI environment. The default value of 0.0 turns the effect off.
This effect should generally be very subtle; a value of 0.1 is often enough. The final intensity of reflections also depends on the Flake Color and Flake Weight values.
- Flake Specular Exponent
-
The Phong specular exponent for the flakes. Default=45.0.
- Flake Density
-
The density of the flakes. The useful range is from 0.1 to approximately 10.0, where lower values indicate sparser flakes and higher values indicates denser flakes. Default=0.5.
- Flake Decay Distance
-
The distance at which the influence of the flakes fades out. The default value of 0.0 disables fading. Any positive value causes the Flake Weight value to be modulated so that it reaches zero at this distance.
Because flakes are relatively small, they can introduce rendering artifacts if their visual density becomes significantly smaller than a pixel. If the oversampling of the rendering is set high, small flakes can also potentially trigger massive oversampling and hence overlong rendering times needlessly, because the averaging caused by the oversampling will essentially cancel out the flake effect. If you experience these issues, use Flake Decay Distance to counteract them.
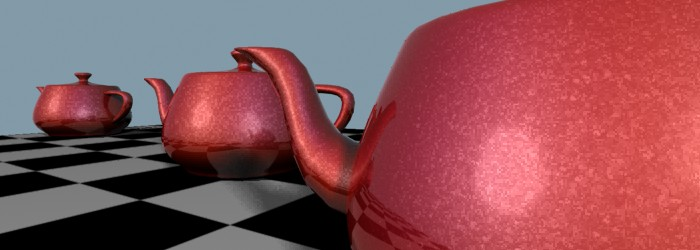
Flakes at different distances with no flake decay. The farthest flakes might cause flicker in animations, or trigger unnecessary oversampling and long render times (rendered here with low oversampling for illustrative purposes).
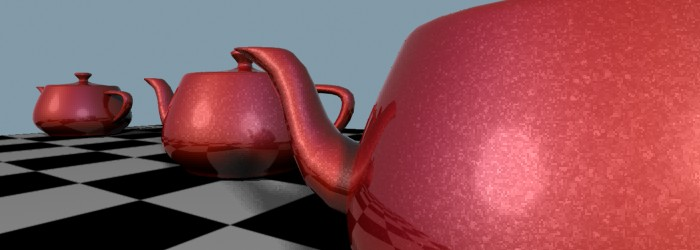
Using flake decay. The flake strength diminishes with distance. The same intentionally low oversampling as in the previous image has been used.
- Flake Strength
-
The difference between the orientation of the flakes. The useful range is 0.0 to 1.0 where 0.0 means that all flakes are parallel to the surface, while higher values increasingly vary the orientation of flakes. Default=0.8.
- Flake Scale
-
The size of the flakes. The procedural texture is calculated in object space, and will hence follow the object. Thus, the scale is influenced by any scale transformation on the object. Default=0/12.
Specular Reflections rollout
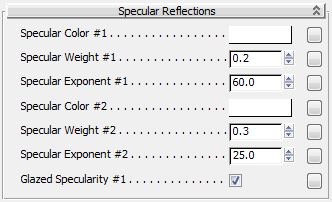
- Specular Color #1
-
Click the color swatch to change the color of the primary specular highlight.
Click the map button to assign a Specular Color map. This button is a shortcut: You can also assign a Specular Color map on the Maps rollout.
- Specular Weight #1
-
A scalar multiplier applied to Specular Color #1. Default=0.2.
- Specular Exponent #1
-
The Phong exponent of Specular Color #1. Default=60.0.
- Specular Color #2
-
Click the color swatch to choose the color of the secondary specular highlight.
- Specular Weight #2
-
A scalar multiplier applied to Specular Color #2. Default=0.3.
- Specular Exponent #2
-
The Phong exponent of Specular Color #2. Default=25.0.
- Glazed Specularity #1
-
When on, enables a special mode on the primary specular highlight called glazing. By applying a threshold to the specular highlight, it makes the surface appear more polished and shiny. For a new sports car with a lot of wax, turn this on. For a beat-up car in the junkyard, turn it off. Default=on.

Left to right: Flake specularity only; standard specularity; "glazed" mode enabled; "glazed" mode specularity with flakes
Reflectivity rollout
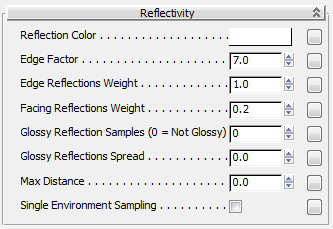
- Reflection Color
-
Click the color swatch to change the color of the reflections in the clear-coat layer. By default this is white, which is the typical color.
Click the map button to use a Reflection map. This button is a shortcut: You can also assign a Reflection map on the Maps rollout.
- Edge Factor
-
The clear coat tends to reflect more at glancing angles (edges). The Edge Factor setting defines the "narrowness" of this edge. Default=7.0.
- Edge Reflections Weight
-
The reflective strength at the edge. Default=1.0, and usually this is the preferred value.
- Facing Reflections Weight
-
The reflective strength at facing angles (generally low: 0.1 to 0.3). Default=0.2.
- Glossy Reflection Samples
-
Enables a glossy clear coat. This parameter sets the number of glossy reflection rays traced. The default value of 0 disables glossiness.
- Glossy Reflections Spread
-
Sets the amount of glossiness. A car surface is generally a near-mirror, so keep this value small. Default=0.0.
- Max Distance
-
Limits the reach of reflective rays. Default=0.0.
- Single Environment Sampling
-
When on, optimizes lookup of environment maps. Default=off.
Dirty Layer (Lambertian) rollout
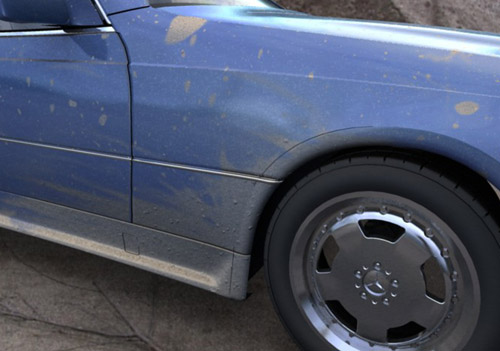
Real cars are rarely clean. This shows the dirt layer (hand-painted dirt-placement map), including a bump map applied in the dirty regions.
A simple Lambertian dirt layer covers the underlaying paint and clear-coat layers.

- Dirt Color
-
The color of the dirt.
- Dirt Weight
-
The amount of dirt in the layer. This is typically connected to a texture shader to obtain variations in the dirt across the surface. If the value is 0.0, no dirt is added.
Advanced Options rollout

- Irradiance Weight (Indirect Illumination)
-
The influence of indirect light (photons and final gathering) on the surface. It is internally divided by pi (3.14159); for example, a value of 1.0 means the standard 1.0/pi weight.
- Global Weight
-
A global tuning parameter that affects the entire diffuse, flake, and specular subsystems. It does not affect reflections or dirt.
Maps rollout
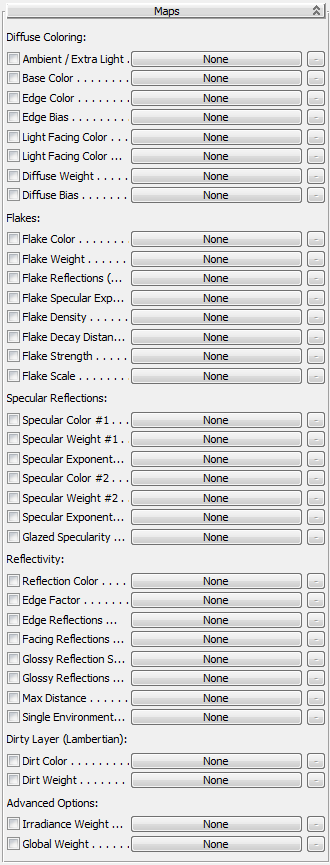
This rollout lets you assign a map or shader to any Car Paint parameter. You can also assign maps and shaders on the rollout where the parameter first appears: The principal value of this rollout is that it also lets you toggle a parameter's shader, using the checkbox, without removing the map.
![]() The button to the right of each main shader button is for shaders that can return multiple parameters. If a shader that returns multiple parameters is assigned to the component, the button's tooltip shows the parameter name.
The button to the right of each main shader button is for shaders that can return multiple parameters. If a shader that returns multiple parameters is assigned to the component, the button's tooltip shows the parameter name.