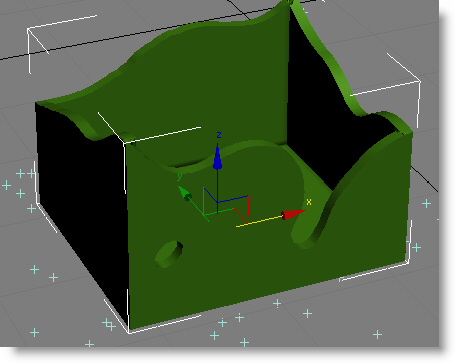
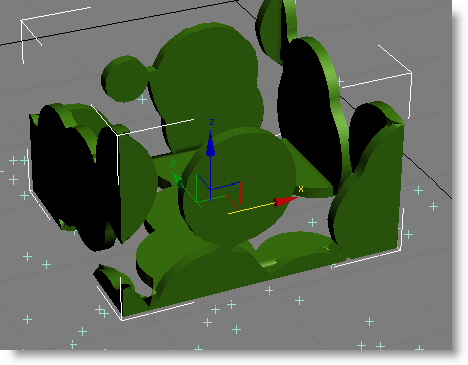
Particle Face Creator is an object-space modifier that uses particle positions to hide and reveal mesh geometry. As particles move past the geometry, parts of it melt away and then reappear in a natural-looking sequence. This is a result of the modifier's ability to adjust the geometry in a way that obscures the underlying face topology.
Interface

- Type
- Defines the mode of face modification:
- Create Faces appear in close proximity to particles.
- Dissolve Faces disappear in close proximity to particles.
Timing group
The settings in this group let you set a frame range within which the particles affect the object appearance, and hide the geometry before and/or after the specified frame range.
- Hide Before Time On
- When on, the object is completely hidden before the frame specified by Time On.
- Time On
- The absolute frame at which the particles start affecting the object appearance.
- Time Off
- When on, lets you set the absolute frame after which the particles no longer affect the object appearance.
- Hide After Time Off
- When on, the object is completely hidden after the frame specified by the Time Off numeric setting. Available only when Time Off is on.
- Particle Flow Systems
- Shows the Particle Flow systems whose particles will affect the object appearance. Use the Add button to add systems by selecting the PF Source icons in the viewport, or the By List button to add PF Source objects from a list. To remove a system, highlight it in the list and click Remove.
- All Particle Flow Events
- When on, all events in the listed Particle Flow systems (see preceding) participate in the modifier. When off, use the Particle Flow Events controls (see following) to specify which events' particles should affect the object appearance.
- Particle Flow Events
- When All Particle Flow Events is off, the list shows the events whose particles affect the object appearance. Add events to the list with the Add By List button, and remove events by highlighting them and then clicking Remove.
Particles For Face Creation group
Use these settings to define how the modifier calculates the proximity to particles. The modifier does not consider particle shapes; only their positions and scale factors.
- Zone Size
- The distance value. If the distance between a particle and a face or vertex of the geometry is less than or equal to this value, then the geometry is created (or dissolved). Thus, potentially, the lower the value, the less likely the particles are to affect the geometry.
- Blend Particles
- When off, to determine the "reveal" factor, a geometry vertex looks for the closest particle. If the closest particle is within the Zone Size distance then the vertex is revealed. When on, the "reveal" factor from all nearby particles is accumulated and used to determine whether a vertex is to be revealed or not. This creates a smoother boundary between different areas of the revealed geometry.
The following illustrations show the difference between Blend Particles on (top) and off (bottom) at the same animation frame. With the option off, each particle has a greater individual effect on the mesh appearance.


- Weight %
- When on, specified the amount of blending of nearby particles. The higher the value, the more blending occurs. At 0.0, the effect is the same as turning off Blend Particles.
- Multiply By Particle Scale
- When on, uses the particle scaling factor as a multiplication factor for the Zone Size parameter. For this to have any effect, the particles must have scaling data, which you can apply with a Scale or comparable operator.
- Influence %
- The extent to which to use the particle scale factor as a multiplier of the Zone Size setting.
- Edge Split Precision
- The Particle Face Creator modifier works by subdividing and trimming the geometry dynamically as particles move past, thus permitting smooth borders between visible and hidden parts of the object. This setting determines how to trim the geometry when showing only part of it. Note: Because of the way the modifier works, it is important to have sufficient tessellation on the original geometry. For instance, with a Box primitive, use reasonably high Length/Width/Height Segs values, such as 32 for each. Otherwise the algorithm does not have enough faces to split based on the vertices' status (inside or outsize the Zone Size distance).
You can control the trimming process with the Edge Split Precision setting. If a split point is close to the original vertices of the geometry, the face split can create "sliver" faces (one short and two long edges), which make the geometry look bad. To avoid the creation of sliver faces, you can tell the software when a split point should snap to the closest original vertex.
The options are:- Relative % Defines the snap decision in terms of relative edge length. 100% gives you perfect precision, although sliver faces can be generated as a result. 0% means that all split points are snapped to the closest original vertex.
- Absolute Defines the snap decision in terms of the length of the smallest edge on a split face. If an edge is shorter than the Absolute value, the split vertex is snapped to the closest original vertex.
- Parameters Animation
- You can animate the Zone Size and Influence settings, and when you do you can synchronize the parameter animation with particle timing by using the Sync By parameter. Note: You can also animate the Weight, Relative, and Absolute settings, but their animation cannot be synchronized with particle timing.
- Sync By
- Choose the time frame in which to apply animation of the Zone Size and Influence settings: Absolute Time, Event Duration, or Particle Age. For details, see Scale Operator topic
 Animation Offset Keying group section.