The Shadow Map Parameters rollout is displayed when you have chosen shadow mapping as the shadow-generation technique for a light. You select this in the General Parameters rollout.
Both the scanline renderer and the mental ray renderer support Shadow Map shadows.
Interface

- Bias
-
Shadow bias moves the shadow toward or away from the shadow-casting object (or objects).
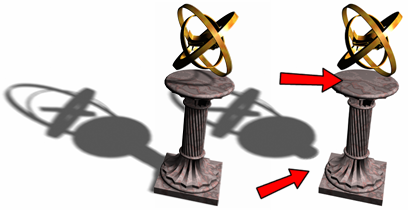
Left: Default shadows
Right: Increasing the Bias value separates the shadow from the object.
If the Bias value is too low, shadows can "leak" through places they shouldn't, produce moire patterns or making out-of-place dark areas on meshes. If Bias is too high, shadows can "detach" from an object. If the Bias value is too extreme in either direction, shadows might not be rendered at all.
This value depends on whether Absolute Map Bias is on or off:
- When Absolute is off (the default), Bias is calculated based on the scene extents, and then normalized to one. This provides similar default shadow results, regardless of scene size. User adjustments to Bias are typically low decimal values near 1.0 (for example, 1.2).
- When Absolute is on, Bias is a value in 3ds Max units. User adjustments to Bias depend on the size of the scene, and can range from values close to zero to values in the hundreds (see the Tip at the end of this topic).
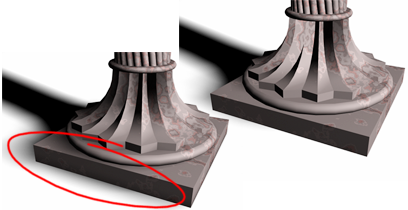
Left: Too small a Bias value causes shadow “leaks.”
Right: Increasing the Bias value fixes the problem.
- Size
-
Sets the size (in pixels squared) of the shadow map that's computed for the light.
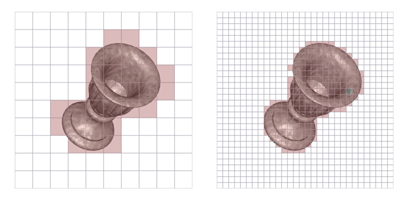
The shadow map size specifies the amount of subdivisions for the map. The greater the value, the more detailed the map will be.
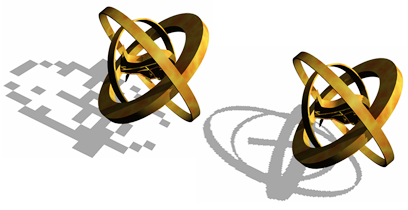
Left: Size set to 32.
Right: Size set to 256.
- Sample Range
-
The sample range determines how much area within the shadow is averaged. This affects how soft the edge of the shadow is. Range=0.01 to 50.0.
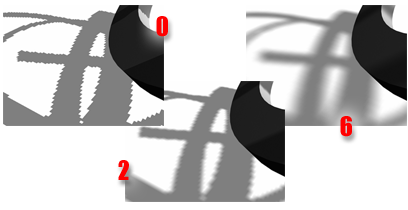
Increasing the Sample Range blends the shadow edges and creates a smooth effect, hiding the granularity of the map.
- Absolute Map Bias
-
When on, the bias for the shadow map is not normalized, but is instead based on a fixed scale expressed in 3ds Max units. This value does not change during an animation. You must choose the value, based on the size of the scene extents.
When off, the bias is computed relative to the rest of the scene, and then normalized to 1.0. This provides a common starting bias value in scenes of any size. If the scene extents change, this internal normalization can vary from frame to frame. Default=off.
Tip: Leaving Absolute Map Bias off gives good results in most situations, because the bias is internally balanced to match the scene size. In animations, however, if moving objects cause a large change in the scene extents (or if objects are unhidden, and so on), the normalized bias value might become inappropriate, causing shadows to flicker or disappear. If this happens, turn on Absolute Map Bias. You will have to set the Bias control to a value appropriate for the scene. As a rule of thumb, try a Bias value that is the distance between the light and the target object, divided by 100. - 2-Sided Shadows
-
When on, backfaces are not ignored when calculating shadows. Objects seen from the inside are not lit by lights from the outside. When off, backfaces are ignored, which can cause outside lights to illuminate object interiors. Default=on.
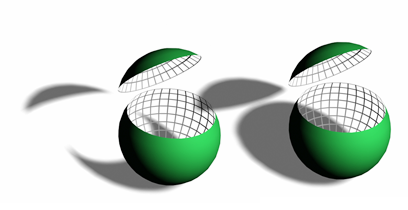
The faces inside the sliced sphere do not cast shadows if 2-Sided Shadows is not selected.
Note: The mental ray renderer disregards this setting, and always renders 2-sided shadows.