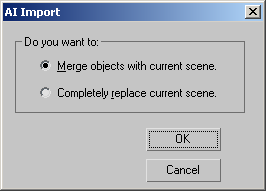
In addition to using the Import command on the Application menu, you can import geometry by dragging and dropping. If the scene to which you’re importing already contains geometry, 3ds Max usually asks whether you want to merge the imported geometry with the existing scene, or replace the scene entirely.
Importing Geometry by Dragging and Dropping
You can import geometry by dragging from a file browser into a 3ds Max viewport. When you use this method, typically 3ds Max does not prompt you to merge or replace the scene, but merges the imported geometry with what is already there.
For most file formats, after you release the mouse in the viewport, you can move the geometry to position it. Click once to set the position of the imported geometry.
Importing Geometry into an Existing Scene
When you use the Import command to import geometry into a scene that already contains geometry, in most cases 3ds Max opens a dialog that asks whether you want the imported geometry to be added to the scene, or to replace the scene entirely.
For example:

-
Merge objects with current scene
Merges imported data with the current scene.
-
Completely replace current scene
Completely replaces the current scene with the imported data.
Typically, once you click OK, 3ds Max opens a second dialog with geometry-specific options, as described in the topics that follow. For some geometry formats, only one dialog appears, and these options are merged with the geometry-specific options.