![]()

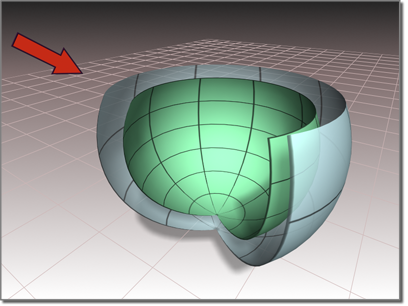
Surface created as an offset
Procedures
To create an offset surface:
- In the NURBS toolbox, turn on
 (Create Offset Surface).
 - Click the surface you want to offset, and drag to set the initial distance of the offset surface.
The offset surface is created.
- Adjust the Offset parameter.
The NURBS object must contain at least one surface.
Interface
While an offset surface sub-object is selected, a rollout with the offset Distance parameter is displayed at the bottom of the Modify panel.
Offset Surface rollout (creation time)

- Offset
-
The distance between the parent surface and the offset surface, in 3ds Max units.
If the parent surface is planar, the appearance of the offset surface doesn't change with distance. If the parent surface is curved, increasing the offset value increasingly exaggerates the curvature of the offset surface.
- Flip Normals
-
Lets you flip the surface normals at creation time. (After creation, you can flip normals using controls on the Surface Common rollout.)
- Cap
-
When on, eight boundary curves are generated (four at the four edges of each surface), and then generates four ruled surfaces to connect the two original surfaces. While they are present, cap surfaces are maintained so they match the dimensions of the offset and its parent.
The Cap checkbox appears only on the creation rollout. If you want to remove the caps later, simply select them as surface sub-objects and delete them. Think of offset capping as a workflow shortcut rather than a property (or parameter) of offset surfaces.
To flip the normal of an offset cap, select it as a surface sub-object and use the Flip Normals toggle on the Surface Common rollout.
Note: If you trim the original surface, or make the offset surface independent and then trim it, the capping surfaces will look strange.
Offset Surface rollout (modification time)

- Offset
-
The distance between the parent surface and the offset surface in 3ds Max units.
If the parent surface is planar, the appearance of the offset surface doesn't change with distance. If the parent surface is curved, increasing the offset value increasingly exaggerates the curvature of the offset surface.
- Replace Base Surface
-
Lets you replace the parent surface. Click the button, then click the new surface on which to base the offset.