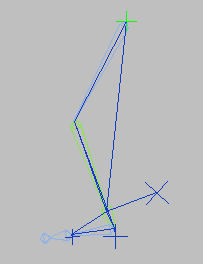
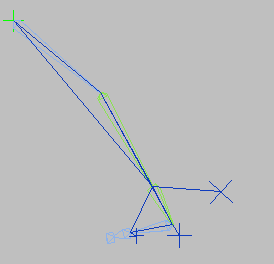
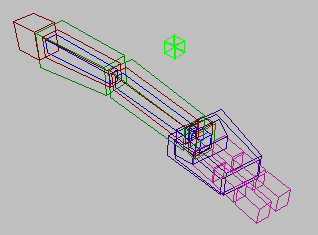
The HI (History-Independent) Solver does not rely on IK solutions calculated in previous keyframes in the timeline, so it is just as fast to use at frame 2000 as it is at frame 20.
The HI Solver uses a goal to animate a chain. You animate the goal and the IK solver attempts to move the end effector (the pivot point of the last joint of the chain) to match the position of the goal. Often the goal is parented to other control objects such as points or dummies, splines or bones, and these control objects in turn are wired to viewport or rollout sliders.
The IK solution takes place in a plane, known as the solver plane. The angle of the solver plane in world space is controlled by a parameter called the swivel angle. The swivel angle is animatable. You can adjust it directly, or with a manipulator.
The HI Solver allows for the creation of multiple or overlapping chains. This allows you to create multiple goals for additional controls. By linking the goals to points, splines, bones or dummies, you can create simple controls to animate complex chains or hierarchies. You can also use constraints on these goals or control objects, as another animation tool.
Applying an HI Solver
To apply an HI Solver to any part of a hierarchy select the bone or object where you want to the solver to start. Then choose Animation menu  IK Solvers
  HI Solver. In the active viewport move your cursor to the bone where you want the chain to end. When you click to select that bone, the goal is drawn at the pivot point of that bone. If you want a goal at the far end of the bone, refine the bone where you want to goal to be placed. An extra bone will be added, and then choosing that bone allows you place the goal at the end.
When you create bones, a small "nub" bone is automatically created at the end of the chain to assist in this process.
Setting Up Multiple Chains
To rig a skeleton for a human leg you could use three chains in one leg, as follows:
- The first chain is created from the hip to the ankle. This chain controls the overall leg motion including bending of the knee.
- The second chain is created from the ankle to the ball of the foot. This chain controls the heel's up and down motion.
- The third chain is created from the ball of the foot to the toe.
When the three chains work together they help to maintain the foot’s position in space. This means it will keep the foot planted on the ground as the character’s body moves. All three IK chains in this hip-to-toe setup place goals at key positions in the foot that mimic natural foot behavior. In real life, the toe, ball of the foot, and heel can be planted on the ground or raised.
Each chain has an goal that drives motion on the heel, ball of foot, and toe. Use the IK goals to raise the heel, bend the toe, move and rotate the entire foot, and maintain the foot's position in space.
Overlapping Chains
The IK solver system allows you to create overlapping IK chains in a single hierarchy. In a human leg, for example, you could create a chain running from the hip to the ankle, then a second chain from the knee to the ball of the foot, and a third from the ankle to the toes. Use overlapping chains, when you want to apply goals to sequential bones, but you don't want to refine the bones.
Another good use for overlapping HI IK chains is to keep the goals at the bottom of the hierarchy firmly rooted in place. In the case of the leg example, the ankle, ball and toe of the foot would not move until the upper portion of the hierarchy had reached its full stretch.

Overlapping chains make the toe stick to the ground

Overlapping chains make the toe stick to the ground
Don't try to overlap chains with different kinds of IK solvers or you might get unpredictable results.
Creating Control Objects
To create control objects to animate the goals, create dummies, points, splines or other objects near the goal, then link the goal to the control object. For example in a human leg, you might have a goal at the ankle, ball of the foot, and the toe. You then create three splines under the foot, one for the heel, one for the ball and one for the toe. Link each goal to each spline, then you can animate the goals using these splines. You could also link the splines together, so that the rotation of the toe is controlled by the movement of the heel.
Besides hierarchical linkage, you can now use the new Constraint system in conjunction with IK solvers. You could apply any of the constraints to create a relationship between the goals or bones and other objects. The goal could be position constrained to a dummy which is moved. Or you could create three bone chains that are all in the same place, and constrain one bone chain to another, then weight the constraints.

Bone chains constrained together
Using control objects gives you something bigger to select in the viewport. You can also use control objects to separate chains, for example in a human arm one chain could end at the wrist and another separate chain be created for the hand and fingers. The control object at the wrist serves as the root node for the hand chain, yet that chain would remain disconnected (hierarchically speaking) from the arm chain.
You can create viewport sliders using the manipulator helper, and then use the viewport sliders to control the transforms of the control objects. Use wire parameters to hook up the sliders with the control objects. You can also create Custom Attributes to add these sliders to the object rollouts.
Mixing Forward Kinematics with Inverse Kinematics
The HI IK solver provides a tool for mixing FK and IK in a single animation track. There is an FK subcontroller beneath the IK controller assigned by this solver.
When the Enabled button is on, the FK subcontroller values are preserved but ignored. When Enabled is turned off, the FK subcontroller values apply. To access the Enabled button, select the goal and go to the Motion panel, then turn off the Enabled button. This will allow you to animate using FK rotations of the bones or hierarchy objects.
IK for FK pose allows one to turn on IK in middle of FK manipulation. When the Enabled button is turned off, and IK for FK Pose is on, then selecting and moving the goal lets you use IK to create the forward kinematic keyframes. Moving the goal poses the skeleton and add rotation keys to all the objects in the chain when the Auto Key button is on.
When working with IK and FK together it is possible to create a situation where the goal has moved away from the end of the chain. Use the IK/FK snap button to reposition the goal, snapping it back to the end of the chain. When AutoSnap is on, the snap happens automatically; when you touch the goal, you don't have to click the IK/FK snap button.
Controlling HI IK Precision
When you are animating with HI Solvers, if you find the animation of the limbs is not smooth, you should try doubling the Iterations in the Solutions group of the HI Solver Properties rollout. You can also try reduce the Thresholds value to smooth the animation.