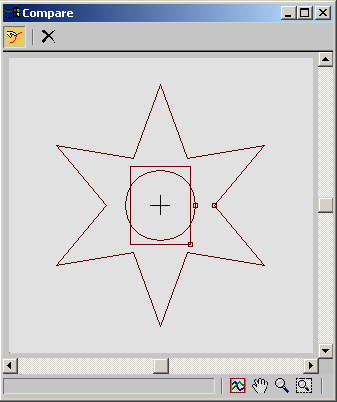
The Compare dialog lets you compare any number of cross-section shapes in a loft object for purposes of making sure their first vertices are properly aligned. If shapes' first vertices aren't aligned, unexpected lofting results can occur.
Interface

-
 Pick Shape
 -
Lets you select shapes to display from the selected loft object. Click the Pick Shape button in the upper-left corner of the dialog. Then, in the viewport, select the shapes to display. Select a shape a second time to remove it from the display.
When you position the mouse cursor over a shape in the loft object, the cursor image changes to show whether the shape appears in the dialog window: a + sign appears if the shape isn't selected (indicating that if you select the shape, it will be added to the dialog window), and a - sign appears if the shape is already selected.
With each shape, the Compare dialog displays the first vertex as a small square. For correct lofting, the first vertices of all shapes on the path need to be in the same position.
-
 Reset
Reset -
Removes all shapes from the display.
Dialog controls
You can scroll the Compare dialog with the scroll bars at the bottom and right sides. You can also use the buttons in the lower-right corner to perform View Extents, Pan, Zoom, and Zoom Region functions.
Align group
While the Compare dialog is open, you can affect the shapes' positions in the dialog window with the Shape Commands rollout  Align group buttons. Turn off Pick Shape, select a shape in the viewport, and then click the Align group buttons. See Shape Commands for further information.