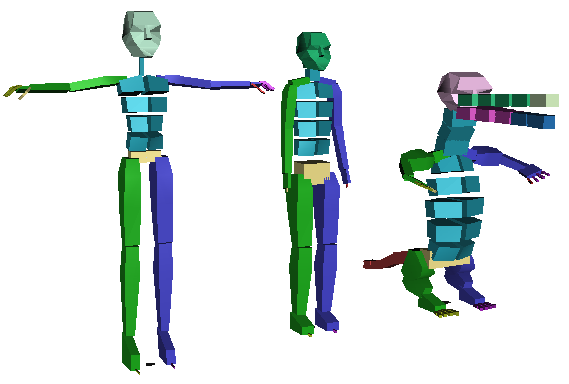
A biped model is a two-legged figure: human or animal or imaginary. Each biped is an armature designed for animation, created as a linked hierarchy. The biped skeleton has special properties that make it instantly ready to animate. Like humans, bipeds are especially designed to walk upright, although you can use bipeds to create multi-legged creatures. The joints of the biped skeleton are limited to match those of the human body. The biped skeleton is also specially designed to animate with character studio footsteps, which help solve the common animation problem of locking the feet to the ground.

The parent object of the biped hierarchy is the biped’s center of mass object, which is named Bip001 by default.
Creating a Biped
A button for creating a Biped appears in the Create panel under Systems. You create a biped by clicking this button and then dragging in the active viewport. You define the height of the biped interactively as you move the cursor.
During biped creation, you can change any of the default settings that are used to define its basic structure. The default settings, for Arms, Neck Links, Spine Links, and so on, are for a human figure.
If you turn on Most Recent .fig File, the biped you make will use the parameters stored in the last FIG (figure) file you’ve loaded.
Changing Biped Parameters
Like other 3ds Max objects, you can change biped parameters on the Create panel at creation time. However, to modify or animate a biped, you use parameters on the Motion panel. For more information on changing biped parameters, see Structure Rollout.
Procedures
To create a biped on a surface:
- On the
 Create panel, click
  (Systems), then on the Object Type rollout, click Biped.
 - Turn on AutoGrid.
- Move your cursor over any geometry in the viewport.
A Transform gizmo moves with your cursor to indicate the location of the AutoGrid.
- Drag out a biped.
The biped feet will be in contact with the geometry.