Paint Deform provides tools for deforming mesh geometry interactively and intuitively by dragging the mouse over an object surface. The primary tools are Shift, for moving vertices with falloff in the direction you drag the mouse, and Push/Pull, for moving vertices inward and outward. Additional tools include Smudge, Flatten, Noise, and more.
Paint Deform tools work the same way at the object level and at all sub-object levels, and are independent of any sub-object selection. To exit a Paint Deform tool, click its button again or right-click in the active viewport.
Interface

Paint Deform panel on minimized ribbon

Paint Deform panel on maximized ribbon
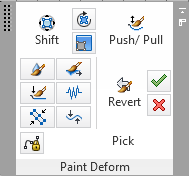
Paint Deform panel floating
-
 Shift /
  Shift Rotate /
  Shift Scale
 -
Move, rotate, or scale sub-objects around in screen space (perpendicular to the viewing direction) with an adjustable falloff effect. The Shift tools are roughly equivalent to transforming with Soft Selection, but no initial selection is necessary.
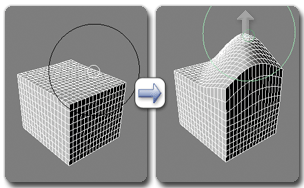
Using Shift on a mesh object
Shift affects only vertices within the brush area when you start to drag; to affect other vertices, release and then drag again.
When you activate the Shift tool, its Options panel opens with settings for adjusting the tool’s effect. Certain settings are also available via the following keyboard modifiers:
-
 Drag vertically to change the radius of the Falloff (black) circle.
 -
 Drag vertically to change the radius of the Full Strength (white, inner) circle.
  +
+ Drag vertically to change the Strength % value.
Note: Revert works with the Shift tool only after you use another Paint Deform tool, such as Push/Pull. For example, if you use Push/Pull, don't use Commit, then use Shift, you can then use Revert to "paint" the object to its previous shape, including the shifted parts. -
-
 Push/Pull
 -
Drag the brush to move vertices outward;
 +drag to move them inward. Important:
 +drag does not work as expected in Maya mode. In Maya mode,
  +drag orbits a viewport (Perspective views only).
Using Pull (left) and Push (right) on a mesh object
Following is a list of other effects available with keyboard alternatives:
-
 Reverts to the previous saved state.
 -
 Relaxes the mesh.
 -
 +
+ Resizes the brush.
 -
 +
+ Changes the brush strength.
Change brush size, strength, and other settings on the Paint Options Panel.
-
-
 Relax/Soften
 -
Drag the brush to smooth out the surface; for example, to round off corners.
Note: With most other brushes, you can apply Relax/Soften by dragging with held down.
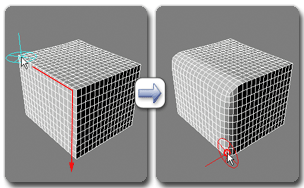
Using Relax/Soften on a mesh object
Following is a list of effects available with keyboard alternatives:
-
 Drag the brush to relax the mesh without shrinking.
 -
 Reverts to the previous saved state.
  +
+ Resizes the brush.
 -
 +
+ Changes the brush strength.
Important: +drag does not work as expected in Maya mode. In Maya mode,
  +drag orbits a viewport (Perspective views only).
 Change brush size and strength on the Paint Options Panel.
-
-
 Smudge
 -
Drag to move vertices around. Smudge is roughly equivalent to the Shift tool, but updates the area of effect continually as you drag, and doesn’t use falloff.
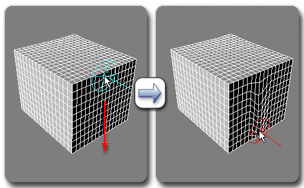
Using Smudge on a mesh object
Following is a list of effects available with keyboard alternatives:
-
 Drag the brush to move vertices horizontally only (prevents movement in normal direction).
 -
 Reverts to the previous saved state.
 -
 Relaxes the mesh.
 -
 +
+ Resizes the brush.
 -
 +
+ Changes the brush strength.
Important: +drag does not work as expected in Maya mode. In Maya mode,
  +drag orbits a viewport (Perspective views only).
 Change brush size and strength on the Paint Options Panel.
-
-
 Flatten
 -
Drag the brush to flatten convex and concave areas.
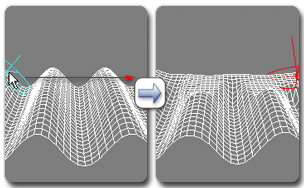
Using Flatten on a mesh object
Following is a list of effects available with keyboard alternatives:
-
 Reverts to the previous saved state.
 -
 Relaxes the mesh.
 -
 +
+ Resizes the brush.
 -
 +
+ Changes the brush strength.
Change brush size and strength on the Paint Options Panel.
-
-
 Pinch/Spread
 -
Move vertices closer together by dragging, or spread them apart with
 +drag. Important:
 +drag does not work as expected in Maya mode. In Maya mode,
  +drag orbits a viewport (Perspective views only).
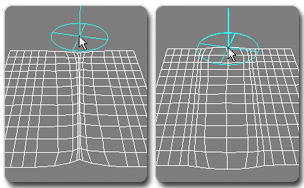
Using Pinch (left) and Spread (right) on a mesh object
Following is a list of additional effects available with keyboard alternatives:
-
 Reverts to the previous saved state.
 -
 Relaxes the mesh.
 -
 +
+ Resizes the brush.
 -
 +
+ Changes the brush strength.
Change brush size and strength on the Paint Options Panel.
-
-
 Noise
Noise -
Drag to add convex noise to the surface, or
 +drag to add concave noise. Important:
 +drag does not work as expected in Maya mode. In Maya mode,
  +drag orbits a viewport (Perspective views only).
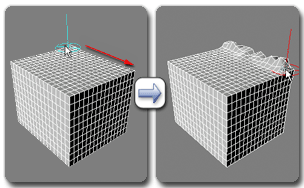
Using Noise on a mesh object
Following is a list of additional effects available with keyboard alternatives:
-
 Reverts to the previous saved state.
 -
 Relaxes the mesh.
 -
 +
+ Resizes the brush.
 -
 +
+ Changes the brush strength.
Change brush size, strength, and other settings on the Paint Options Panel.
-
-
 Exaggerate
 -
Makes the features of the painted surface more pronounced by moving convex areas outward and concave areas inward.
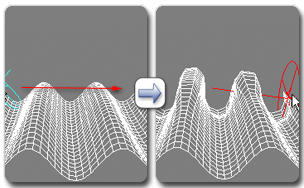
Using Exaggerate on a mesh object
Following is a list of effects available with keyboard alternatives:
-
 Inverts the exaggeration, making convex areas concave and vice-versa.
 -
 Reverts to the previous saved state.
 -
 Relaxes the mesh.
 -
 +
+ Resizes the brush.
 -
 +
+ Changes the brush strength.
Important: +drag does not work as expected in Maya mode. In Maya mode,
  +drag orbits a viewport (Perspective views only).
 Change brush size, strength, and other settings on the Paint Options Panel.
-
-
 Constrain to Spline
 - When active, and a spline is defined, painting with any Paint Deform tool except the Shift tools restricts brush movement to the spline (as a path), and projects the painting effect from the view plane through to the spline.
For best results, follow this procedure:
- Create a spline and position it on or near the surface of the editable poly or Edit Poly object to deform.
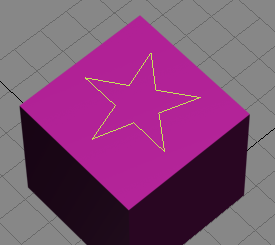
Spline positioned on object surface
- Click the Pick button below or next to the Constrain To Spline button and then select the spline.
- Choose the Paint Deform tool, such as Noise, and turn on Constrain to Spline.
Now, when you move the mouse in the active viewport, the paint brush gizmo is attached to the spline and can move only along its length.
- Paint as normal to produce the deformation as constrained by the spline.

After using Push/Pull tool with star-shaped spline path
- Create a spline and position it on or near the surface of the editable poly or Edit Poly object to deform.
- Pick (or spline name)
- To define a spline for use as a path by Constrain To Spline, click this button and then select the spline to use. When a spline is already defined, the button label is the name of the spline. To change the spline, repeat the process with the new spline.
-
 Revert
 -
Paint to restore the mesh to its previous shape, before the last use of Commit (see following).
If you haven’t used Commit yet, Revert goes back to the object’s initial shape.
Following is a list of effects available with keyboard alternatives:
-
 Relaxes the mesh.
 -
 +
+ Resizes the brush.
 -
 +
+ Changes the brush strength.
Change brush size and strength on the Paint Options Panel.
Note: Revert works with Shift only after you use another Paint Deform tool, such as Push/Pull. For example, if you use Push/Pull, then immediately use Shift, you can then use Revert to "paint" the object to its previous shape, including the shifted parts. -
-
 Commit
 -
Sets the restore buffer to the current state of the object.
After using Commit, using Cancel or the Revert brush (see preceding) returns the model to its shape when you last used Commit.
-
 Cancel
 -
Removes any changes made with Paint Deform since the last Commit.
If you haven’t used Commit, returns the model to its initial shape.