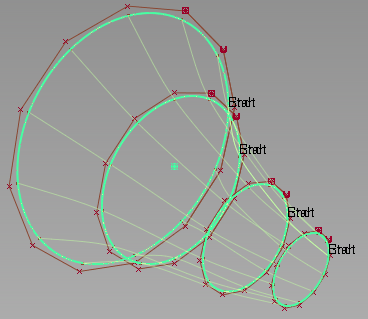
Use the Skin tool to create a surface by connecting a set of profile curves.

Create a surface using the enhanced Skin tool
- Choose Surfaces > Skin Surfaces > Skin

 .
. The Skin Control box opens.
- Click the first curve or curve set to select it.
If Chain Select is on, G1 continuous curves are selected.
To remove the curve or curve set from the selection, click the curve again.
- Click the next curve or curve set.
The surface is created after selection of the second curve, and is based on the parameterization of the first selected curve.
-
Click the third curve to start a new skin operation or
 -click additional curves or curve sets to add them.
 If Auto Update is not selected, you can pick as many curves as you want before you click Build to create the skin. Curves can be added or removed by holding
 and clicking.
 Output surfaces are grouped under the Skin node.
If Modify Range is selected, arrow manipulators appear on the skin surface at each curve or curve set.
If you select a curve or curve set, the selection is removed from the input and the surface is recreated.
Degree and spans of the surface are displayed in numerical fields of the Explicit Control option is selected.
Optional deviation displays between input curves and the surface.
Box selecting additional curves without holding
 starts a new skin.
If you modify explicit control degree and/or spans, the surface is refit to a new parameterization and the deviation display is updated.
If you modify the location of the range manipulator, the surface is fit to the new extent and the deviation is displayed between the extent of the surface and input curves.
If you select Undo All, the surface is removed.
If you select Next, you are prompted to select the first curve or curve set.
Create a surface using the original Skin tool
- Choose Surfaces > Skin Surfaces > Skin 2012
- Click the first and second curves.
The tool creates a surface between the two curves.
- Do any of the following:
- Hold
 and click more curves to add the surface.
 - Hold
 and click the previous curve again to undo the last part of the surface. Curves can be deselected all the way back to the first curve.
 - Click a curve without holding
 to start a new surface.
Note: If the Auto Update option is off, the tool works differently. Click all the curves you want to use in order, then click Go. The surface does not appear until you click Go. - Hold
What if...?
The resulting surface is too complex or has parameterization problems?
- The best way to minimize problems is to create a curve, then duplicate it to create the other cross-section curves. This way all the curves have the same degree and parameterization.
- Surfaces created with Chord Length parameterized curves (drawn with the New Edit Point Curve tool) are more complex than surfaces created from uniformly parameterized curves.