Whenever ductwork needs to branch away from the main run a shoe or boot can be added to allow this. Attaching a shoe is achieved by using the Fix Relative option.
Procedure
Fixing a Rectangular Shoe
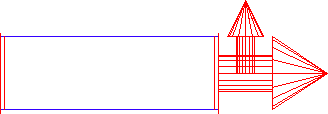
- Set the Attacher arrow

to the item you wish to add the shoe branch. - The direction of the Attacher main arrow determines the direction of the flat or back of the shoe.
- The small directional arrow will determine the side of the duct that the shoe will attached to. Note: The user must still pick the correct corresponding side in relation the small direction arrow or the shoe may be drawn inside the duct.
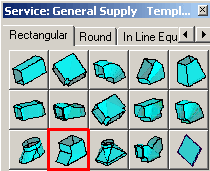
- Click the Shoe Icon from the appropriate Service to prompt the Shoe Edit dialogue.
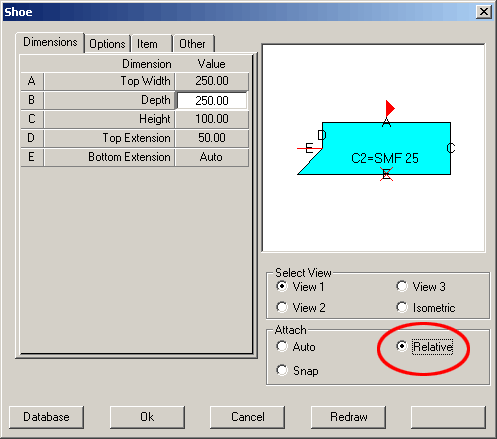
- Enter the required dimensions then select Relative from the Attach menu.
- Click OK.
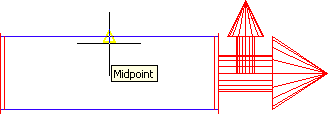
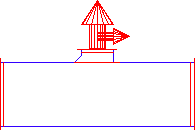
- The initial insertion point must now be selected. The Straight shown in the diagram below has 3 usable snap points one at each end and one at the midpoint. Click once to select the insertion point - in this case the duct midpoint.
- The Fix Relative dialogue should now display as shown below.
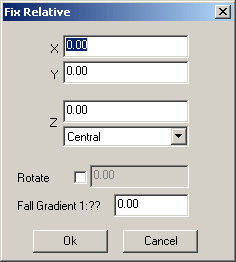
- The Fix Relative dialogue gives the user options of moving the inserted item after its initial placement. The X and Y parameters control the offset along their respective axis. The Z value gives the user additional options to enable movement along the Z or Height plane (assuming Plan view).
Z Value Presets (Viewed from front)
Value - The user may enter a value that should include the height of the duct.
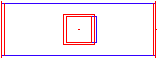
Central - The shoe is attached centred on the duct.
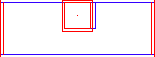
Level to Top - The shoe is attached positioning the attaching connector level with the top of the duct.
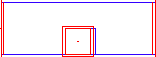
Level to Bottom - The shoe is attached positioning the attaching connector level with the bottom of the duct.
Top Down - Similar to Level on Top but allows the operator to add an additional Z offset from the top of the duct e.g. to move the shoe down 50mm from the top enter 50 in the box above the Z options drop-down menu.
Bottom Up - Similar to Level on Bottom but allows the operator to add an additional Z offset from the bottom of the duct e.g. to move the shoe up 50mm from the bottom enter 50 in the box above the z options drop-down menu.
Note: The Rotate and Fall Gradient options are not used when fixing a shoe. - Select one of the options or enter a value and Click OK. The shoe will now attach to the duct.

Tip - By rotating the attach arrow before selection, the branch can be positioned on any side of the item.