CADmep fittings support the AutoCAD Stretch command. This enables the user to dynamically change the length of the fitting using the mouse. Although interactive the stretching process is governed by a series of rules that prevent the stretched Items from exceeding specified parameters.
- Click the Database Icon.
- Click the CadDuct Solids BSS tab.
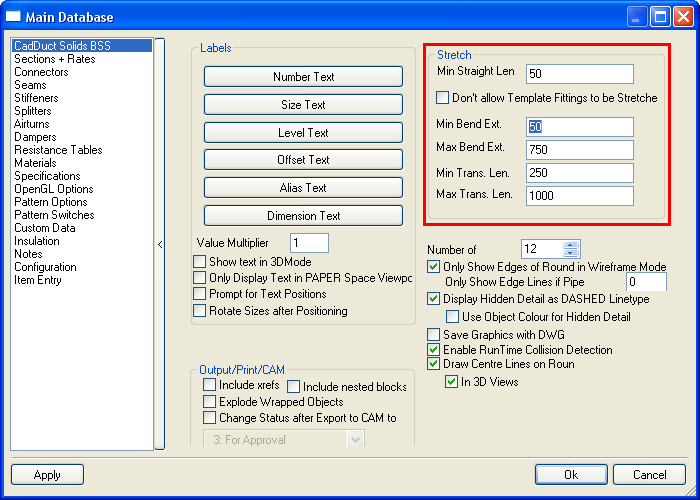
The following options are available:
- Min Straight Len - Straight fittings cannot be stretched lower than this value
- Min Bend Ext. - No single extension of a bend can be stretched lower than this value
- Max Bend Ext. - No single extension of a bend can be stretched to exceed this value
- Min Trans. Len. - Taper fittings cannot be stretched less than this value
- Max trans. Len. - Tapers fittings cannot be stretched longer that this value
Note: These settings control the fittings only when stretching. Values that break these rules can be entered manually by using Item Edit.
The Stretch rules are also used by CAD-Duct Solids/CAD-Mech AutoFill routine.
Procedure
One of the most common uses for Stretching duct or pipework is to connect one set of Items to the next.
- Click on the Item to be stretched.
- The Item should highlight and the object Grips should be displayed.

- Click the Grip at the end of the fitting to be stretched.
- Click and hold the left mouse button, stretching the duct to meet the bend.

- To make the stretch more precise, enable the Node OSNAP setting. All Items have nodes located at their connector ends allowing for exact connections when snapping Node to Node.

Another use for stretching is to extend a run of duct or pipe by a specified length. To do this:
- Click on the Item to be stretched.
- The Item should highlight and the object Grips should be displayed.
- Click the Grip at the end of the fitting to be stretched.
- Press F8 to activate Orthogonal Locking (Ortho Mode).
- Move the cursor in the direction of the stretch.
- Type in the value for the distance of the stretch and press Enter.