Configure Users allows the management of our software solutions in a multi-user environment, users can be setup with privileges, only allowing them to access those parts of CAD, CAM or Estimating. If the Network deployment is installed, with multiple users sharing a common Database and Services, user privileges can then be configured to prevent the alteration of the standard or configured settings.
If the error message "Cannot Run User Manager" appears when trying to access Configure Users, this indicates that there is no Users folder as a sub level to you database folder, if this is the case follow the instructions below:
Creating a Users Folder
-
Using Windows Explorer browse to the installation "database" folder (default - C:\Users\Public\Documents\Autodesk\Fabrication 2014\Metric Content\6.07\Database) See the Note above if database folder is not in the default location
-
Click File
 New Folder
 -
A new folder will now be created with the default name New Folder , rename this to Users
From the Installation Folder run the umapuser.exe so that we can setup new users for the MAP system.
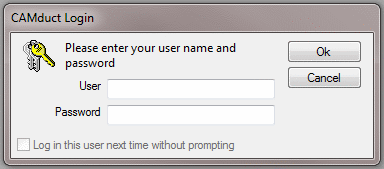
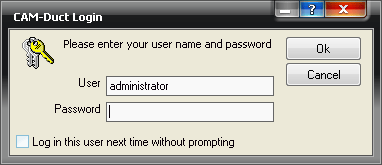
The MapUser screen will appear and prompt the user for a username and password.
-
Type administrator and click in the password box.
-
Enter admin (the default MapUser password). Passwords are case sensitive.
Creating a new user
- From the Menu's at the top of the screen select User > New
- In the Login Name box type in a user name.
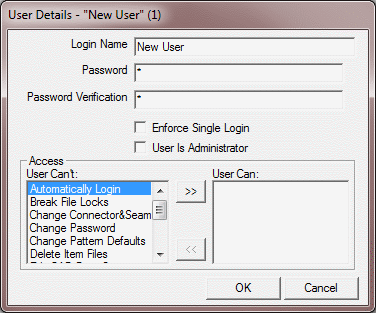
- In the Password box type in a password for that user here. Text will appear as *'s for security purposes. This field is case sensitive, 'C' is not the same as 'c'.
- The system requires you to re-type the password in the Password Verification box to confirm it was entered correctly.
- IMPORTANT NOTE: It is recommended that if the user has rights to amend the Database or Patterns that the "Enforce Single Login" box is checked, We highly recommend that only one user has full Database rights to ensure that any changes made are not overwritten by another user with rights logging out of the system after the changes have been made. If multiple users have made changes only the changes created by the last user to leave the system will be saved as it will over write any previous changes.
Setting up User Privileges
-
If the user is to be granted the ability to edit other users details, click the User Is Administrator check box
-
If the user is to be granted the ability to change their password from within our software click on Change Password in the left hand window
-
Click the right arrow icon to place the option into the User Can: pane:

-
Repeat the above action as necessary for the remaining options, Automatically Login, Break File Locks, Change Pattern Defaults, Edit Database, Edit Reports, Purge database and Setup Item Folders
-
Click OK when you have finished editing the users details
User privileges may be removed by clicking the left arrows icon to remove the option from the User Can: window: 
Checking user details at a glance
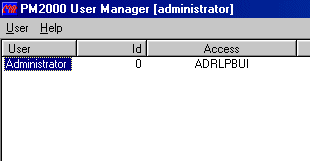
For example this user has the following options enabled, for a full list of restrictions/options see the end of this document.
- The User column lists all the users who have access to our software
- The ID column displays the id number the user has been assign by Mapuser
- The Access column displays the access privileges granted to a user in our software
- A = This user is an administrator
- D = This user can edit & change the database settings
- R = This user can edit & change reports
- L = This user can change their password from within our software
- P = This user can change pattern defaults
- B = This user can break lock files pattern
- U = This user can purge database entries
- I = This user can create\amend item Folders
- G = The user will automatically Log in to the PC that he has specified to be logged in to by checking the Login this user next time without prompting tick box.
Menus Explained
The User menu changes user details:
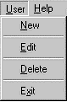
- User New creates a new user
- User Edit edits the details of the currently selected user
- User Delete deletes the current user
- User Exit quits the MapUser program
The Help menu:

- Help About displays the version number of MapUser
- Help Access Key displays information about the access keys
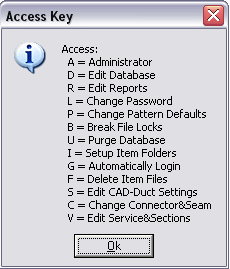
- A = This user is an administrator
- D = This user can edit & change the database settings
- R = This user can edit & change reports
- L = This user can change their password from within our software
- P = This user can change pattern defaults
- B = This user can break lock files pattern
- U = This user can purge database entries
- I = This user can create\amend item Folders
- G = The user will automatically Log in to the PC that he has specified to be logged in to by checking the box
- F = The user can delete Item files
- S = The user can Edit CAD-Duct settings
- C = The user can change connector and seam settings/values
- V = The user can edit services and sections
An example of adding a new user in MapUser
- Start MapUser by double clicking it's desktop icon
- Enter Username = administrator
- EnterPassword = admin
- Click OK
- Click User New
- Enter Username = Mark
- Type Password = Test
- Type Password Verification =Test
- Click onChange Password
- Click the right arrow icon to place the Change Password option into the User Can: pane
- Click on Change Pattern Defaults
- Click the right arrow icon to place the Change Pattern Defaults option into the User Can: pane
- Click OK
The newly created user "Mark" may now login to our software, he will have the ability to change his password and edit pattern defaults, but will not have access to edit the database settings, reports or amend item folders etc.