From time to time it may be necessary to send files to Autodesk to investigate a problem. The files required may be one or more of the following:
- Archive files (.ESJ)
- CNC files
- Machine Settings files
- Report Files
Autodesk support will tell you which of these you need to send.
To save a job in .ESJ format:
- With the job open ClickFile > Save Job As.
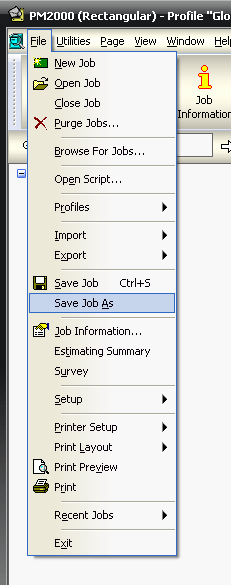
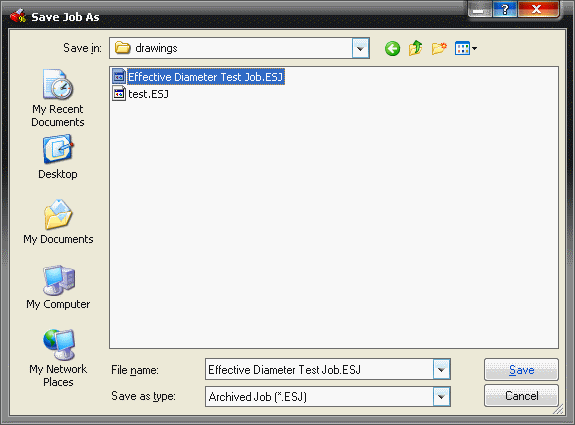
- The Save As dialogue appears .
- At the top of this dialogue box is a 'Save In' dropdown box containing the name of the folder where the file will be saved.
- Click on the down arrow at the right of this dropdown box and the 'path' of the folder is displayed.
- Change the destination folder if necessary and make a note of the path where the job will be saved e.g. C:\CAM\Projects\.
- In the Save As Type: dropdown box at the bottom of this dialogue, clickon the down arrow and select Archived job (*.ESJ). Enter the filename in the filename box, make a note of it, and click Save.
- An example of path for file name XXX would be C:/CAM/Projects/XXX.ESJ.
To find names of CNC Files:
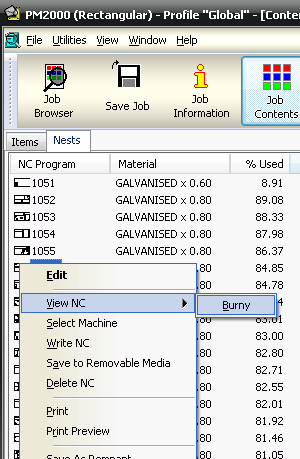
- With the job open Click Utilities > Job Contents.
- Click on the Nests tab.
- Make a note of the relevant sheet numbers.
- Right-click on one of the nests and select View NC.
- Select the machine name e.g. Burny.
- On the top line of the screen the full name and path of the nest is displayed in the title bar e.g. C:/CAM/CNC/10413.B3 the file extension - in this case .B3 is most important.

- Again make a note of the path and filenames - you may want to send all the sheets noted before or just one if you have identified which one is causing a problem.
To find location of Machine Setting Files:
With the job open Click File > Setup > Installed Machines.
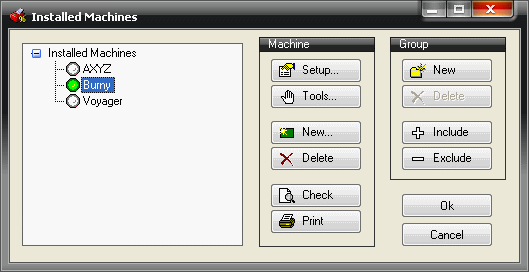
- A list of installed machines is displayed .
- Make a note of the name(s).
- Close or minimise the job.
- In Windows explorer - find the software folder (e.g. C:\CAM).
- In this folder, click on the cross next to the Database folder.
- The Machine Setting Files are stored in this folder e.g. Burny.mch.
- Make a note of the path for each machine e.g. C:/CAM/Database/Burny.mch.
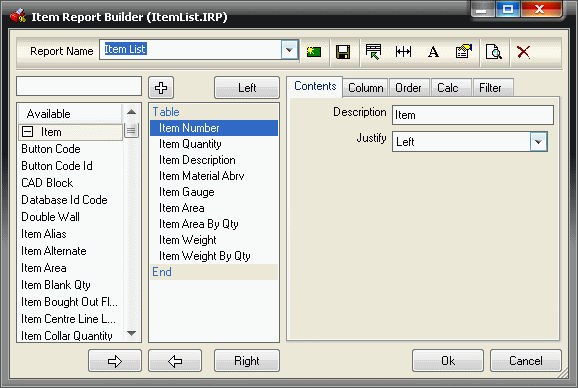
To find names of Report Files:
- With the job open ClickFile > Print Layout.
- Select the report type .
- The Report Builder dialogue appears.
- Select the report name from the report name drop down.
- On the top line of the screen the full name of the report is displayed in the title bar e.g. ItemList.IPR.
- All reports are located in the MIS folder within the main program directory.
- ItemList.IPR will be found as C:/CAM/MIS/ItemList.IPR.
To E Mail these files to MAP:
The process has been written for Outlook Express for Windows but the same type of process is used in other E-mail programs.
- Open Outlook Express on the machine with the Internet connection.
- Click File > New > Mail Message.
- Click in the field To.
- Click in the Subject field.
- Type "Required Job help file".
- Press the TAB key.
- It is now possible to enter a message explaining why the E-mail is being sent. When the message has been entered, Click Insert - File Attachment or the attach icon.
- With the notes you have made of the paths and filenames to hand - use the Insert Attachment 'Look in:' dialogue box to find the .ESJ file, CNC and .MCH Files you want to send.
- For each one - use the Ctrl key and click on the files so they become highlighted.
- Click Attach.
- Repeat for each file if necessary.
- The file(s) are now attached to the E mail, this can be seen in the new field on the Email called Attach.
- Click Send.