There are times when it is necessary to have a Report listed on separate tables, the following will explain how this is done. In this example we will use a Delivery Note to create separate tables in the Report.
- Go to File > Print Layout > Item Reports and open the existing Delivery Note. It is recommend that a copy of the original report is created first.
- Click the New Icon,
 follow the on-screen prompts and rename accordingly.
 - Add ' Item Service Type' as the first entry on the report.
- Select the ' Column' menu tab and set Width = 0.
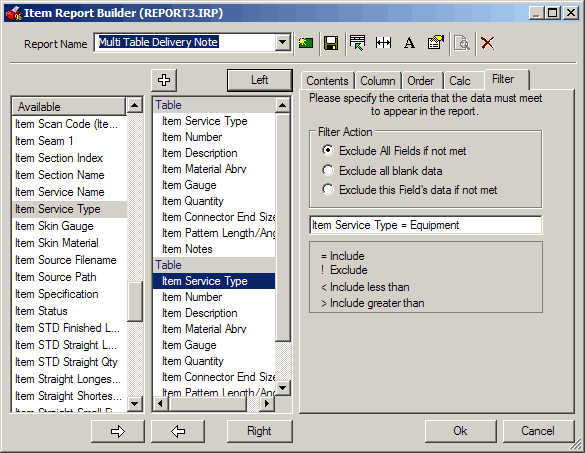
- Select the ' Filter' menu tab and set this to Item Service Type not Equipment as shown below, this excludes all the 'extra' items from this first table.

- Next we have to duplicate this first table.
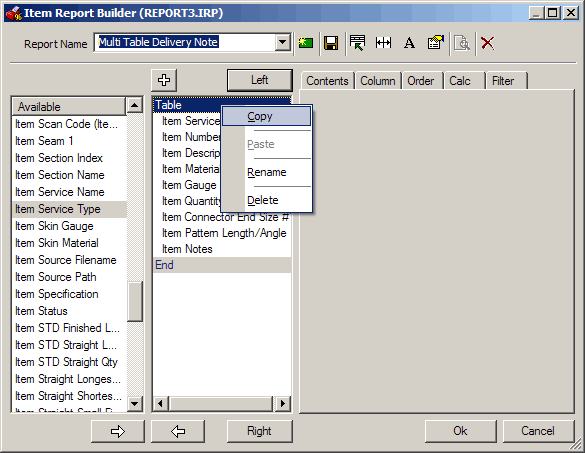
- Make a single Right Mouse Click on the ' Table' line and select Copy from the pop-up menu.
- Move the mouse cursor over a vacant area below the first table.
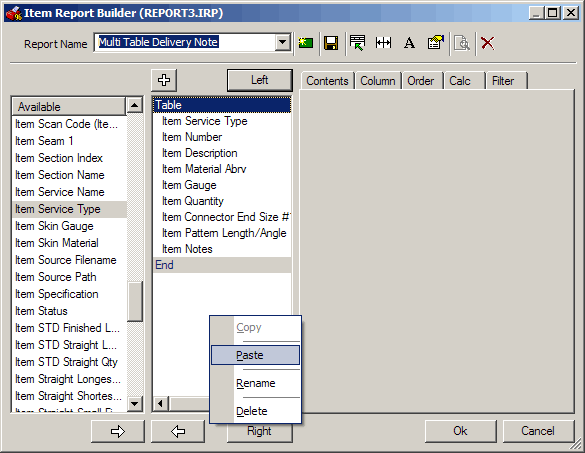
- Make a single Right Mouse Click on the ' Table' line and select Paste from the pop-up menu.
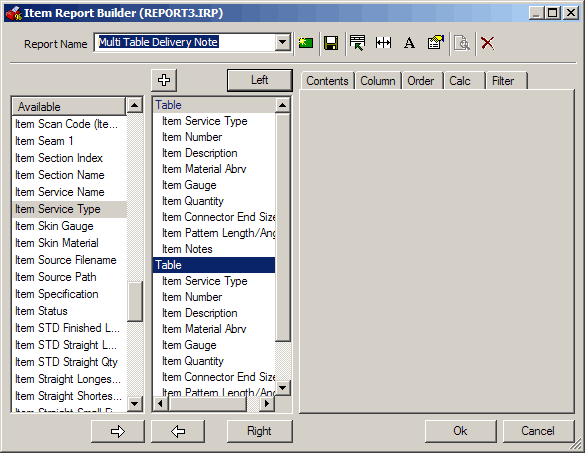
- The copied table will appear below the first table.
- Highlight the 'Item Service Type' entry.
- Select the 'Filter' menu tab and set this to Item Service Type =Equipment as shown below.
- This restricts the second table to only display 'Equipment' items i.e. the extras.
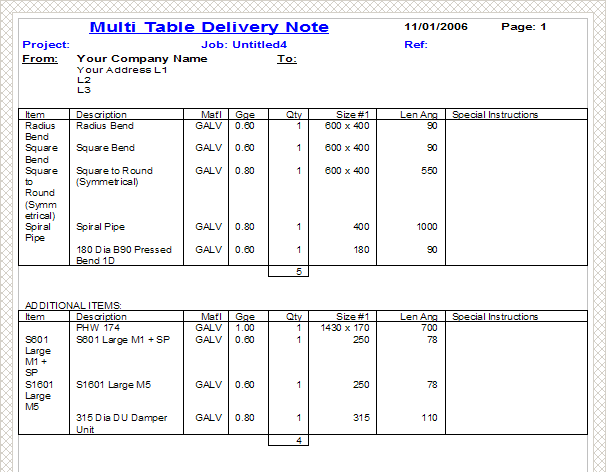
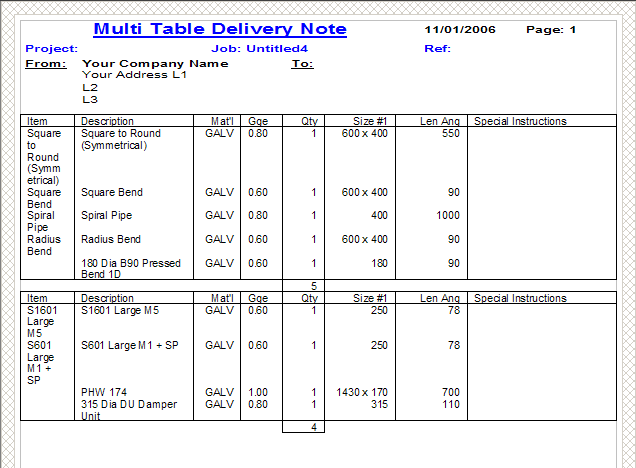
- This will generate a report similar to the example below.
If you would like to create a title or separating line between the two tables this can be done as follows:
- Insert a new ' blank' table in between the existing two.
- Do this by highlighting the second table line and clicking on the large
 icon above the table layout area.
 - Add a ' Blank Object' entry into this table.
- Set it's Description field as required and put an ' =' sign as the last character i.e. ADDITIONAL ITEMS=
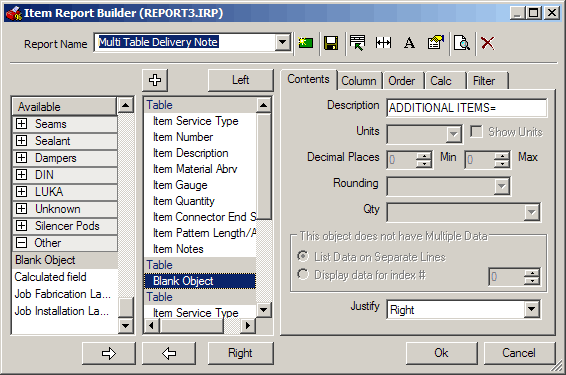
- Select the ' Column' menu tab and set Width = 0.
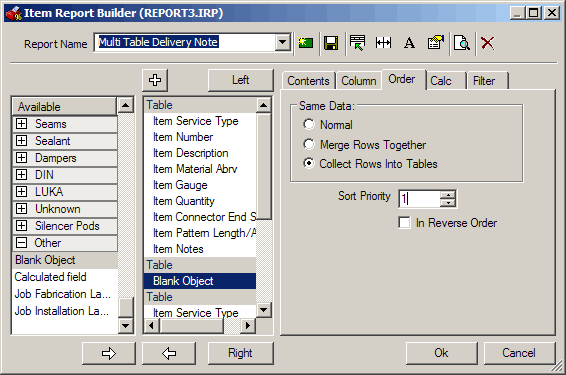
- Select the ' Order' menu tab and select Collect Rows into Tables with a Sort Priority = 1.
- This will generate a report similar to the example below.