Once sheets have been set up within Sheet Management (for further information see Sheet Management), it is possible to nest on these sheets and any remnants created from them.
- First of all create a job with a few items that are made from the same material as those set up in Sheet Management.
How to nest using Remnants
Remnants are created from left over parts of sheets that have been created within Sheet Management. Is possible to nest on these in two ways.
Option 1: Manually select a remnant
To manually select a remnant, follow these instructions.
- Click Utilities > Automatic Nesting and the Automatic Nesting dialogue box will appear, as below.
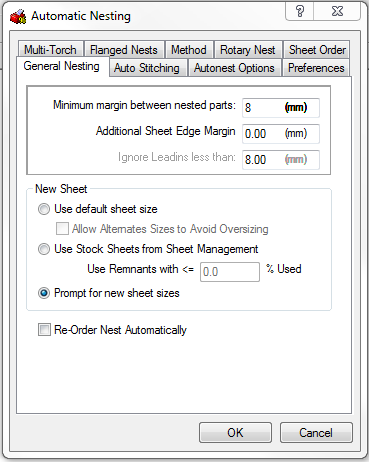
- In the New Sheet section of the dialogue box ensure that the Prompt for new sheet sizes option is selected. Click OK.
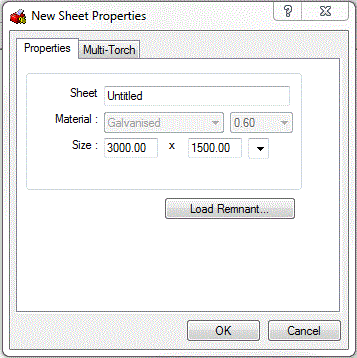
- The following dialogue box will appear, click Load Remnant.
- It is now possible to select a remnant from the Import Remnant Sheet dialogue box that appears.
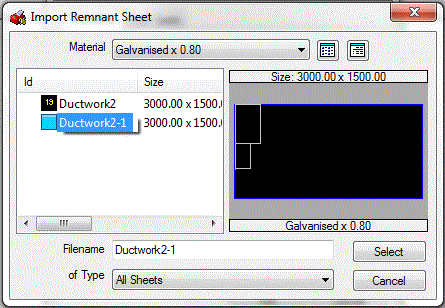
- Click on the relevant remnant and click Select and then OK.
- The part will now be nested on the remnant.
Note: When the part(s) is nested on the remnant and it appears in job contents, it will look as though it has been nested along side the parts that were burnt on the original sheet. This however is not the case, the original parts are there for reference only and will not be reproduced.
Option 2: Use stored remnants automatically
To automatically use remnants, follow the instructions below.
- Click Utilities > Automatic Nesting and the Automatic Nesting dialogue box will appear, as below.
- Ensure that the Use Stock Sheet Sizes from Sheet Management option is selected. This option enables the Use Remnants <= field. This field the size of remnant that will be used. In the example below the program will only used remnants with less than 50% of the original sheet used. If the field is set to 0% the software will just use full sheets contained within sheet management.

- Click Ok and the parts will be nested on remnants where possible.