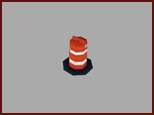
Sketch city furniture in a model or proposal. Any type of 3D model, including landscaping items like trees and bushes can be used.
You can add or modify city furniture in a model or proposal.
To add city furniture
- Click


 .
. - Select a 3D model draw style and click OK.
- Do one of the following to sketch your furniture:
Action Result Visual Double-click at a point on the terrain.
A single piece of furniture is placed at that point.
Click individual points to create a path for the city furniture. Double-click the last point to end the path.
A series of the furniture items are spaced along the path.

City Furniture is a Furniture layer in the Model Explorer, and information about it appears on the Properties Palette. The number of city furniture items you added or removed appears in the City Furniture section of the Proposals Manager.
To change the style of existing city furniture
- Select the city furniture and right-click to open the context menu, then click Properties.
- In the Properties Palette, double-click on the style selected under the Manual Style field.
- Click the browse button to view available 3D model styles.
- Click on a new 3D model style and click OK, then click Update to apply that style to the selected city furniture.