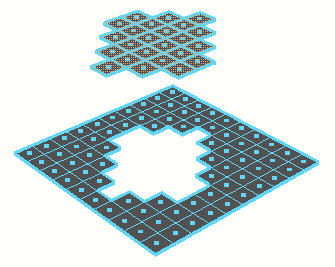
You can select and then disconnect faces from a polygon mesh using the Mesh > Extract feature. Extract removes the polygons by duplicating the appropriate edges and vertices based on the selection.
You can either place the extracted faces into a new shell within the same mesh object, or create a new polygon mesh using the extracted faces.

To extract faces from a mesh
- Select the faces you want to extract and choose Mesh > Extract >
 .
. - Set the Extract options as follows:
- If you want the extracted faces to become their own mesh, turn on Separate extracted faces. The extracted faces will be separated into their own separate object. Any pre-existing shells in the mesh will not be affected.
- Turn off Separate extracted faces to make the duplicated faces part of the existing mesh.
- If you know the exact transformation values you want to use, you can enter them in the option box, otherwise you can specify them interactively later.
- Click Extract.
The action creates a node and switches to the Show Manipulator tool.
- Do any of the following:
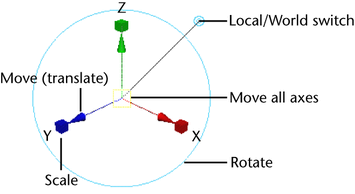
- Use the manipulator to control the direction and distance to move the extracted faces. Remember that you can also change the pivot by pressing Insert or Home. Click the circle handle attached to the manipulator to switch between local and world axes.
 Note:
Note:The Show Manipulator Tool only appears when Construction History is on.
- Use the controls in the attribute editor or channel box to edit the extraction.
- Use the manipulator to control the direction and distance to move the extracted faces. Remember that you can also change the pivot by pressing Insert or Home. Click the circle handle attached to the manipulator to switch between local and world axes.
Keeping extracted faces together
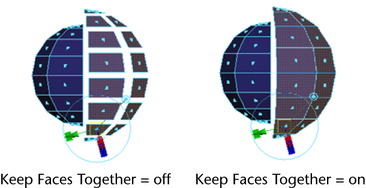
The Keep Faces Together option controls how Extract treats the edges of adjacent faces. When Keep Faces Together is on, the faces expand so their edges stay connected. When Keep Faces Together is off, the edges are disconnected.

When the Keep Faces Together option is off and Separate extracted faces setting is on, each face becomes a separate mesh.