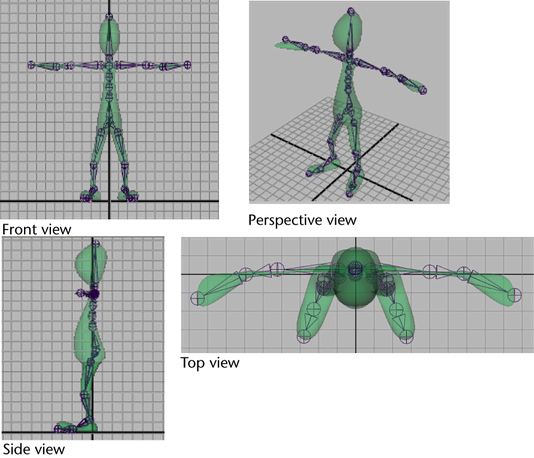
Building a skeleton is the process of placing and orienting joints to create a system with which you can pose a deformable object. Depending on the type of character you want to create, you need to place the joints where they approximate real joint positions. For example, if you are creating a skeleton for a human biped, you would place joints at all the major points of articulation in its model (shoulders, knees, elbows, spine and so on).
When constructing a skeleton, use multiple camera views to ensure that your skeleton fits its object appropriately in all three dimensions and use the display grid as a guide when judging the size and shape of the skeleton.

You can position and rescale the grid to suit your work and you can use snapping to align your joints with the grid. If you want to adjust the Maya snapping settings, go to Window > Settings/Preferences > Preferences. From the Preferences window that appears choose Settings > Snapping.
For more information on the Move Tool, see Move Tool.
Once you have created the skeleton, you can group or parent objects to joints and use the skeleton to control the objects movements. Thus, skeletons and their joints can be viewed and navigated in the scene view, Outliner, and Hypergraph in the same way as any other hierarchy in Maya.
To complete the basic character setup of your object, you need to apply a kinematics system to the joints of the skeleton and bind the object to its skeleton. See Posing skeletons and Skinning.
Creating joint chains
When building a skeleton for your character, you first need to draw a joint chain using the Joint Tool. Once you create a joint chain, you can use the Insert Joint Tool to continue the chain or add to it by creating new joint chains starting from any of the joint chain’s joints. In this way, you can create a complex structure of varying joint chains. These connected joint chains create a skeleton hierarchy.
Related topics
Mirroring joint chains
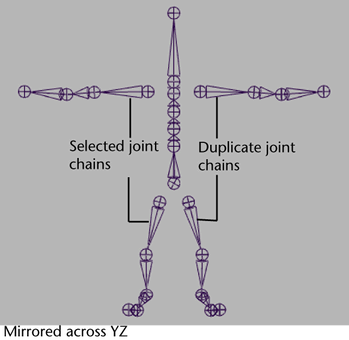
You can duplicate or create mirror copies of joint chains using the Mirror Tool. A mirror copy is a copy that is symmetrical about a selected plane. In effect, the reflection of the original joint chain in the specified plane is turned into a real copy of the original with all the aspects of the joint chain mirrored accordingly. The origin of the plane is at the parent joint of the original joint chain. When mirroring joints, joint attributes are mirrored as well as the joints and their bones. Other skeleton data such as constraints, connections, and expressions are not included in the mirrored copy.
Mirroring is useful when creating the ‘limbs’ a character. For example, you can build a right arm and hand, and then create a mirrored copy of it for the left arm and hand.

Mirroring affects all aspects of the creation of the left arm, including the joint limits. You do not have to reset the joint limits so that the left arm’s joint limits are symmetrical to the right arm’s joint limits—Maya does this for you.
You can not create a mirrored duplicate of a joint chain using Edit > Duplicate with a Scale of -1. Use Skeleton > Mirror Joint instead.