Use the Thumbnail view to graphically monitor the progress of your jobs throughout the Autodesk® 360 process. The Thumbnail view informs you of the condition of your jobs, and indicates when they have completed successfully. If an error occurs that prevents successful completion, you can access a log file to view an error report.
As each job runs, a thumbnail image of the job appears in the Active section. At the conclusion of the job, the thumbnail moves to the Complete section.
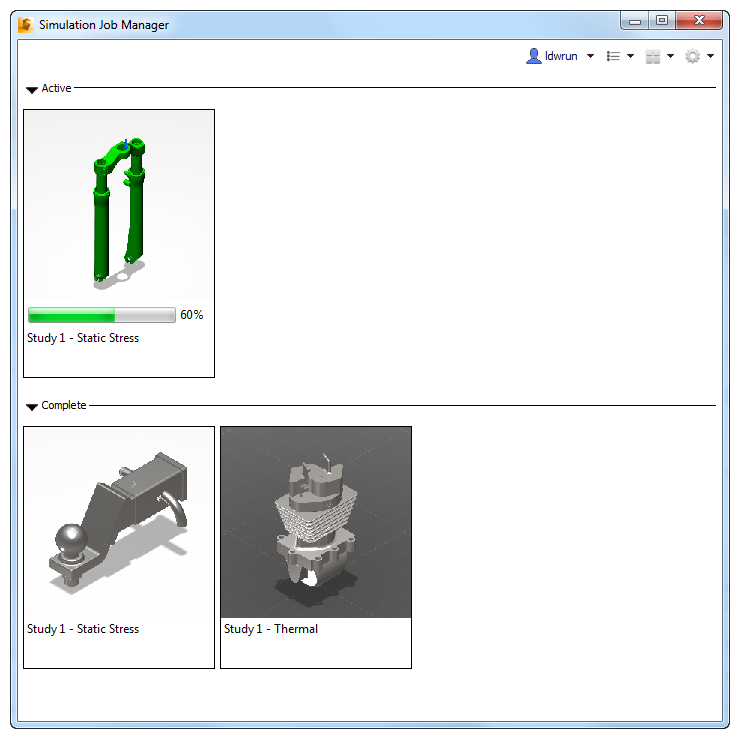
To view run-time convergence data, enable Convergence Plot output from your product. (Each product has a different user interface command for this, so check your product documentation.) Based on the frequency you input in your product, the convergence plot updates in the job thumbnail image as the job runs. Use this to track the progress of your job outside of the product user interface or remotely.
To change the size of the thumbnail, select from the Sizes menu in the toolbar.
Detail View
To monitor the progress or to see the details of a specific job, either left-click on a thumbnail image or right-click on the thumbnail image, and select Details.
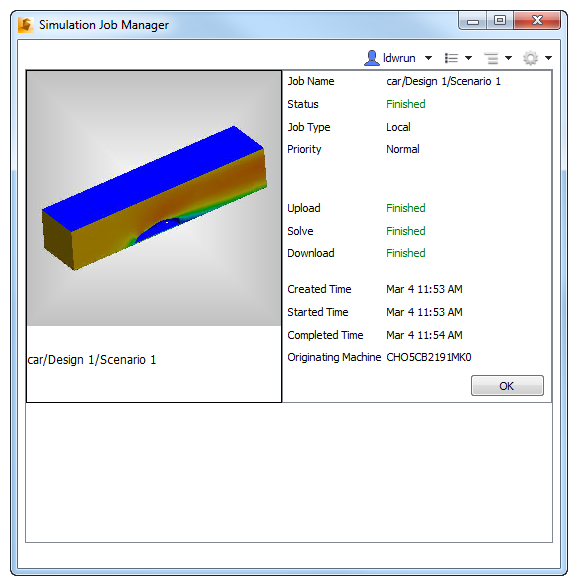
These are the details displayed for each job:
- Job Name: This is the name you assigned to the job. The actual name displayed in the details view depends on the naming convention of the specific Autodesk® 360 product.
- Status: You can view the current status of each stage in the simulation process. There are several possible status conditions:
- Scheduled: The Job Manager is aware of the job, but has not initiated the stage.
- Queued: The Job Manager has initiated the stage, but the stage has not started.
- Running: The Job Manager has started the stage.
- Canceled: The job was halted because Cancel was selected on the right click menu.
- Failed: The stage did not successfully complete. This can be caused by several factors.
- Abandoned: The stage did not complete successfully. This can be due to network issues.
- Finished: The stage has completed successfully with no errors.
- Job Type: Jobs that are run on Autodesk® 360 are designated as Cloud. Jobs run on the local workstation are designated as Local (for users that have purchased the Local Solve option).
- Priority: By default, Local jobs are Normal priority. This means that they run in the order in which they are submitted. If, however, it is necessary to run a Local job sooner than in the submitted order, increase its priority to High. This causes the job to run next, after the current job is finished, regardless of how many jobs were submitted before it. Likewise, to cause a job to run later than in the submitted order, change its priority to Low. (This option is available only for Local jobs, for users that have purchased the Local Solve option.)
- Cost (available only for Cloud jobs): This value indicates the cost of the job, in terms of Cloud Credits.
- Simulation process stages:
- Upload: The process of compressing and transferring an encrypted copy of the model to the Autodesk® secure storage service.
- Solve: The computational tasks performed by Autodesk® 360. Examples include mesh generation and numerical calculation.
- Download: The process of copying the simulation results data from the Autodesk 360 secure storage service back to the local workstation. When the Download stage reaches Finished, the simulation is complete and results are ready for visualization on the local computer. Note, there are times when the Download stage shows as Running at the same time as the Solve stage. This is done to support download of intermediate results.
- The times indicate when the job achieves a specific status:
- Created Time: The time when the job was first created by the Autodesk® 360 product.
- Started Time: The time when the job started.
- Finished Time: The time when the job finished.
To return to the thumbnail view, click OK.
Sorting Jobs
- Click the Job Filter button in the toolbar
- Select Sort from the menu.
- Select the sort criteria from the list.
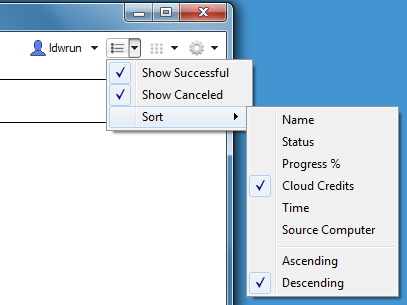
To invert the order of the sorted jobs, select either Ascending or Descending.