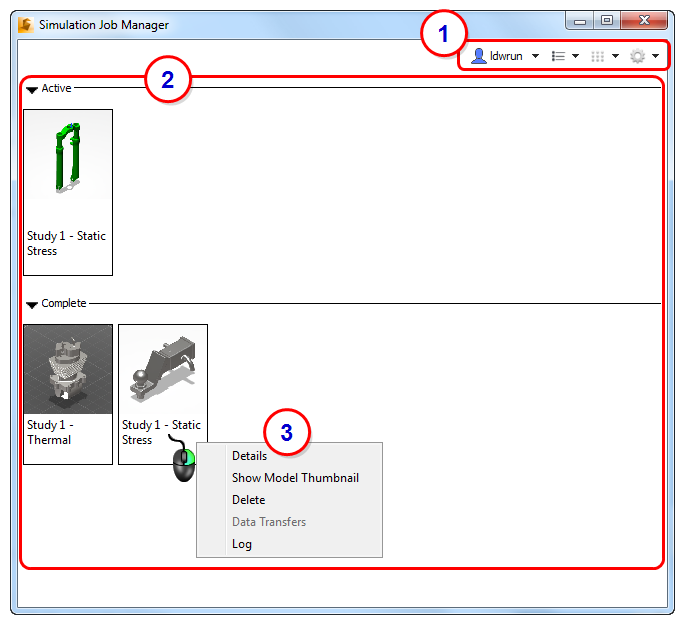
The Simulation Job Manager contains the following elements:
1. Toolbar
The toolbar contains the following items:
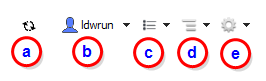
a. The Sync Monitor indicates when network activity occurs between your local machine and an Autodesk 360 server. To view the number of files being uploaded or downloaded, hover your mouse on the Monitor, and a tooltip displays the current network activity.
b. Before starting your Autodesk® 360 product, you must be signed into Autodesk 360.
c. Use Job Filter to toggle the display of canceled and completed jobs in the Monitor Frame. Additionally, select the sort criteria for how jobs are listed. This affects both the thumbnail and list views.
d. Control the size of thumbnail images with the Sizes menu. You can also display your jobs in a List View from this menu.
e. Set Preferences to customize how the Simulation Job Manager behaves. Additionally, you can access Help and open the About box to check the version number and the active port number.
2. Job View
The Simulation Job Monitor displays your Autodesk® 360 jobs in the Job View. This area is divided into areas for Active and Complete jobs. You can choose to display your jobs either as thumbnail images or in a list view using the Sizes button in the toolbar.
3. Right-Click Menu
The right-click menu on each job (thumbnail or list view) contains several tools for gaining additional insight into the progress of your simulation. The options display in the menu based on the current context. This means that all are not available in every situation:
- Details: Open the Detail view and the thumbnail image of the model. While running, a progress bar indicates the progress of the simulation. Additionally, the Detail view lists the status, job type, priority, and time of creation, start, and completion of the simulation.
- Open: Open the model in the Autodesk® 360 product in which it was created.
- Show Model Thumbnail: Displays the image file of the model in the default jpg file viewer.
- Show Convergence Plot Thumbnail: Displays the image file of the simulation convergence plot.
- Cancel (while running): Stops the running job. No additional results are saved to the local workstation for visualization. Note that cloud credits are refunded when you cancel a job.
- Delete (when complete): Click to remove a job from the Complete list. Note that the job is not deleted from your local computer.
- Transfers: Opens a summary of the data uploaded and downloaded to and from the cloud.
- Log: If an error occurs, the log file can be a useful source of information. This log file contains a lot of highly technical information. A Technical Support Engineer may request it from you in the event of a problem.
- Priority (while running): Set the priority of jobs run with the Local Solve option. By default, Local jobs are Normal priority. This means that they run in the order in which they are submitted. If, however, it is necessary to run a Local job sooner than in the submitted order, increase its priority to High. This causes the job to run next, after the current job is finished, regardless of how many jobs were submitted before it. Likewise, to cause a job to run later than in the submitted order, change its priority to Low. (This option is available only for Local jobs, for users that have purchased the Local Solve option.)
To select multiple jobs, hold the keyboard Shift key, and left click on each desired job.
The right-click menu depends on whether you selected active or finished jobs:
- If you select only active jobs, the right click menu option is Cancel.
- If you select only completed jobs, the right click menu option is Delete.
- If you select a combination of active and completed jobs, clicking Cancel only affects the active jobs. Likewise, clicking Delete only affects the completed jobs.