Watch the Quickstart videos
|
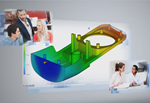
How can Moldflow help you? Watch this video and see what you can do! |
|
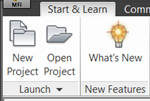
A brief video describing how to import an existing model. |
|
See where the commands are to mesh your model. |
|
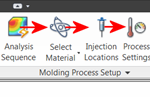
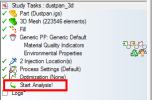
This video provides a quick overview showing you all the steps needed to setup an analysis. |
|
This video shows you how to run an analysis on your model. |
|
This video shows you how to animate your results and examine them in detail. |
Practice with Quickstart tutorials
|
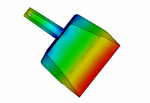
A fill analysis looks at the filling phase of the injection molding cycle right up until the mold is completely filled. The filling analysis is the foundation for most of the analysis sequences. |
|
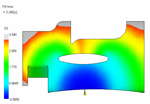
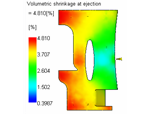
The pack analysis runs over the entire molding cycle, but the focus is on the packing phase of the cycle. The primary reason for running a packing analysis is to look at how the material shrinks. |
|
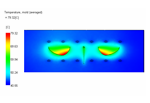
The BEM cooling analysis calculates a steady state, or average temperatures over the entire mold cycle. The primary reason for running a cooling analysis is to evaluate and optimize the mold's cooling system. The minimum input requirements are the part, mold boundary, and cooling channels. |
|
|
The FEM cool analysis calculates both cycle averaged and transient mold temperatures. The primary reason for running this cooling analysis is to evaluate and optimize the mold's cooling system and provide a mold temperature distribution for use in filling, packing, and warpage analyses. To run an FEM cooling analysis, the part, cooling channels and mold block must be modeled. |
|
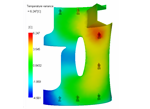
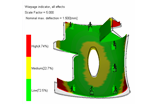
The size and shape of the molded part are often critical quality factors. A warp analysis shows how much the part deflects relative to the nominal deflection. Here we look at warpage and its causes. Inputs for this analysis include results from cooling, filling and packing analyses. |
Understand the basic workflow
Click  () for a visual overview of the steps required to setup an analysis, analyze the results and communicate the information to other stakeholders in your team. In its current implementation this map is intended only for a new user, to help with the initial setup and creation of meaningful data. You should be able to search the help for the various terms used in this map and find help on those topics. More experienced users are encouraged to go directly to the user's guide for advice on more sophisticated analyses.
Apply what you've learned
The final step is to create a project of your own, and run an analysis on your own model. If you don't have model, you can use a model from the Tutorial folder. Follow the steps in the Getting Started section, to apply what you have learned.