Make a 3 x 3 pattern of the previously created hole. Suppress the middle hole in the pattern.
Procedure
- Click
 Home
Home  Solid Rectangular Pattern.
 - Expand the Board:1 branch of the browser and select the Hole2 subheading.
- Click
 Pattern Selections Direction.
 - Click one of the long edges of the board. Yellow and red direction arrows will appear at the hole.
- Click and drag the yellow (X-direction) arrow towards the opposite end of the circuit board. Note that the pattern defaults to three holes in this direction, which is what we need.
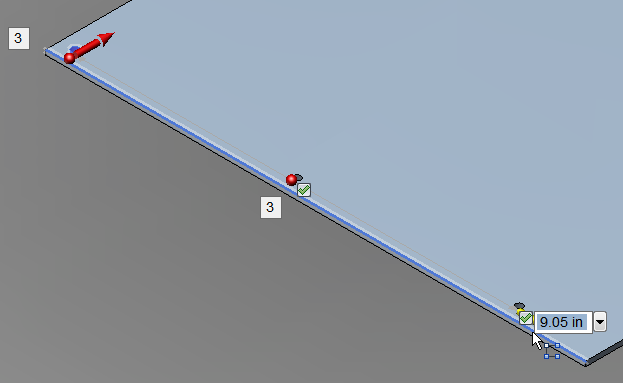
- Type 10.4 and press Enter. The field indicating the number of holes in the pattern is now highlighted. Important: Do NOT press Enter again to confirm the number 3 because that would complete the command, leaving a pattern of holes in only the one direction. Press Enter again only if you change the number of holes in the pattern, which accepts the changed value but allows you to continue to define the pattern in a second direction.
- Click and drag the red (Y-direction) arrow towards the top edge of the board. Note that the pattern once again defaults to three holes in the Y-direction, as we want.
- Type 6.4 and press Enter once.
- There is a green checkmark next to each of the nine holes in the pattern. We need to exclude the hole at the very center of the board. Click the checkmark next to this hole. It will change to a red X and the hole will be eliminated.
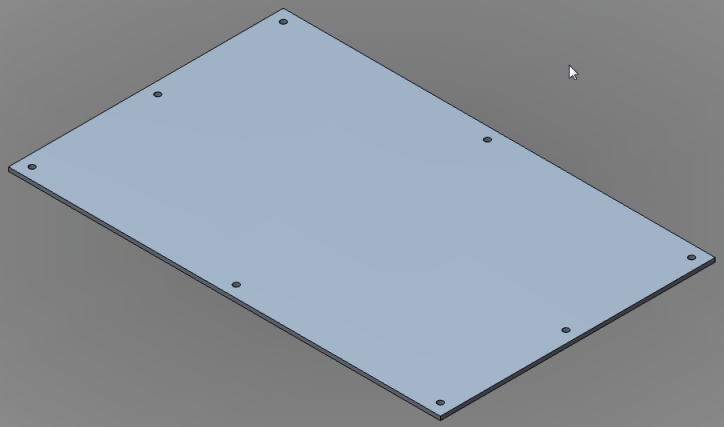
- Press Enter to complete the command and create the pattern of eight holes. The board should look like the image below.
- Expand the Rectangular Pattern subheading under the Board:1 heading. Notice that the Occurrence5 subheading is missing from the list under the Rectangular Pattern heading (the list skips from Occurrence4 to Occurrence6). We excluded the fifth hole of a nine-hole pattern. Tip: It is also possible to delete individual items from a pattern after the pattern has been created by right-clicking on an OccurrenceX subheading and selecting the Delete command.
- This completes creation of the board. In the QAT, click
 Save.
Save.