Learn how to reinforce the structure by modeling additional attributes, such as brackets.
- In the Menu Bar, select Geometry > Additional Attributes >
 (Brackets).
 - In the Brackets dialog box, click
 (New Bracket).
 - In the New Bracket dialog box, type the Name 0.2 x 1.0 x 1.0 and set the new bracket's parameters as follows and as shown below.
- Length: 0.2
- Height: 1.00
- Width: 1.00
- Thickness (Th 1): 1.00
- Thickness (Th 2): 1.00
- Position: Down.
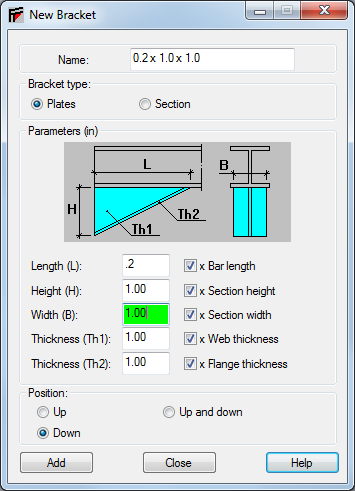
Note: The bracket's position is set relative to the Z-axis. - Click Add and then click Close.
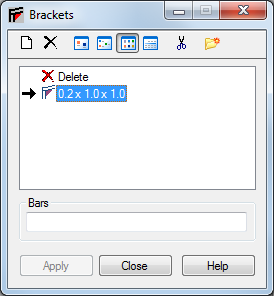
- The new bracket displays in the list of brackets as shown below.
- To keep track of which bar you are working with, in the View Status Bar, click
 (Bar Numbers). This is an on/off toggle.
 - In the View Control Bar, click
 (Local Systems) to display the local coordinate system of the bars (as shown below), so that you can verify the bar origins. Brackets are only added to the beginning node of a bar when you are assigning it in the dialog box.
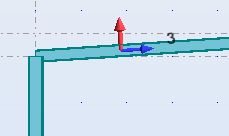
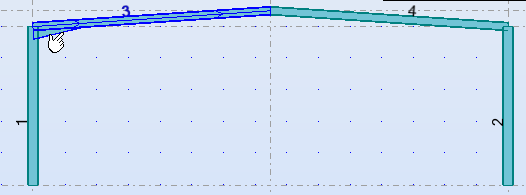
- Move the dialog box as needed and place the first bracket on the left side of the structure using either of the following methods:
- In the Brackets dialog box, select the Bars edit box and type the bar number where you want the bracket to be attached (in this case, 3 as shown below) and press <Enter> or click Apply. When you use this method the bracket is automatically assigned to the beginning node of the bar.
- In the graphical pane, click the left end of the top left bar. When you use this method you can select either end of the bar.
- Repeat this step to create a bracket on the right side of the structure.
- Close the Brackets dialog box.
- Save the project.