Learn how to select the appropriate Design Codes for loads and then how to apply wind and snow loads to the structure.
Note: For more information on snow and wind loads, please refer to:
- EN 1991-1-3 Eurocode: Actions on structures: Part 1-3 Snow loads
- EN 1991-1-3 Eurocode: Actions on structures: Part 1-4 Wind loads
- To verify that adequate loads codes are available, in the Menu Bar, select Tools >
 (Job Preferences).
Note: Job Preferences only control the parameters for the current project.
(Job Preferences).
Note: Job Preferences only control the parameters for the current project. - In the Job Preferences dialog box, in the left panel, click the + sign to expand the Design Codes area, and then click Loads. The Code combinations, Snow/wind loads, and Seismic loads for the current project are displayed as shown below.
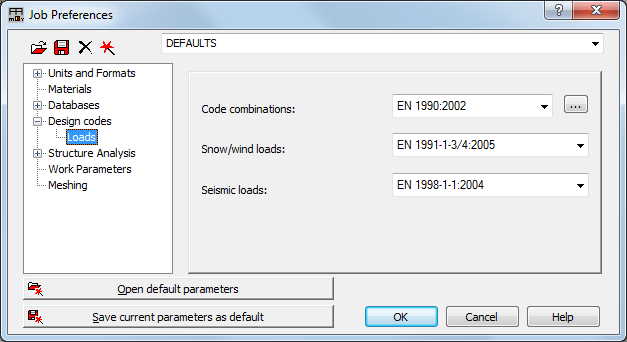
- Expand the drop-down list of Snow/wind loads and end with EN 1991-1-3/4:2005. Click OK to close the dialog box.
- To apply the new loads, in the Menu Bar, select (as shown below), or in the Bar Loads toolbar (typically on the right side of the screen) click
 (Snow/Winds Loads 2D/3D).
- In the Snow and Wind 2D/3D dialog box, click Auto to select all of the existing nodes, generate an automatic envelope, and then set the following parameters:
- Total Depth: 30,00 m
- Bay spacing: 5,00 m
- Select Display note after load generation.
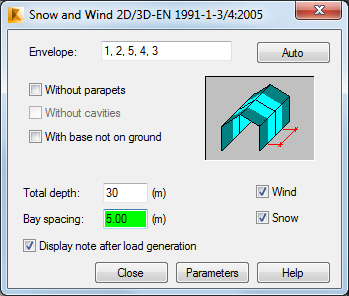
- Click Parameters and note the information in the dialog box. Leave the default parameters unchanged.
- Click Generate.
- In the Structure frame selection dialog box, verify that All is selected. This generates wind loads on all of the structure frames.
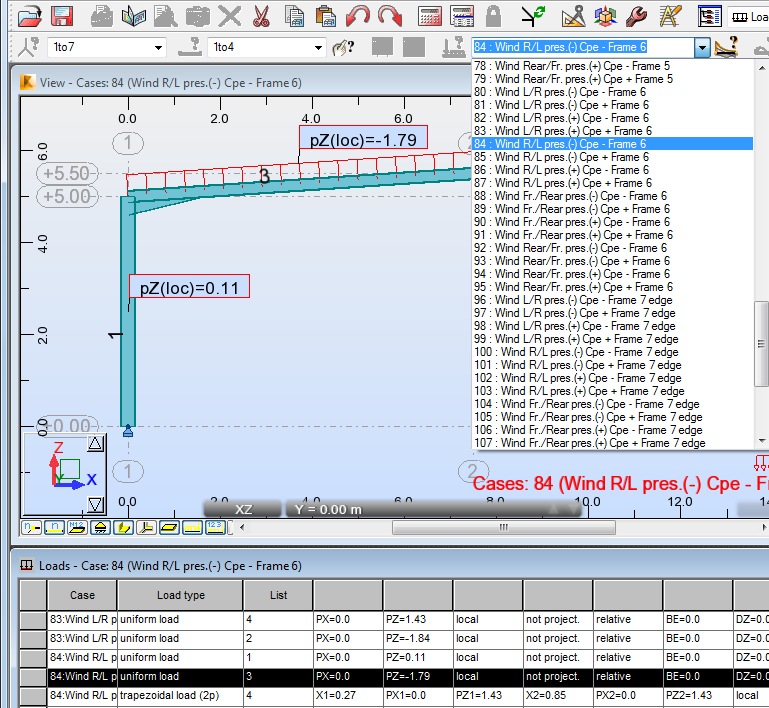
- In the Load case list, select Wind R/L. This sets the wind direction from the right to the left as shown below.
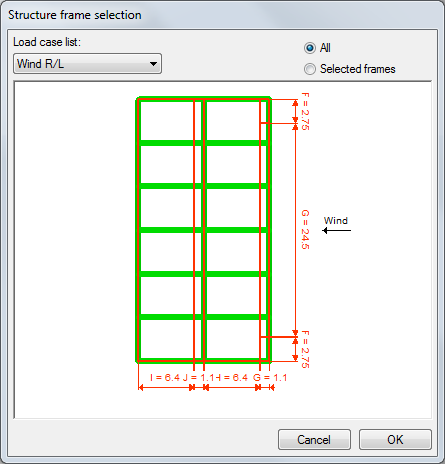
- Click OK.
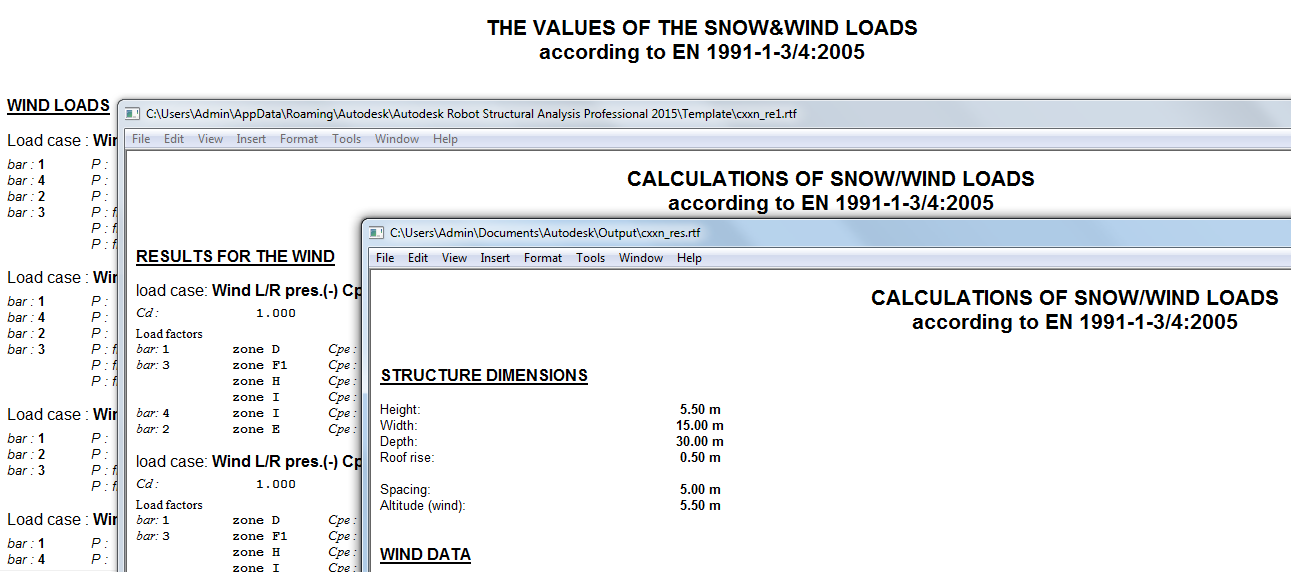
- Three windows open containing the various calculation notes for the Wind Loads, Results for the Wind, and the Structure Dimensions and Wind Data as shown in part below. Calculation notes enable you to inspect all of the parameters of the loads that have been generated.
- Close or minimize the notes windows and the Snow and Wind 2D/3D dialog box.
- All of the loads display in the view window. To display each load case graphically, select a load case in the Cases drop-down list as shown below, or highlight the Cases in the Loads – Case dialog box.
- When you have finished reviewing the various load cases return to the Load Case G.
- Save the project.