Learn how to run calculations and review the outcome of the steel verification process.
- In the Calculations dialog box, set the Member verification to 1to4.
- In the Limit states group of options, verify that Limit states is set to ULS, and then click List on the same line.
- In the Load Case Selection dialog box, click None to clear the existing selection.
- At the bottom of the dialog box, select the Combin. tab and select all of the combinations. (Hold down <Shift> and select the top and bottom of the list.)
- Click
 . The load case combinations are added to the Case list as shown below.
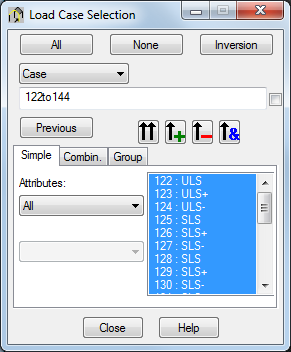
- Click Close.
- In the Limit states group of options select SLS.
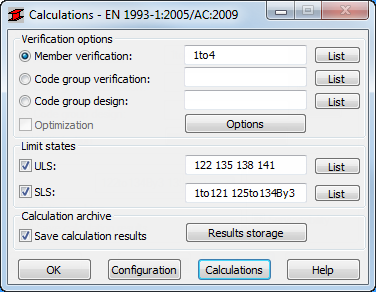
Note: Selecting both ULS and SLS will set the calculations to recognize the correct type of combination and apply the correct checking condition (serviceability or ultimate design). - In the Calculations dialog box, click Calculations.
- The Member Verification dialog box opens displaying the most significant information about the sections. The Messages tab (as shown below), contains important information for the engineer to consider when taking the next steps in the design.
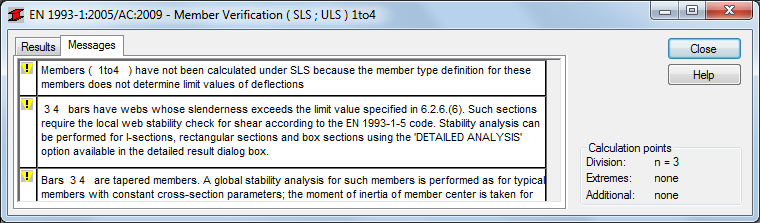
Note: The Tapered member message is there to remind the engineer that the code does not explain how to apply verification formulas to tapered members and that the method used by the software might not agree with the expected outcome. - The Results tab includes a results interpretation symbol for each section (or section group). In the case shown below, two of the members passed the test while two of them did not.
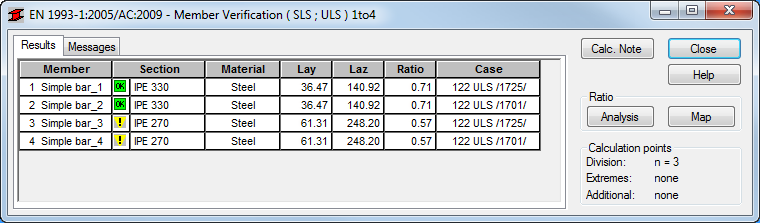
- In the Ratio area, click Analysis to open the Global Analysis – Bars dialog box to review a graphic presentation of the ratio for the verified members.
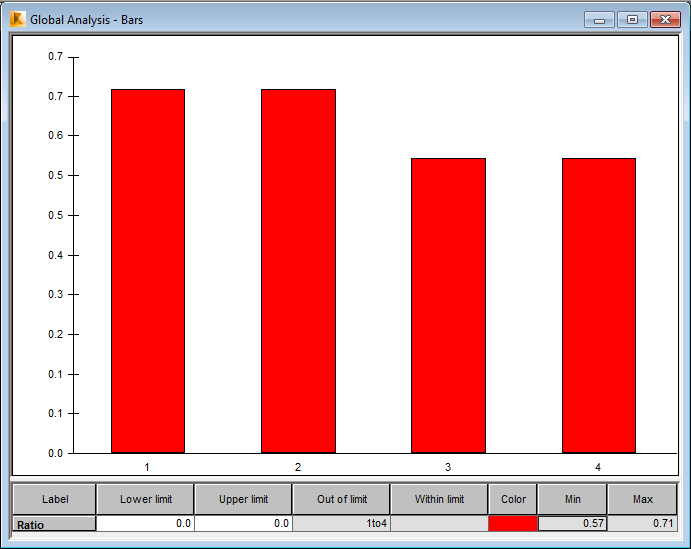
- Close the dialog box.
- In the Member Verification dialog box, click one of the yellow exclamation marks
 . The Results dialog box opens indicating that there is Instability in the member, as shown in part below.
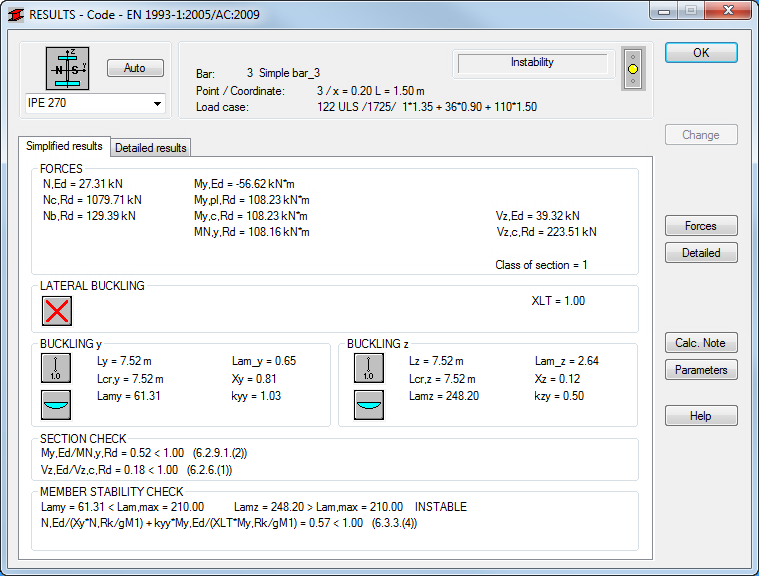
Note: You can also generate a printable note including the information by clicking Calc Note in the dialog box. Calculation Notes can be saved and printed. - Click OK to close the Results dialog box.
- In the Member Verification dialog box, click Close. You do not need an archive of this attempt.
- Click Cancel when the Calculation Result Archiving dialog box opens.
Note: The next steps can take engineers hours (or days) to find the right solution depending on the complexity of the problem. Some solutions would be to use a tougher steel, to increase the section diameters, or to change the frame geometry by slightly increasing the beam slope or reducing the frame distance.
- Save the project.