Learn how to start a new Frame 2D design session and how to set the preferences for regional settings to Eurocode (Metric). You then learn how to create custom structural axes in the X- and Y-directions as the basis for your design.
- Start Autodesk Robot Structural Analysis Professional.
- In the Opening Screen, click
 (Frame 2D Design) or select File > New Project… and click (Frame 2D Design). First, set the preferences to use the Eurocode Regional settings that are used throughout this tutorial. Once these preferences have been set they do not change during your use of the software unless specifically modified.
 - In the Menu Bar, select Tools >
 (Preferences…).
 - In the Preferences dialog box, in the Languages area, set the Regional settings to Eurocode, as shown below.
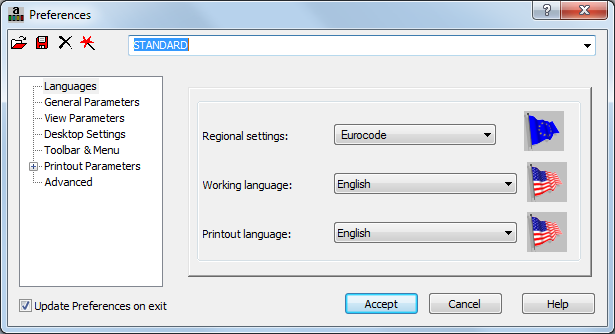
Note: These preferences control this copy of the software. Additional project specific settings can be set in the Job Preference dialog box ().You are in the Structural Model layout and can now start the process of developing your structure. The first step is to create a structural axis on which you can build your structure. The axis is only a reference and is not linked to the structural members. It is not always required. - In the Menu Bar, select Geometry >
 (Axis Definition).
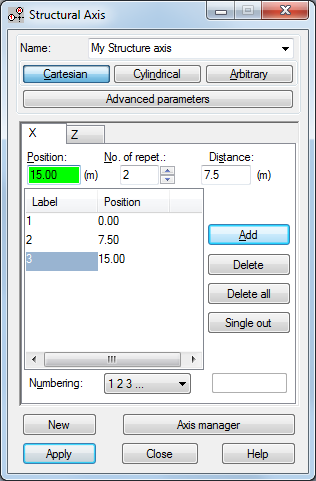
 - In the Structural Axis dialog box, type a name for the custom axis, such as My Structural Axis.
- Three different types of axes can be used: Cartesian, Cylindrical, and Arbitrary. In this case, verify that Cartesian is selected as the type of axis.
- On the X tab, set the Position to 0.00, No. of repet. to 2, and Distance to 7.5 as shown below.
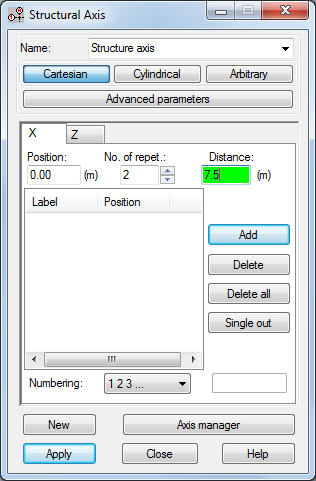
Note: If the Distance is not displayed as meters (m), close the dialog box, save and close the project, and then open it again. The software should now be working in metric. - When you press <Enter> after entering the Distance or click Add, the new positions are added to the list as shown below. Because these distances were an equal distance apart you could set a repeat and not have to enter each axis position.
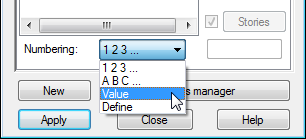
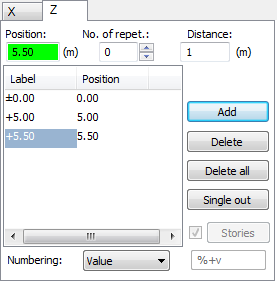
- Switch to the Z tab and set Numbering to Value as shown below.
- Set the Position to 0.00 and click Add.
- Add positions for 5 and 5.5 meters. Because these axes are at different distances from each other you need to enter them individually. Additionally, instead of numbers for the labels, the label equals the value of the position as shown below.
- Click Apply and then click Close.
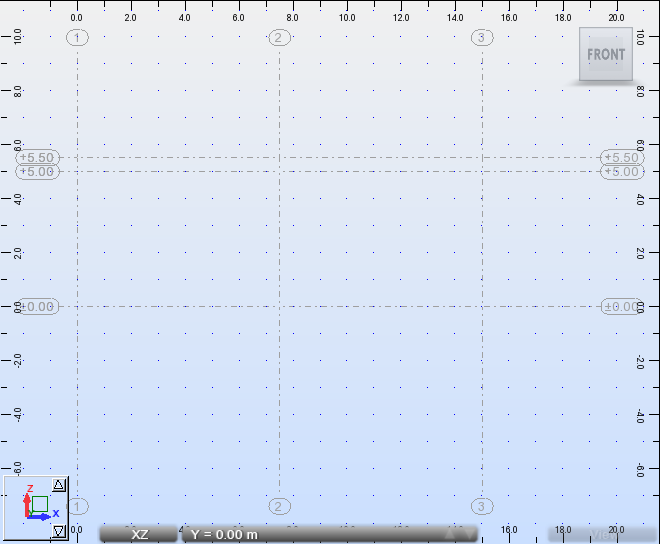
- The structure axis displays on the grid as shown below.
- Save the project as My Structural Project.rtd.