If imported data uses a different co-ordinate system than your model uses, InfraWorks 360 will transform the imported data to the model's co-ordinate system during import. Specify a co-ordinate system for imported data or manually position imported data to resolve this.
Generally, InfraWorks 360 can correctly position imported data automatically, based on the data itself.
Note: A co-ordinate system transformation can fail if the converted data falls outside the extent of the target co-ordinate system or required Grid (.gsb) files are missing. For more information, see To locate Grid (.gsb) files.
To specify the co-ordinate system during import
- Click


 to open the Data Sources panel.
- Import the data .
- Right-click the imported data in the Data Sources panel and select Configure to display the Data Source Configuration dialogue box.
- Select the Geo Location tab.
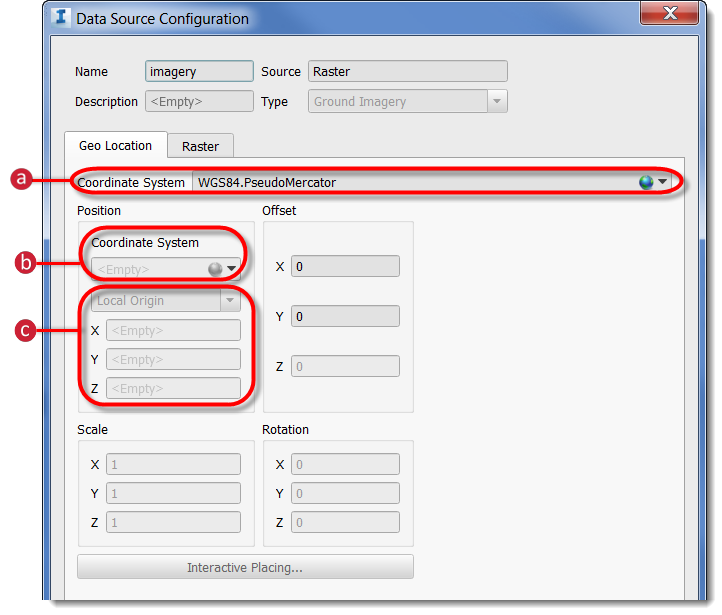
- Source Co-ordinate System: Most of the time, InfraWorks is able to determine the source co-ordinate system automatically, based on attributes of the data source. If necessary, specify the co-ordinate system of the incoming data in this field.
- Position (Target) Co-ordinate System: this is the co-ordinate system that InfraWorks 360 will use to store and display the imported data.
- You can also specify a Local Origin for imported data. This is helpful if the imported dataset has no world file associated with it.
Note: See the To manually position imported data section below for more information about using the Geo-Location tab.
- Click Close & Refresh.
To manually position imported data
- Open the Data Source Configuration dialogue box for the desired data and click the Geo Location tab.
- To control the positioning manually, do either:
- Enter x, y, z co-ordinates in the Position section.
- Select Interactive Placing and position the data in the model using the mouse.
When you place a 3D model interactively, you can use the mouse wheel in conjunction with a modifier key to adjust it. This is useful for 3D models that have no world file.
- To adjust projections for project specifics (for example, false easting/northing), enter an arbitrary offset to the data using the Offset X, Y and Z fields.
Note: Scale (X, Y) and Rotation (X, Y, Z) are not available during import of IMX data when the imported data uses a Geographic Co-ordinate System or a Project Co-ordinate System.