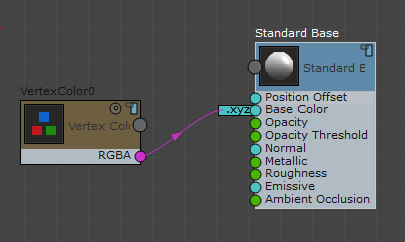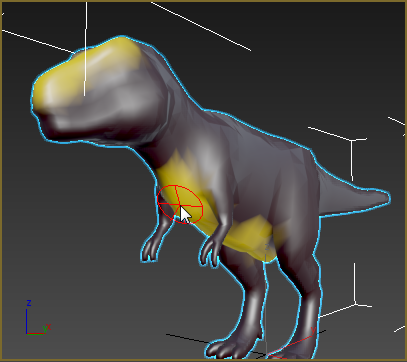
You can add a vertex color channel to your Stingray network, paint your vertices in 3ds Max, and export your object and its associated Stingray shading network to your game engine as an FBX file.
To add a vertex color channel to your Stingray shader network:
- Create a Custom Stingray shader (the new graph should have only a Standard Base node).
- Create a Vertex Inputs
 Vertex Color 0 node (drag and drop from the Node Browser to the work area) and connect it to the Base Color attribute of your Standard Base node.
- Minimize the ShaderFX Editor and the Material Editor.
- In the Perspective viewport,
 select your geometry (in this example, we use the dinosaur from Autodesk Mudbox). Go to the
  Modify panel and apply a VertexPaint modifier.
 Now you can use the tools in the VertexPaint Paintbox to color the model. Try the following:
- Change the color to black, then click
 (Paint All).
 - Change the color to a brighter hue, then use
 (Paint) to paint on the object.
In the viewport, you can now see the painted areas on your model.

- Change the color to black, then click
To combine vertex color with a texture map:
- Open the ShaderFX Editor, again.
- Delete the wire that connects the VertexColor0 node to the Standard Base node.
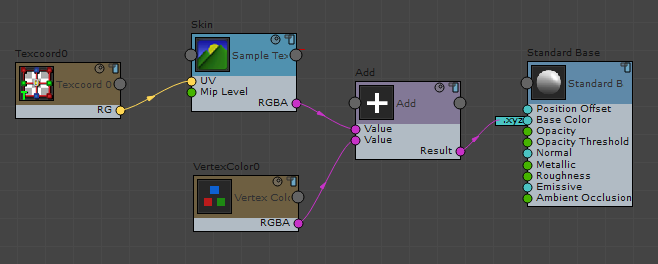
- Add a Sampling
 Sample Texture node to the graph. Add a Vertex Inputs
  Texcoord0 node to the graph, and connect it to the UV input of the map node. Give the map node a readable name (for example, Skin).
 - Add a Math
 Add node to the graph, just to the left of the Standard Base node.
 - Wire the Texture and Vertex Color nodes to the Value inputs of the Add node, then wire the Result of the Add node to the Base Color input of the Standard Base node.

- Minimize the ShaderFX Editor.
- On the Material Editor, assign a texture to the new Texture map.
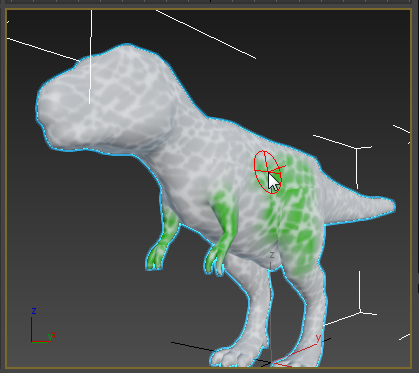
- Use VertexPaint to paint on the object, again.
Now the Add node combines the texture and the VertexPaint colors.

This procedure continues from the previous one.