With 3ds Max, you can quickly create multiple versions of one or more selected objects during a transform operation.

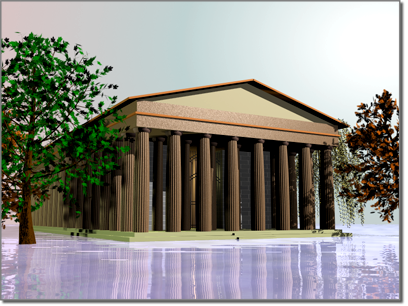
Portico created from arrays of columns
To create a copy, instance, or reference, hold down the Shift key as you move, rotate, or scale the selection.
The general term for duplicating objects is cloning. This section presents methods available for cloning objects.
In addition to the Shift+transform method, the Mirror tool and various Array tools can clone objects. See Techniques for Cloning Objects.
You can animate any of the cloning techniques.
Overview of Copies, Instances, and References
To duplicate an object, you use one of three methods. For all three methods, the original and clone (or clones) are identical at the geometry level. Where the methods vary is in the way they handle modifiers (for example, Bend or Twist).

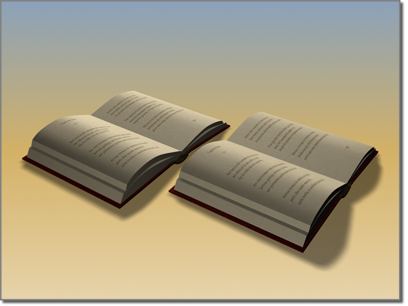
An object can be a copy of another.
Copy method: Creates a completely separate clone from the original. Modifying one has no effect on the other.
Instance method: Creates a completely interchangeable clone of the original. Modifying an instanced object is the same as modifying the original.
Reference method: Creates a clone dependent on the original up to the point when the object is cloned. Changing parameters for modifiers that were applied to the object before the object was referenced, will change both objects. However, a new modifier can be applied to one of the reference objects, and it will affect only the object to which it is applied.
Depending on the method used to create them, cloned objects are called copies, instances, or references.
The following discussion focuses on how you might use these methods.
Copies
Copies are the most familiar kind of clone object. When you copy an object, you create a new, independent master object and data flow resulting in a new, named object. The copy duplicates all of the data of the original object at the time it is copied. The copy has no connection to the original object.
Example of Using Copied Objects
If you modeled a basic building shape and wanted to create a group of varied buildings, you could make copies of the basic shape and then model different features on each building to distinguish them from each other.
Copying Actively Linked Objects
When you copy objects that are actively linked through the File Link Manager, 3ds Max automatically converts the copies to editable mesh objects. If your selection contains several objects that instance another object, the resulting copies also instance the same object.
Instances
Instances are alike not only in geometry, but also in every other way as well. Instancing an object results in multiple named objects based on a single master object. Each named object instance has its own set of transforms, space warp bindings, and object properties, but it shares the object modifiers and master object with the other instances. The data flow for an instance branches just after evaluating object modifiers.
When you change one instance by applying or adjusting a modifier, for example, all the other instances change with it.
Within 3ds Max, instances derive from the same master object. What you’re doing "behind the scenes" is applying a single modifier to a single master object. In the viewport, what you see as multiple objects are multiple instances of the same definition.
Example of Using Instanced Objects
If you wanted to create a school of swimming fish, you might begin by making many instanced copies of a single fish. You could then animate the swimming motion by applying a Ripple modifier to any fish in the school. The whole school would swim with exactly the same motions.
Instances of Actively Linked Objects
Creating instances of actively linked objects is not recommended. Reliability issues can arise if the instanced object is deleted in the linked file.
References
References are based on the original object, as are instances, but can also have their own unique modifiers. Like instances, references share, at minimum, the same master object and possibly some object modifiers.
The data flow for a reference branches just after the object modifiers but then evaluates a second set of object modifiers unique to each reference. When you create references, 3ds Max displays a gray line, called the derived-object line, at the top of the modifier stack for all clones. Any modification made below the line is passed on to other references, and to the original object. New modifiers added above the line are not passed on to other references. Changes to the original object, such as in its creation parameters, are passed on to its references.
This effect is useful for maintaining an original that will affect all its references, while the references themselves can take on individual characteristics.
All shared modifiers reside below the derived-object line and are displayed in bold. All modifiers unique to the selected reference reside above the derived-object line and are not bold. The original object does not have a derived object line: its creation parameters and modifiers are all shared, and all changes to this object affect all references.
The results of changing or applying a modifier to a named object reference depends on where in the modifier stack it is applied:
- Applying a modifier to the top of the modifier stack affects only the selected named object.
- Applying a modifier below the gray line affects all references branching above that line.
- Applying a modifier at the bottom of the modifier stack affects all references derived from the master object.
References of Actively Linked Objects
Creating references of actively linked objects is not recommended. Reliability issues can arise if the referenced object is deleted in the linked file.
Example of Using Referenced Objects
In the example of modeling heads, you might want to keep a family resemblance in your characters. You could model basic features on the original, then model specifics on each reference.
At some point, if you wanted to see what your characters would look like as "cone-heads," you could apply a Taper modifier to the original head, and have all the other characters take on the same feature. You could give the original character a very pointed head, then apply a separate Taper to some referenced characters to reduce the point toward normal.
For swimming fish, you might choose to make all members of the school as referenced objects based on a single, original fish. You could still control the swimming motion from the original fish, and also add modifiers to individual fish in the school to vary their behavior.