With Advance Steel you can easily define new bolts, using the Management Tools application.
To create a new bolt:
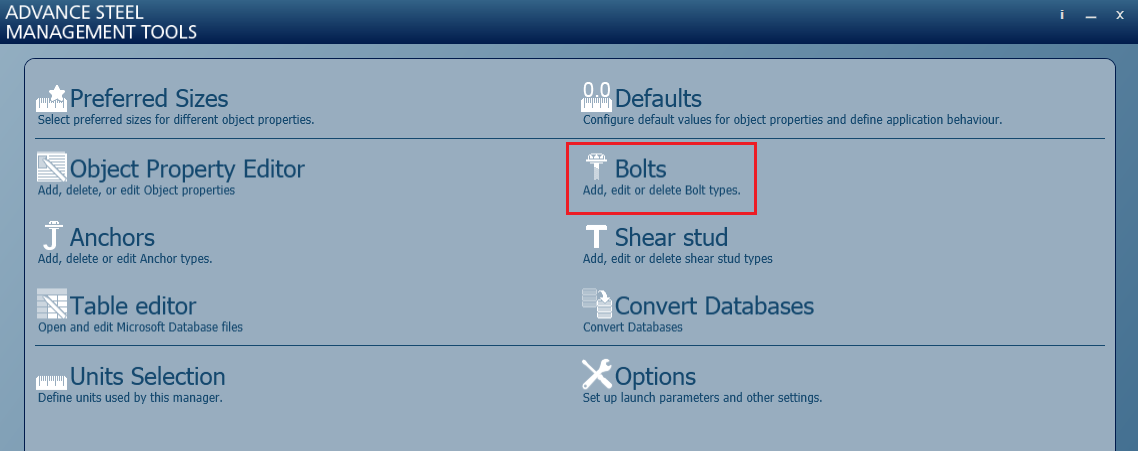
- Open the Management Tools application and go to the Bolts category.
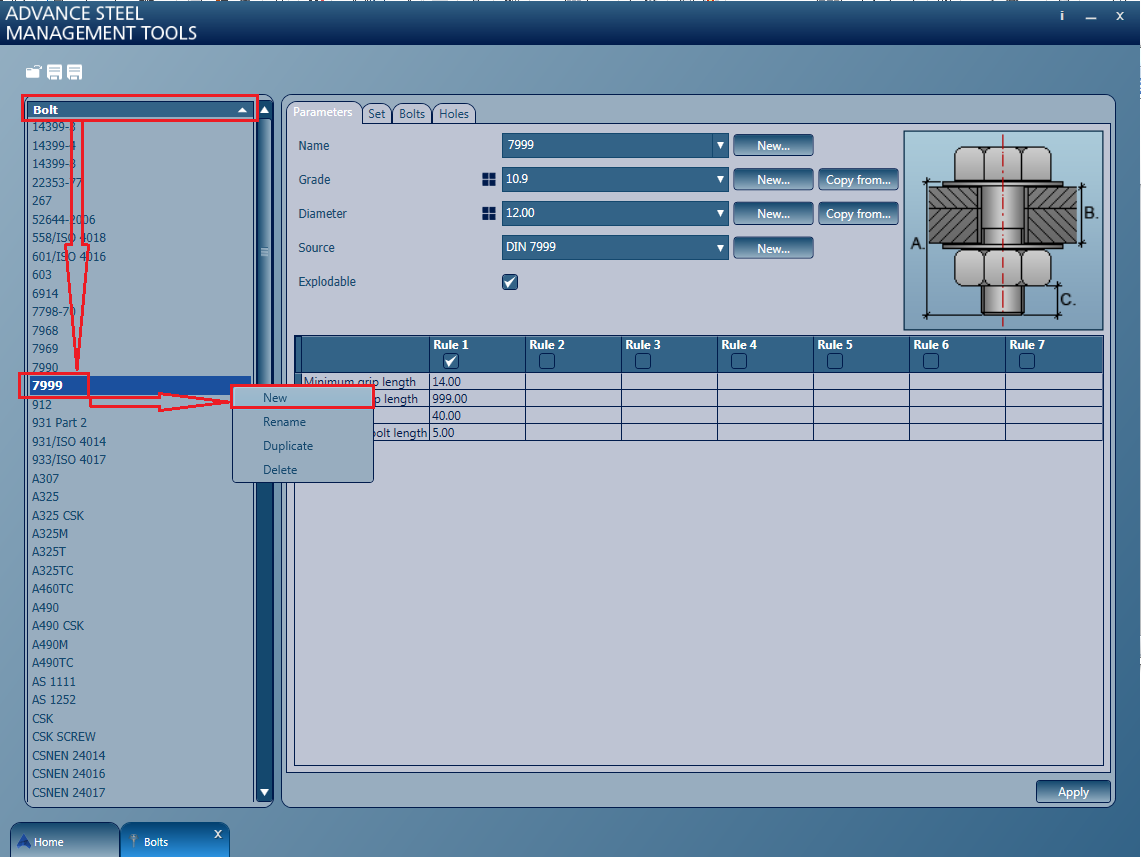
- Open the Bolt menu, right click on any of the existing bolts and select New.
- On the
Parameters tab - where you can define the name, grade, diameter and even the norm (where the bolt is categorized) for the newly created bolt:
- Give a new name for the bolt by clicking on the New... button and typing the desired name (e.g. FAQ Bolt).
- Click Apply.
- Grade and Diameter:
For example, select 8.8 for grade and 27.00 for the diameter.
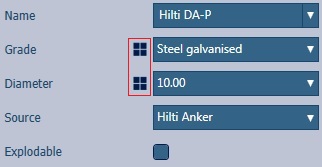
After you have created some classes of bolts, the filters, marked with 4 squares, are used to filter the grade and diameters specific only to a certain bolt class.
- Source - representing the norm of the bolt:
This information can be displayed in the BOM lists.
For example:- Select 6914 from the source drop-down list.
- Check
Explodable - this means that the bolt will be displayed in the BOM lists, exploded into each of its components (bolt, nut, washer), all of them under the part name you have given to the bolt (in this case, FAQ Bolt).
If the Explodable option is not checked, then the bolt assembly will pe represented as a whole in the lists.
Note: You can also use some of the parameters (such as grade or diameter) from other already created bolts, by using the Copy from... button: - In this example we will consider a bolt with the following characteristics:
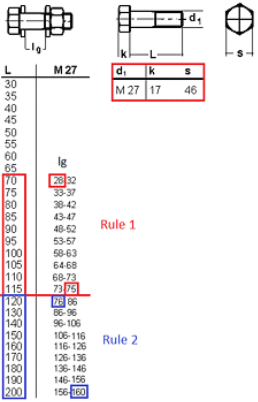
L - bolt length
d1 - bolt diameter
k - head thickness
s - head width
lg - grip length

Attention: If you click Apply after only completing the information in the Parameters tab, you will receive an error message: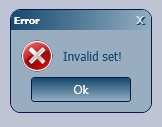
To avoid this, go to the Set tab before clicking Apply and select or create a Name of bolt assembly.
- Set tab:
In this tab you can choose from a variety of nuts and washers, already present in the database. The characteristics of the nut and washers selected in this example are shown on the right side of the image below:
The bolt we want to create in this example has 2 washers and a nut. In the Set tab we did not create a new bolt assembly, but selected an existing one from the drop-down list: Na2W (Nut2Washers).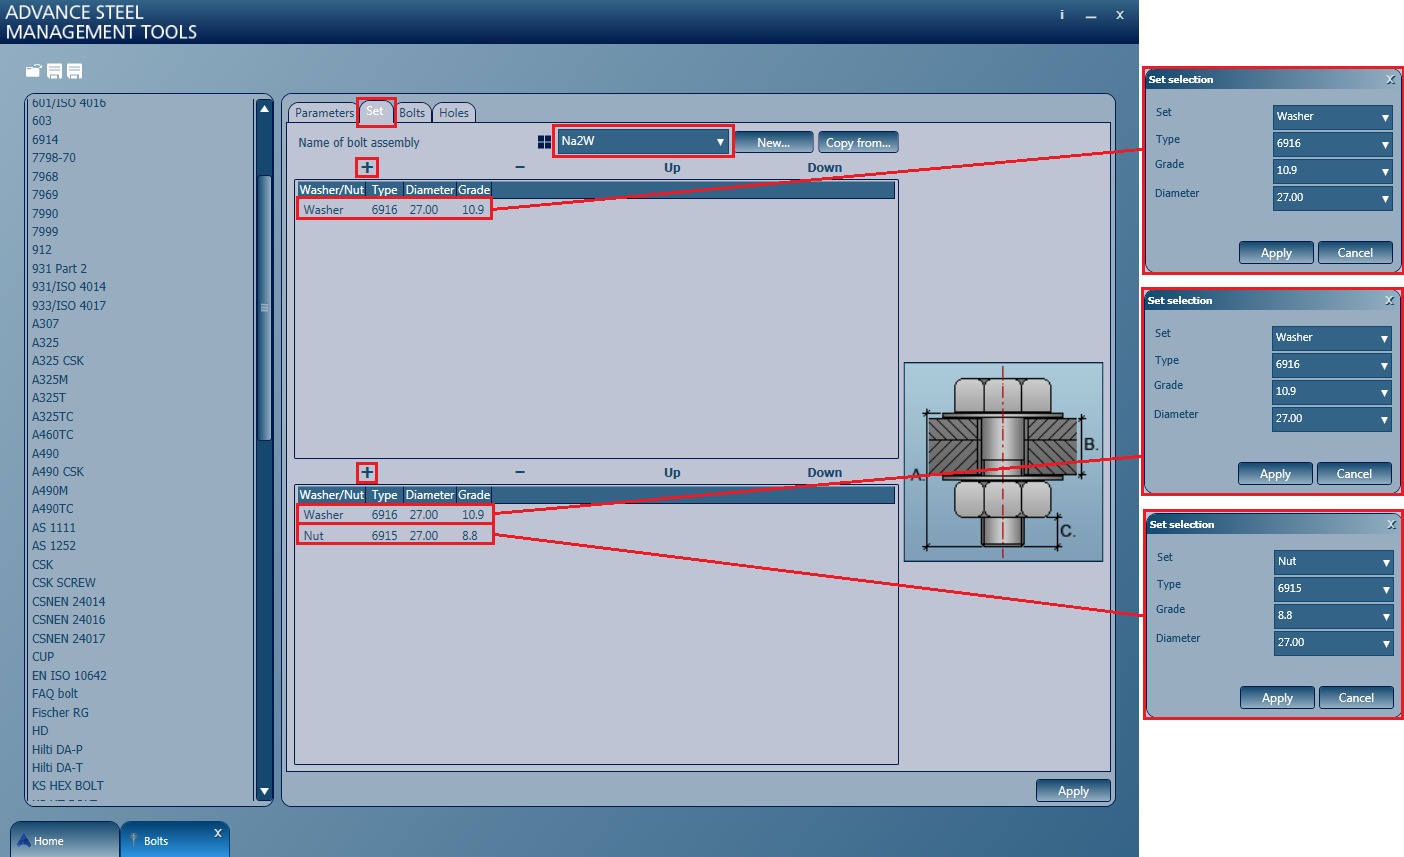
Using the plus sign, we added a single washer in the first table and a washer and nut in the second table.
If you cannot find a suitable assembly in the drop-down list, you can create a new one by clicking the New... button.


- Go to the
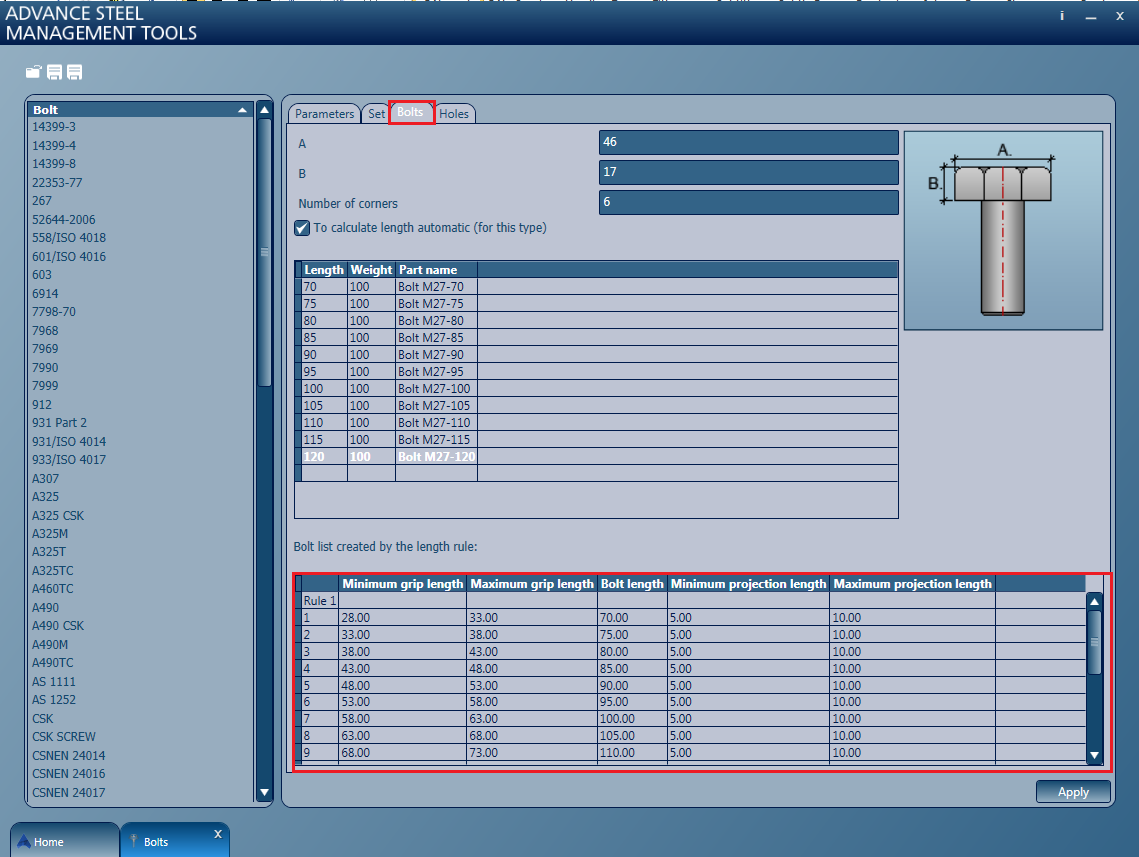
Bolt tab and enter the head width (A - 46mm), thickness (B - 17mm) and number of corners (6) in the first 3 fields. For a round-headed bolt, the number of corners is 0.
Next, define each bolt by its length, weight and part name, using the dedicated table.
The part name of the bolt is displayed in the BOM lists, therefore, it should be a descriptive one. In this example, this value is defined as Bolt M2 -70 for the first bolt. Or you can be more specific and also add the norm of the bolt to the name. In this case, you will have Bolt M2 -70 DIN 6914.
- Go back to the Parameters tab and set the rules in the second table. For the bolt selected in this example, we need to define 2 rules because the bolt has 2 different increments. The bolts with a 20 to 120 mm length have a 5 mm increment, while the ones with a 120 to 200mm length have a 10mm increment.
- In the
Holes tab you can select the hole type, location and a tolerance. The tolerance is mostly used when modeling. In the bolt patterns or in the joints where you will use this bolt, you will be able to change this tolerance value if you need to.
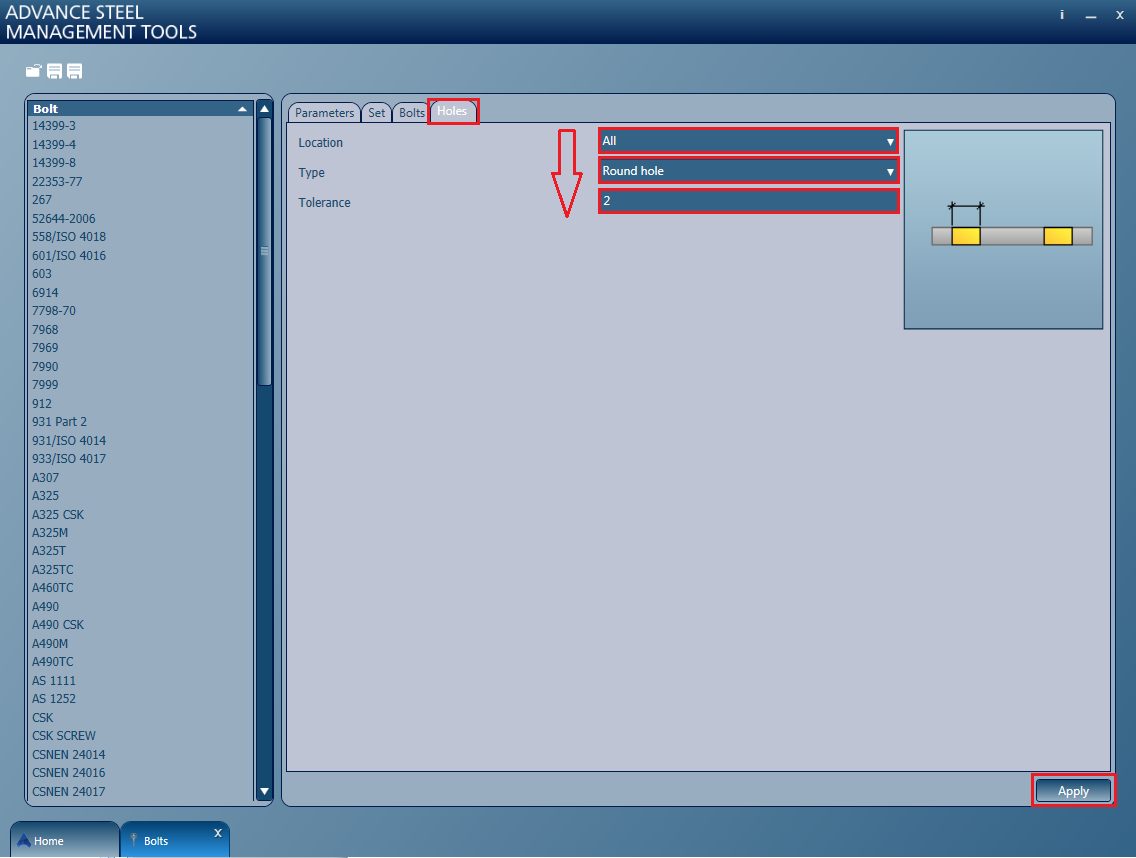
There are 3 types of holes:- Round holes:
- Threaded holes - these also need a Depth value:
- Countersunk holes - which have two more parameters to be set, Angle and Head diameter:


- Click Apply to save all the settings.
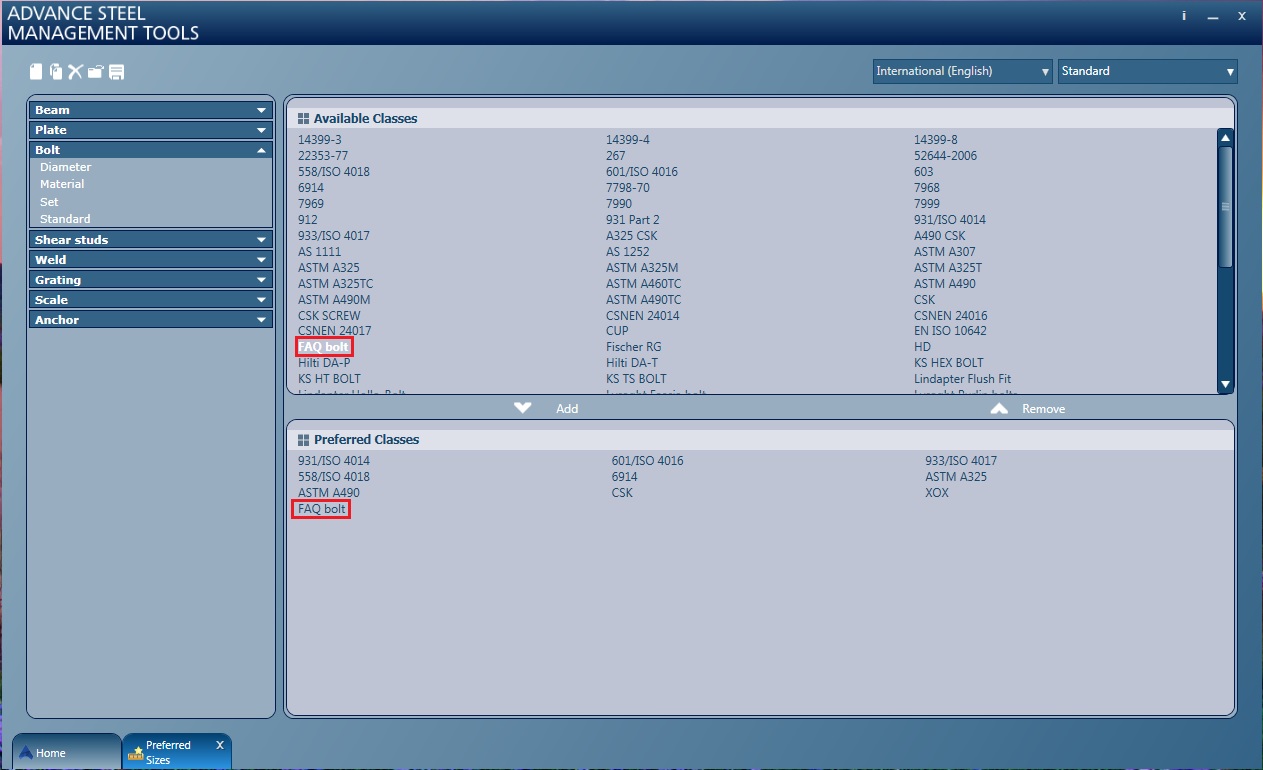
- Include the new bolt in your Preferred Classes:
- Close the
Management Tools.
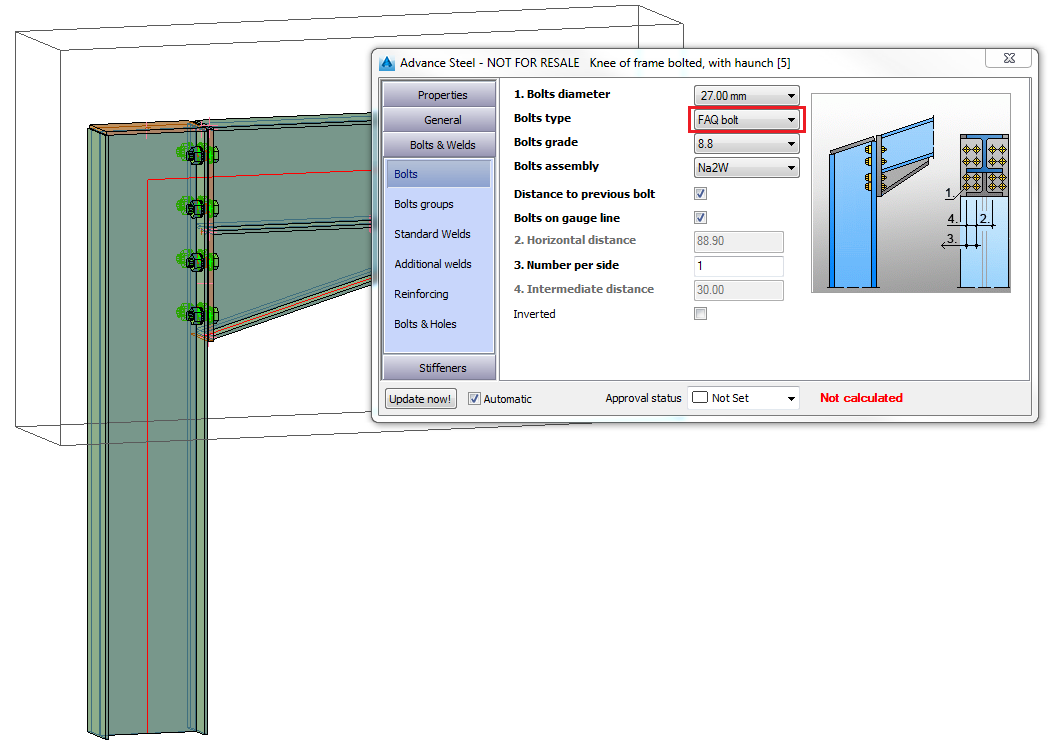
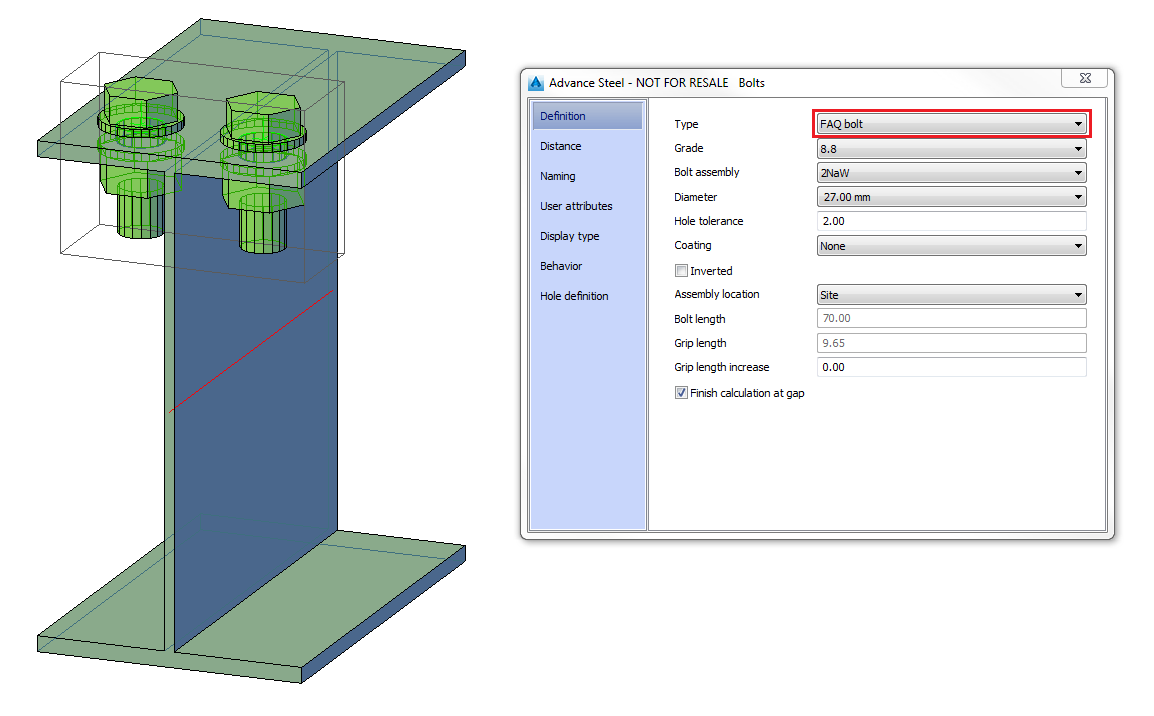
The newly created bolt will be available in the bolt patterns and joints:

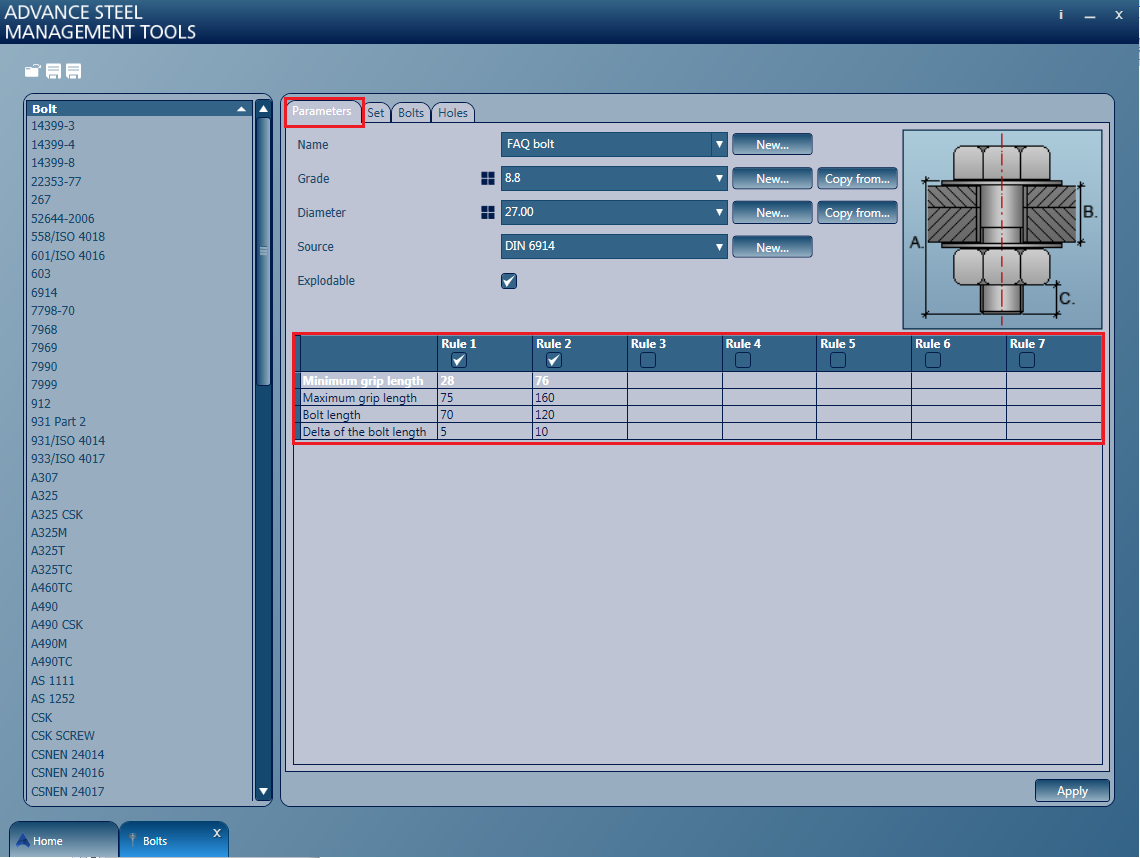
When creating bolts, you can set some rules by checking the boxes and then double-clicking to be able to enter values:
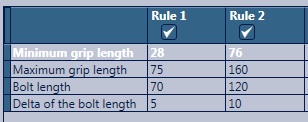
Now, if you go back to the Bolts tab, you will see that the second table has been updated automatically, with the bolt lengths and grip lengths, after having setting the rules (Rule 1 and Rule 2).
The values in this table coincide with the ones from the bolt's characteristics.
