Check out Model Elements
I. Completely check out a connected column
In a shared model, a column is connected to a rafter by a rule based joint.
- In the Extended Modeling tab > Multi User panel, click
 (Check out by section - complete).
- In the model, select the column and press <Enter>.
- Double-click on the beam that is not checked out, to display its properties. Next, double-click on the column that you checked out to display its properties.
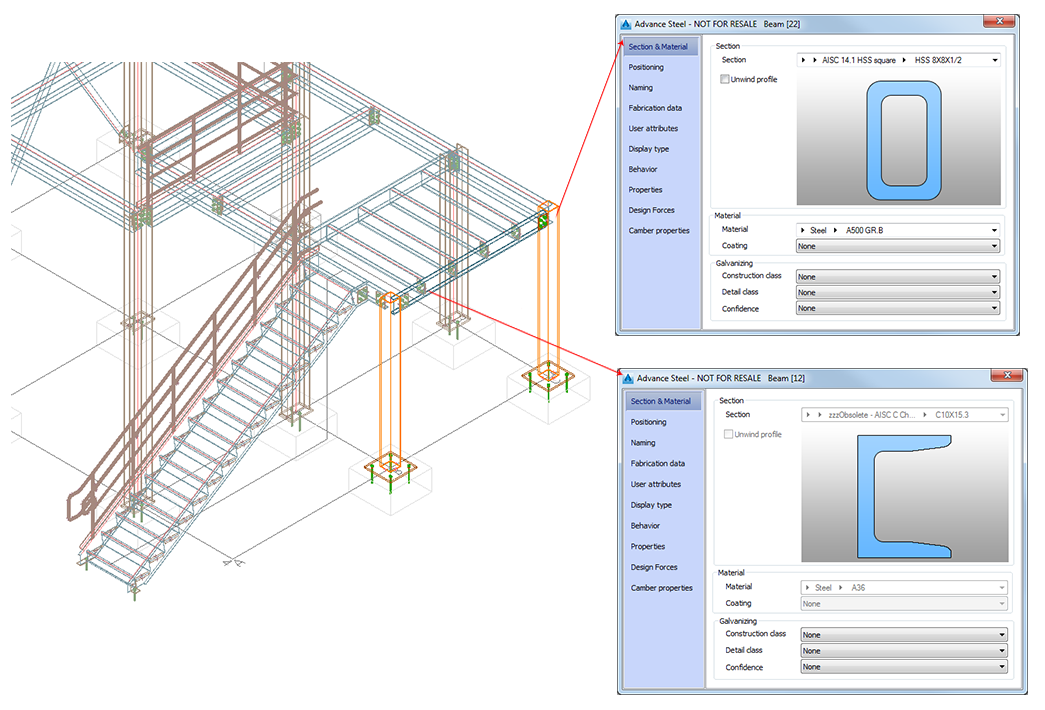
Note that the selected column checked out, along with the rafter that is connected to the column and the elements of the intelligent connections in which the column is involved. The user can modify any of the column properties and the connections. However, only those properties that do not affect the section of the rafter can be changed. The joint can be modified in any way.
II. Partially check out elements that should be connected
The column was checked out completely in the previous example to enable the user to modify the section. Next, partially check out the elements that you want to connect (the other rafter) knowing that another user will work on the other end of the rafter. Therefore, the rafter can be checked out partially by another user who can add connections or features at the other end of the element.
- In the
Extended Modeling tab >
Multi User panel, click
 (Check out by selection - Partial).
-
Select the elements that you want to connect (the rafter) and press <Enter>.
The properties of the rafter cannot be modified, but connections and features can be added.
Note: The elements can be selected (single selection) or selected using AutoCAD tools, such as crossing windows or enclosing windows. You can also use a check out by filter to select a group of elements that have the same properties.
Select all of the beams and columns that have W16x26 sections in the entire model.
- In the
Extended Modeling tab >
Multi User panel, click
 (Check out by filter - Complete) for a complete check out by filter.
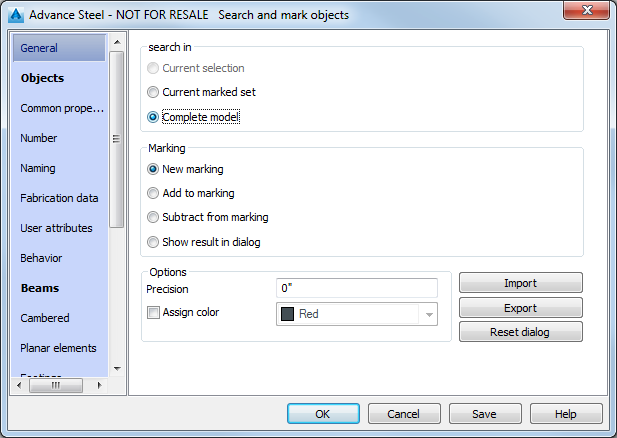
- In the Search and mark objects dialog box, define the following settings:
- In the
General tab, select the
Complete model search field.
- In the
Beams tab, select the elements that you want to modify (e.g., all of the AISC 14.1 W, W14x48 Steel Beams).
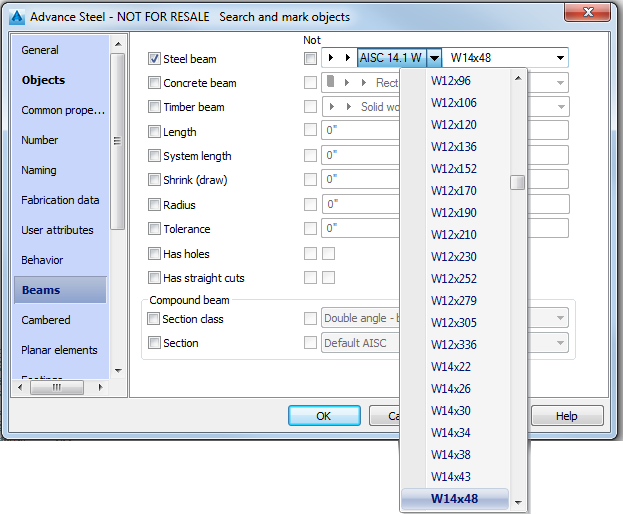
All the AISC 14.1 W, W14x48 Steel Beams are checked out:
- In the
General tab, select the
Complete model search field.
If using the Partial check out tool, only the selected sections are checked out, regardless of their connections. Note that the selected sections are checked out along with the elements that are connected to the searched sections.
Check Objects into the Model
Each user involved in the project works on a local copy of the Master model. To share the work they must publish the modifications to the Master model, so that all of the connected users can see the progress in the modeling. Two tools enable the user to send the modifications to the Master model:
- Check in - keep check out tool: The modifications are sent to the Master model, but the elements are still checked out.
- Check in tool: The modifications are published to the Master model and the elements are released. If the user wants to modify the element again they need to check it out again.
A message about changes to the Master model displays at the bottom-right of the screen for every user.
-
In the Extended Modeling tab > Multi User panel, click
 (Mark objects for check in).
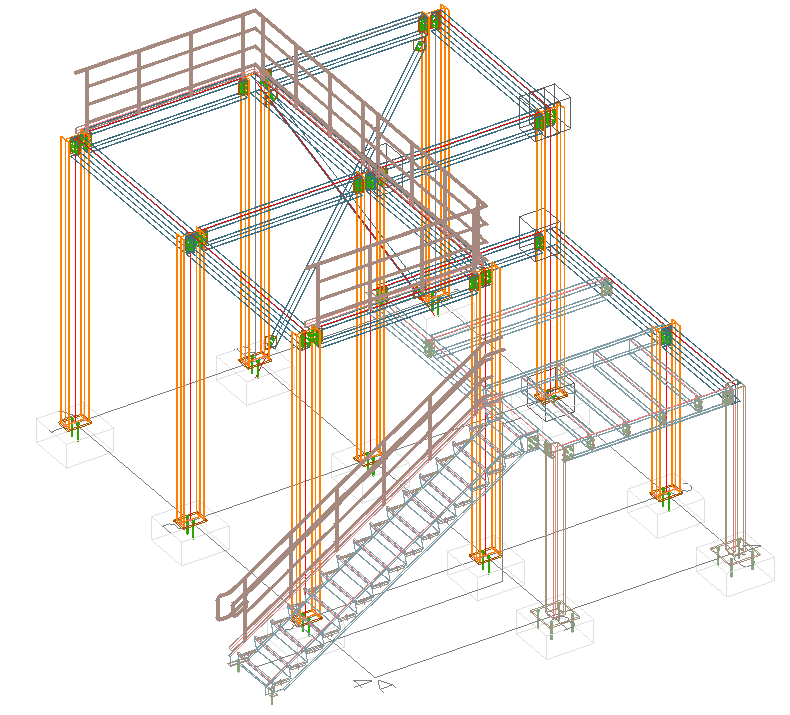
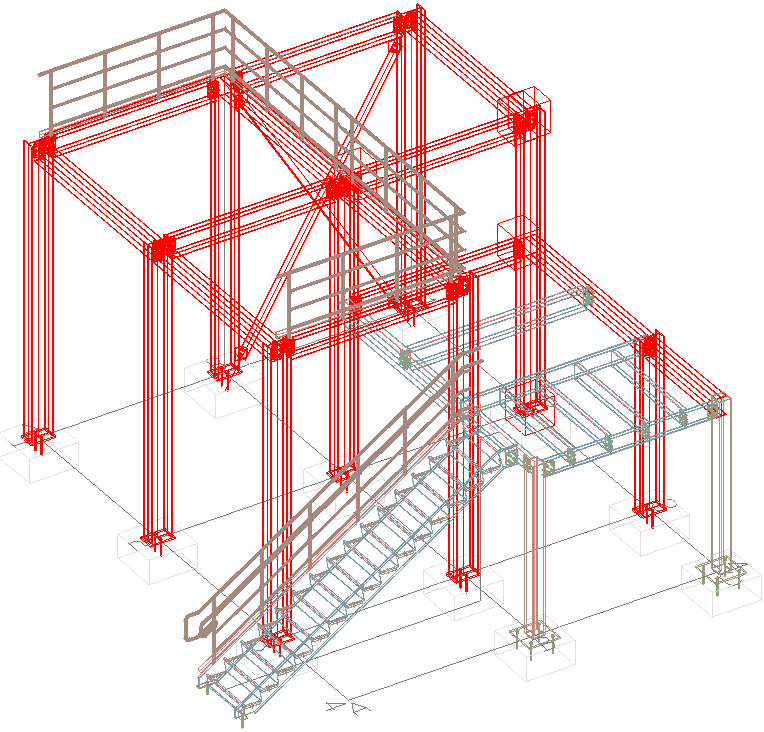
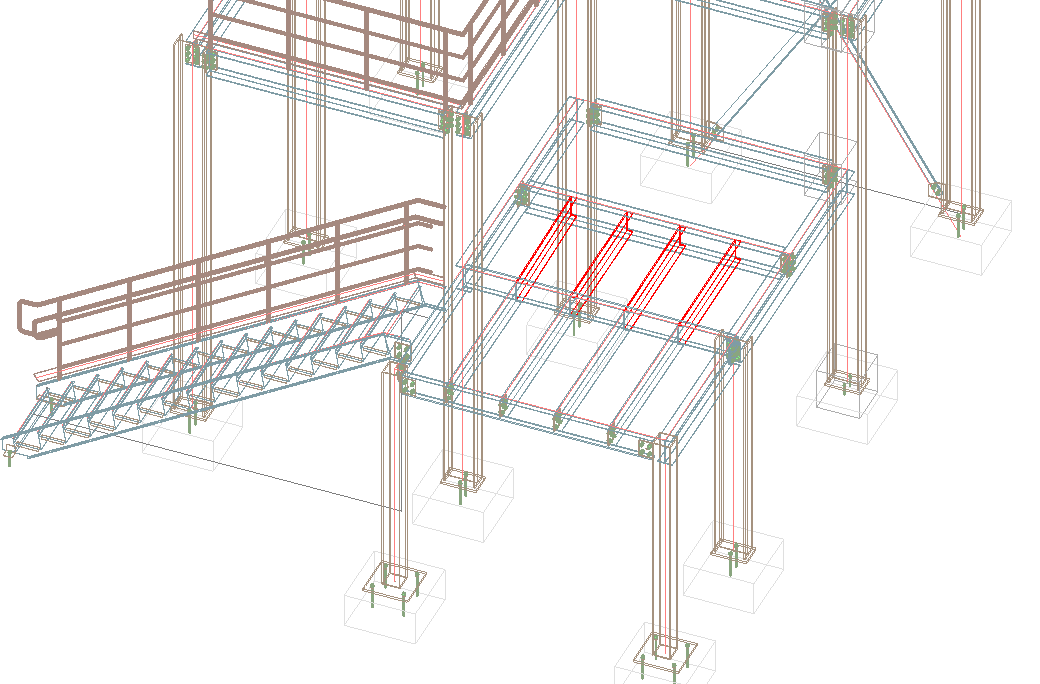
The elements that have been checked out by User 1 are highlighted in red.
- User 1 can then check in the elements and update the Master model by clicking
 (Check in) in the
Extended Modeling tab >
Multi User panel.
(Check in) in the
Extended Modeling tab >
Multi User panel.
- Alternatively, if users want to continue working on the model after checking in the modified elements, they can do so by clicking
 (Check in and keep checked out) in the
Extended Modeling tab >
Multi User panel.
(Check in and keep checked out) in the
Extended Modeling tab >
Multi User panel.
- Alternatively, if users want to continue working on the model after checking in the modified elements, they can do so by clicking
Add Elements to the Master Model
As the project evolves, it might be necessary to add new objects. Users can add new elements to the local copy in which they can modify or delete the elements. Added elements will only be available for other users after they have been checked into the Master model. Once an element has been checked in, it can only be modified after check out.
- In the
Extended Modeling tab >
Multi User panel, click
 (Add objects).
- Select the elements that you want to add to the Master model and press <Enter>.
Note: As the project evolves, the model can be modified by any user. Therefore, it is recommended that you reload the model occasionally and note the progress in the modeling. - Reload the Master model: In the
Extended Modeling tab >
Multi User panel, click
 (Reload Master model) to refresh the Master model.