In the Lattice Rig toolbox, the lattice is the manipulator to change geometry. Unlike with the Transformer Rig, the modification of the lattice and the target geometry both happen within the Lattice Rig tool.
Set up a Lattice Rig
- Pick the surfaces that you want to modify.
- Then click the Lattice Rig icon.
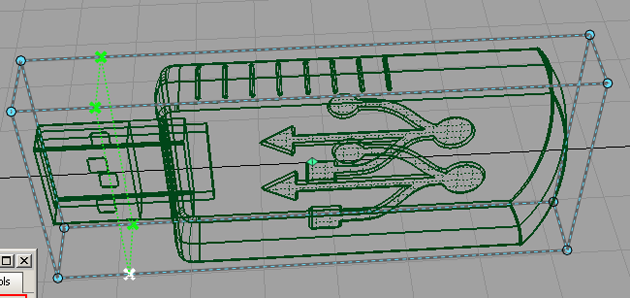
The toolbox of the Lattice Rig appears, and an initial lattice box is placed around the selected geometry. The lattice starts off being a simple box slightly larger than the target geometry.
Notice that the edges of the lattice are shown with dashed lines. This shows that it is "disengaged", and changes made to the lattice do not affect the target geometry.
- To add detail to the lattice, choose the Split Lattice Edge tool. Place the cursor over an edge, and click a mouse button. A set of green lines appears, which can be repositioned until you select either Accept Split or Cancel. If you are satisfied with the placement of the new edges, click Accept Split.
- Repeat until there are sufficient number of points to best approximate the shape of the target geometry. Click Done when you are satisfied with the number of points.
Next, start to move the points so the lattice better approximates the shape of the geometry.
You have a choice between translating (moving) or scaling the points.
- Click-drag a box around a group of points to select them, or pick the points one at a time.
Points turn white when selected. Click Translate to enable the translate manipulators.
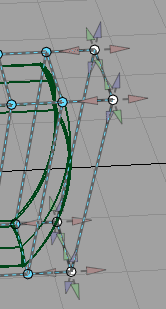
Notice the cones pointing out from the active points. These manipulators show the directions in which you can pull the points.
- Pull manipulators and reselect points to shape the lattice to the geometry.
- To scale points, click Scale. The manipulators change to the following:
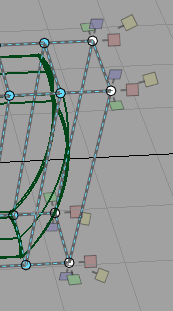
- Pull manipulators and select points to scale the lattice.
- When you’re finished shaping the lattice, choose Toggle Lattice Engage State.
Notice that the lattice is now drawn with a solid color, and the target geometry is drawn in yellow-green. This indicates that the lattice is engaged, and further modifications to the lattice will change the target geometry.
Use the lattice to modify shapes
- With the lattice engaged, pick a lattice point.
- Click Translate, and move the lattice point.
Notice that the target geometry updates to reflect the change. If Auto Update is turned on, a lightweight proxy of the model is used for display purposes while the mouse button is held down, and the model updates when you release the mouse button. If Auto Update is OFF, the proxy is used until the Go button is clicked.
- If you want to move a number of points, pick them, then move the picked points by using the manipulators on one of the points: the other points will follow.
- If you want to scale a point, click Scale, and pick and move the point.
- If you want to scale a number of points, pick them, then scale the picked points by using the manipulators on one of the points: the other points will follow. Note the location of the scale pivot. You can move it to an appropriate spot to affect the scaling operation.
- Repeat the same workflow for the rest of the lattice points to reshape the geometry.