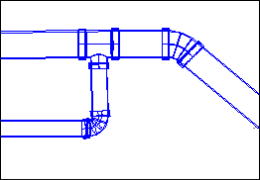
The plan view layout establishes both the horizontal location and the initial vertical information for the pressure network.

|
Lay out the horizontal design of a pressure network. |
Pressure Network Creation Process
Creating a pressure network in plan view involves specifying default settings in the Create Pressure Pipe Network dialog box, and then using the tools on the Pressure Network Plan Layout ribbon to lay out the pressure network. Layout can be done in disconnected segments, which you connect later by inserting parts, or as continuous segments.
The following sections describe some of the main concepts regarding pressure network layout in plan view.
![]() For information about the workflow when working with pressure networks in plan view, see Workflow: To Lay Out a Pressure Network in Plan View.
For information about the workflow when working with pressure networks in plan view, see Workflow: To Lay Out a Pressure Network in Plan View.
Layout Cues
The layout process might involve connecting to an existing part. When the cursor is close to an existing part with a free connection, a small glyph  appears to indicate the potential to connect the two parts. When you click in the drawing to insert a part when this glyph is displayed, a connection is created.
Adding Bends or Deflection to Control Pressure Network Direction
The are two main layout options in plan view: Pipes & Bends and Pipes Only.
The Pipes & Bends option is selected by default when you start the layout process. Using the Pipes & Bends option, bends are inserted when there is a directional change in the pressure network path. Using the Pipes Only option you can insert deflected pipes to create directional changes in the pressure network path.
The compass, which is displayed during the pressure network layout in plan view, shows which bend angles (for the Pipes & Bends option) or deflection angles (for the Pipes Only option) can be used for the currently-selected pipe material and size.
Drawing Curved Pressure Network Segments
Both the Pipes & Bends and Pipes Only options can create curved segments.
A curved segment can represent flexible pipe (when the pressure pipe part has a Minimum Flex Radius greater than zero), or it can represent a series of rigid, straight pipes (when the pressure pipe part has a Minimum Flex Radius of zero).
Establishing Elevation Information for the Pressure Network
Initial elevation information is established for the pressure network during the layout in plan view. Elevations are established at the start and ends points (for pressure pipes) or insertion points (for fittings and appurtenances).
During the plan layout, you can establish the elevation information in the following ways:
- You can specify a reference surface and cover value.
- You can specify the reference surface in the Create Pressure Pipe Network dialog box, or on the Pressure Network Plan Layout ribbon tab.
- The cover value is specified on the Pressure Network Plan Layout ribbon tab.
- You can specify an elevation at the command line (using the Elevation option) before specifying the first pressure pipe point.
- If no reference surface is specified, this elevation is used as the centerline elevation for the pipe segments and the insertion point elevation for fittings and appurtenances.
- If a reference surface is specified, this elevation is used as the start centerline elevation for the first pipe segment only.
- If neither a reference surface or single elevation is specified at the command line, the pressure network is set at an absolute elevation of 0.
After the pressure network is laid out in plan view, you can also assign and edit elevation information for parts in the Pressure Pipe Properties, Fitting Properties, and Appurtenance Properties dialog boxes.
After the initial information is established, you can refine the elevation information in profile view. For more information, see About Working With Pressure Networks In Profile View.
Establishing Station and Offset Information for the Pressure Network
Adding Pipes, Fittings, and Appurtenances in Plan View
Fittings and appurtenances can be inserted in plan view by using the Add Fitting and Add Appurtenance options.
There is not a specific Add Pipe option in plan view. Pipes can be added by resuming the Pipes & Bends or Pipes Only option, or by using the Continue Layout grip.

 00:04:44
 With Audio