Batch Publish lets you create multiple assets at once from blocks contained in DWG files. This feature is useful if you currently manage blocks by grouping them into separate files and want to convert them to factory assets.
To batch publish assets:
- Select Batch Publish from the Factory Assets drop-down menu on the Factory ribbon.
- Browse for the folder containing the DWG files with block data to convert:
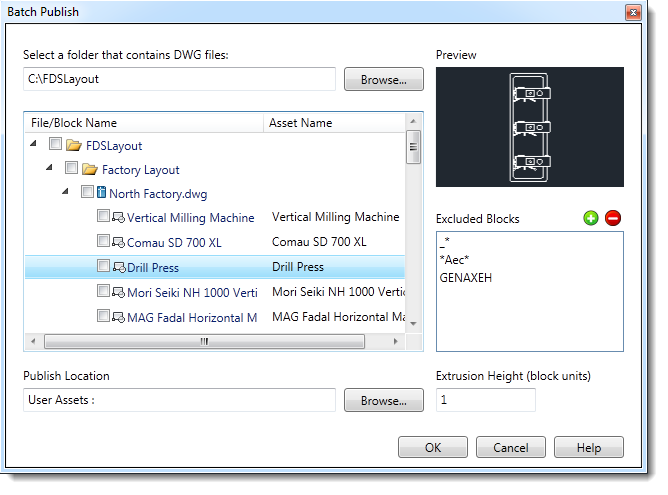
- Locate the Publish Location field toward the bottom of the window and browse to select the location for the published assets. Note: If you select the blocks to convert before you select the Publish Location and you change the location from Local to Cloud or from Cloud to Local, your block selections will be cleared and you will need to re-select them. Selecting the publish location prior to selecting the blocks prevents the need to reselect.
- Click in the check box next to each block to publish. If a DWG does not contain a block, you can convert the entire file to a single asset. To preview an asset, click the name of the file or block. To automatically exclude certain blocks from batch publishing, click
 to add the block name or a search string. Press Enter after adding an excluded block to remove it from the File/Block Name list.
 - Click in the Asset Name column if you want to change the asset name to something other than the block name.
- Enter an Extrusion Height for the new assets. The extrusion turns a 2D asset into a 3D representation by adding the height dimension entered here. Note: The height entered is used for all selected block files and is applied based on the units of measure for each file. For example, if you enter 10 for the Extrusion Height and one of the selected files is measured in inches and another is measured in millimeters, the extrusion will be 10 inches and 10 millimeters respectively.
- Click OK to create the assets.