Once you sample for softness, use the Minimize Noise option to remove grain from the softened areas. Graininess, also known as noise, can occur at the edges of the key, or in the semi-transparent areas such as water or glass.
First, sample an area containing noise. The 3D Keyer analyses the sampled area. Using Minimize Noise, you can then scale the softness in such a way as to minimize the noise in the softened areas.
Minimize Noise is especially useful for semi-transparent areas and edges requiring a lot of softness, such as smoke, reflection, and shadows.
To remove noise:
- Sample for softness. See Setting the Softness.
- Zoom in and choose the area you want to analyse. Look for graininess in the softened areas. For transparencies, look for graininess in the semi-transparent areas.
- Press N (Noise) and drag a rectangle in the selected area.
The 3D Keyer analyses the pixels in the rectangle.
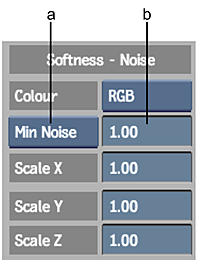
- Select Min Noise from the Softness Scaling box.

(a) Softness Scaling box (b) Scaling field
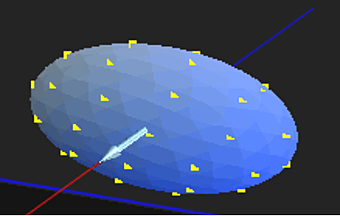
An arrow appears in the softness ellipsoid, showing the direction in which the softness needs to be increased to reduce graininess in the sampled area.

- Increase the softness using one of the following methods:
- Drag the cursor over the Scaling field to the right. The softness is increased based on the results of the analysis from the grainy region. Observe that the softness ellipsoid is scaled in the direction of the arrow.
Note: Each time you change the Scaling value, it is returned to 1.00.- Use a colour value plotted in the image window as the basis for virtual point scaling of softness. To do this, use the O keyboard shortcut to plot a point in the image window, then press Ctrl+V, and click and drag in the Player.
- If some edges or areas are still not softened, analyse again in that area and repeat the procedure.
- Return the Softness Scaling to Prop (proportional scaling).
Alternatively, press Alt + N to scale softness based on the Minimize Noise analysis. This keyboard shortcut is the equivalent of selecting Minimize Noise in the Softness Scaling box, then scaling the softness using the Scaling field.
Note: When Minimize Noise scaling is selected, it controls the arrow in the RGB viewer. To manually control the arrow, you must return to proportional scaling.
To scale softness using Alt+N:
- Perform a noise analysis. Note: Alt + N only works if an analysis for the noise has been done.
- Press Alt + N and click and hold the cursor anywhere in the image window. Drag the cursor to the left to decrease the noise or to the right to increase it.
The softness is scaled according to the noise analysis. Notice that Minimize Noise appears in the Softness Scaling box as you use the keyboard shortcut. When you release the cursor, the Softness Scaling option returns to Prop.
Tip: For transparencies, use the V keyboard shortcut to remove unwanted grey areas in the matte, then use Alt+N to reduce noise in areas you chose to soften (the transparency). Perform the two procedures alternately until you achieve the best result.