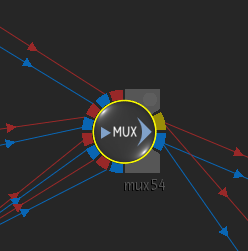
The MUX (multiplexer) node is a tool that helps you create cleaner schematics by allowing you to have multiple RGBA inputs feeding your outputs. The selection of the active input can be changed over time, therefore MUX also acts as an animated switcher.
To access the MUX menu, use:
- The I/O tab in Batch.
-
Timeline, then use Batch FX (see Creating Batch FX).
-
The Modular Keyer, then select a node from the Node bin.
This node accepts any number of front and matte clips, and outputs a result and outmatte.
Using the MUX Node
When entering Batch FX with existing Timeline FX or transitions, you may notice MUX nodes with multiple connections in the newly converted schematic. These MUX nodes are used to help recreate and represent your timeline in a flow graph environment.
You can emulate this behaviour by adding your own MUX nodes to the schematic. If you need more inputs in your MUX node, use the Amount field in the MUX menu to set the number of inputs needed. To switch between inputs, use the Selection field to choose which input is active (this field can be animated with keyframes).
Tip: If you add multiple inputs to a MUX node, you may have trouble seeing or connecting individual input sockets. In this case, you can expand the node by selecting it, and pressing Shift + C. Press the same keyboard shortcut again to collapse the node. You can also hide the input or output links of the MUX node to clean up a large schematic. Even when hidden, you can select a MUX node to display semi-transparent links.
In the case of timeline transitions, the MUX node also acts as a switcher to allow the proper inputs to be selected at the correct time.
In you enable Show Indicators in the Batch or Batch FX preferences, you can view the MUX Timing Offset and Range values directly under the node in the schematic.
