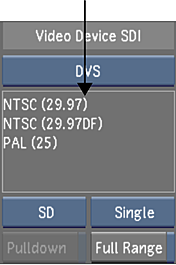
Whenever capturing material, you must select a raster. For a list of the supported rasters, see http://beehive.autodesk.com/community/service/rest/cloudhelp/resource/cloudhelpchannel/guidcrossbook/jsonp?v=2016&p=FLAME_P&l=ENU&guid=GUID-82A0DD4D-E6C5-4CC9-9AD3-FCC683636A5A.
Note: When you select a drop frame (DF) video format, the timecodes are calculated in Drop Frame mode.
To select a raster for capture:
- In the Video Device SDI group, toggle the Video/Graphics option box to display your video card (AVIO). See Capture Menu Options.
- Select an option from the Link Type box. Select Single for a 4:2:2 video signal, and Dual for a 4:4:4 video signal.
- Toggle the Format option box to the required raster format (SD, HD, Film, or Audio).
- In the Raster list, select the raster that matches the material to capture.
 Note: If clicking on a raster in the Raster list does not select the item, that format is not available for capture on that system.
 - (Optional) Remove 3:2 pulldown frames on capture. See Removing Pulldown when Capturing.