- Import Alembic or FBX geometries (as well as other 3D formats).
- Create 3D text that you can extrude and manipulate as a geometry.
- Add lights and shadows, as well as other lighting effects, such as lens flares and rays.
- Look at, and work with your scene, through an Action camera.
- Access the Modular Keyer, where you can key out green screen footage.
Using Action on the timeline offers you a way to create complex compositions as an alternative to working in Batch or Batch FX flow-graph representations. But this workflow allows you to start compositing on the timeline with Action, then promote and explode your comp in Batch or Batch FX to continue working.
Action is also available as a timeline transition, and has all the same options available as Action Timeline FX in the quick menu. In addition, you can access specific transition settings by choosing Transition from the Action Quick Menu selector. When you enter the full Action menu after applying an Action timeline transition, notice that the outgoing clip is listed in the Media list as the back media, while the incoming clip is listed as the front/matte media.
Using the Action Quick Menu
As with other Timeline FX, you can use the quick menu to apply settings without having to enter the full editor. Since Action is comprised of many nodes, each with their own menu settings, there are additional quick menu controls to switch between settings for nodes, while allowing you to still view parent/child relationships.
When applying an Action Timeline FX, a default composition is created with an axis, surface, shadow, light, and camera (you can delete any of these objects, except for the default camera). This allows you to start working directly from the quick menu (use the Action Menu Selection box to switch between Action menus). To access the full Action menu, click the Enter Editor button. Once you have added and connected more nodes to your Action scene, you can return to the timeline and still access settings for most nodes from the quick menu, if desired.

- Menu Selection box
- Select which quick menu to display.
- Object Selection box
- Select which object's menu to display. Objects appear in this list if there are more than one of the type selected in the Menu Selection box.
- Parent or Child Selection box
- Select a parent or child menu to display. Objects appear in this list if there are any parents or children in the scene of the object selected in the Object Selection box.
For some menus, such as Lights, there is another sub menu box to further refine which settings are displayed in the quick menu.
Compositing Examples
Depending on the effect you are trying to achieve, you can decide how your Action Timeline FX is composited (either by the Comp node, or by Action itself). The following two general examples show how you can comp your effect in different ways.
Example 1: Comping with the Comp node.
- On the timeline, add an Action Timeline FX to a gap on a track above another clip.
- In the FX ribbon, make sure that the Comp node is enabled.
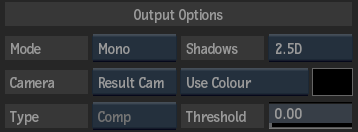
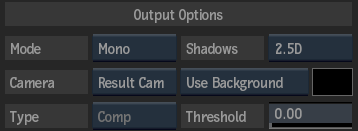
- In the Action quick menu, disable Use Back. Tip: You can set the default behaviour of this button in .
- Double-click the Action entry in the FX ribbon to enter the Action editor.
You can see that the lower clip from the timeline is the front/matte and background in Action.
- In Action, add a 3D Text node, change and animate the text, as needed.
- In the View box, select to see your effect in the context of the timeline. Tip: You can also toggle the F4 keyboard shortcut between the Comp output and Matte output.

Since Action as a Timeline FX is limited to Comp and Matte outputs, in this case you are creating a fill and alpha to then allow the Comp node to blend the Action result with the background. When you return to the timeline, you can change any blending settings in the Comp node menu.
Example 2: Comping in Action.
- On the timeline, add a green screen clip on a track above a moving background.
- Add an Action Timeline FX to the green screen clip.
- In the Action quick menu, enable Use Back, then enter the Action editor. Tip: You can set the default behaviour of this button in .
- Use the Modular Keyer within Action to key the green screen footage onto the background.
- Add lights, lens flares, and any other Action nodes, as needed.

In this case, when you return to the timeline, you are sending the complete result, so there is no need to use the Comp node at the timeline level.