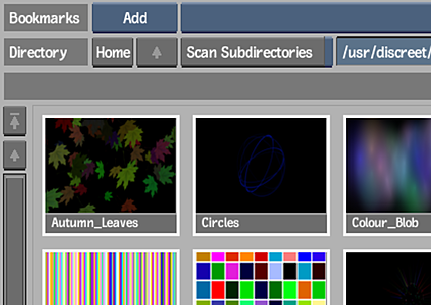
A number of particle presets are included in Action, such as a fog effect to add to your scene. These presets can also help you learn how the particle system works. The presets are divided into a number of categories and are easily added to your scene from the Action node bin.
To add a particle preset:
- Do one of the following:
- Drag the Presets node from the node bin and place it in the schematic.
- Double-click the Presets node. You do not need to be in Schematic view to add a node in this manner.
The file browser opens.
- From the Preset Type box, select Particles.

The Particle Preset file browser appears, pointing to the default location of the presets: usr/discreet/<product home>/particle_presets.
- Optional: Enable Scale to Action Resolution to load the preset in the current Action resolution.
- Optional: Select which rendering settings to enable or disable in the preset (Z-Buffer, Shading, Polygon Resolution, and Colour Clamping). Note: These settings are enabled by default, and by disabling any of them, you may not see the intended results in the preset.
- Navigate through the subfolders to select the particle preset you want to load. Hold Ctrl and click to select multiple presets. Tip: Switch to Proxies view to see a visual representation of the presets.

- Click Load.
The particle preset is then appended to your Action scene.
Note: Some presets have .psd textures associated with them, and a Batch reel is created to house these textures. It is closed by default. For this reason, Particle Presets are not available when accessing Action as a Timeline FX.