The two pipes of blend nodes provide extra functionality compared to branches in the pipeline:
- You can apply the processes to a selected region of the image. You use the lower of the two pipes to define the area on the image where you want to apply the processes used in the upper pipe. For example, you could add a garbage mask node to the lower branch and create a matte. The processes in the upper pipe are only applied to the foreground subject of the matte. If there are no nodes in the lower pipe, the processes in the upper pipe are applied to the entire image.
- You can blend the two pipes in various ways. Use the menu settings and Blend Curve editor to adjust the blending of the front and back images.
- You can use multiple layers. The two pipes together constitute a layer. You can add one to three additional layers to blend nodes.
Adding a Matte to a Blend Node
Add a matte to the Matte pipe of the CBlend and MBlend nodes to limit the area on the image where the colour correction or matte will be applied.
You can use any matte operation in the Matte pipe—add any combination of nodes that you would want to use to isolate an area of the front image. For example, you could add a garbage mask node to the Matte pipe of the CBlend node.
To add a matte to a blend node:
- Drag the node to the Matte pipe. Release the cursor.
The node is added to the Matte pipe.

Image courtesy Behavior Communications Inc.
- Use the node menu to create the matte.
- Add other nodes you want to use to refine the matte.
Blending the Front and Back Images of a Layer
There are two different methods you can use to blend the front and back images of a layer: Basic Blend and Curve Blend.
Basic Blend is appropriate for layers that do not have a matte component. It allows you to add the front and back images, and adjust the colour and opacity of the result image. In effect, since you are using the entire front image, the back image does not influence the result.
Curve Blend is suitable for layers that have a matte component. It allows you to use front and back matte curves to adjust the luminance of the front and back mattes, and also perform logical operations on the front and back images.
The two methods are mutually exclusive—you can set the blending in both the Basic Blend and Curve Blend menus, but it is the menu that is displayed that takes effect.
Basic Blend
Use Basic Blend to adjust the opacity and colour of an MBlend layer that has no matte component. This results in adding a second defined layer to the first one. You can control the opacity of the second layer.
To use Basic Blend:
- Select the MBlend layer by clicking one of the blue boxes to the right of the layer.
The MBlend menu appears and the name of the layer you selected appears in the Layer Name field.

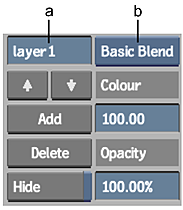
(a) Layer Name field (b) Blend box
By default, if the layer does not have a matte component (that is, there are no nodes in the Matte pipe), the Basic Blend option is selected in the Blend box, and the Basic Blend controls are displayed at the right of the menu.
Note: If Curves Blend was previously selected, then it is displayed. To display Basic Blend, select it from the Blend box. - Display the Result view. This displays the result for the entire blend node.
- Set the colour of the layer in the Colour field. A value of 100 sets the layer as white, a value of 0 sets it as black, and values in between give it a shade of grey.
- Set the opacity of the layer in the Opacity field. A value of 100 makes the layer completely opaque, and a value of 0 makes it completely transparent.
Curve Blend
Use Curve Blend to adjust the blending of the front and back images of a CBlend or MBlend node layer that has a matte component.
To use Curves Blend:
- Select the CBlend or MBlend layer by clicking the red or blue box to the right of the layer.
The CBlend or MBlend menu appears and the name of the layer you selected appears in the Layer Name field.

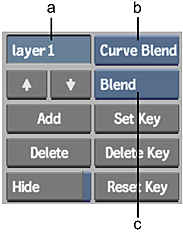
(a) Layer Name field (b) Blend box (c) Logic Ops box
For MBlend nodes, if the layer has a matte component (that is, there are nodes in the Matte pipe), the Curves Blend option is selected in the Blend box and the Matte Curves graph is displayed at the right of the menu.
Note: If Basic Blend was previously selected, then it is displayed. To display Curve Blend, select it from the Blend box. The Blend box does not appear for CBlend nodes, since Curve Blend is the only option. - Display the Result view. This displays the result for the entire blend node.
- To perform a logical operation on the front and back images, select one from the Logic Ops box.
- Use the Blend Curve editor to adjust the front and back matte curves as needed.
Using Several Layers in a Blend Node
You can use up to four layers in blend nodes to create the composite. Using layers, you can avoid doing multiple passes on the same composite. Layers are processed upwards from the bottom layer. In other words, the uppermost layer will appear on top of the next layer, and so on.
The back component of the lowest layer is a pure black image (for MBlend nodes) and the node input image (for CBlend nodes). For additional layers, however, the back component is different. On both CBlend and MBlend nodes, the result image of the lowest layer is fed into the next highest layer to serve as its back component. Likewise, the result image of this layer is fed into the next highest layer where it serves as that layer's back component, and so on.
You can change the order of the layers using the Priority Editor.
To create a new layer:
- Select the blend node by clicking anywhere in the rectangular box at its right end.
The node is highlighted and the Blend Node menu appears.

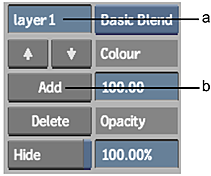
(a) Layer Name field (b) Add button
- Click Add to create the new layer.
A new layer is added to the blend node, above the previous layer. The default name for the new layer is layer2.
- Add nodes to the layer as needed.
- To change the order of the layers, click the
 button to move the selected layer up a layer, or the
  button to move it down a layer.
To rename a layer:
- Select the layer by clicking on the red or blue box to the right of the layer.
- Click the Layer Name field in the blend node menu.

The on-screen keyboard appears.
- Press Esc to remove the previous name and type a new name.
- Press Enter to save the name.
Bypassing Pipes
On blend nodes, you have the option of inputting a source image from another node on the pipeline, effectively bypassing the pipes (for example, using the key-in clip matte in a colour correction in the Matte pipe of the CBlend node). Instead of copying all the nodes in the Front pipe of the MBlend node, you could just add a branch from the end of the MBlend Front pipe to the blue box on the CBlend node.
When attaching an alternate input source to a Matte pipe, you should use a matte image. If you use a colour image, it will be converted to greyscale.