To set camera, working, and orthographic views:
- From the View box, select Camera, Working, or an orthographic view (listed under Action 3D Views).
Select: To: Camera View the scene in Camera view. This is the scene as viewed by the camera eye. In other words, your field of vision in world space is equivalent to the viewing frustum of the camera. The size of objects depends on their distance from the camera eye. Top View the scene as if you are positioned on the positive Y-axis. This is an orthographic view; there is no perspective deformation. Side View the scene from the side, as if you are positioned on the positive X-axis. This is an orthographic view; there is no perspective deformation. Front View the scene as if your line of vision is directed into the camera eye. This is an orthographic view; there is no perspective deformation. Working View the scene just as in Camera view. Try out different positions and adjustments without affecting the camera settings. - If you have multiple cameras in the scene, use the Camera box that appears (below the left-side Action menu buttons) to define which camera is used for the Camera view in the image window. The camera selected in this box is not necessarily the camera used to process the scene.
- Use the Working view if you want to view the scene using different adjustments, without saving any of the settings to a camera setup. For this reason, no parameters are animatable.
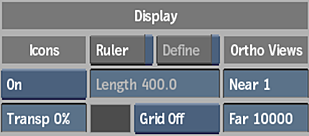
- Adjust the view with the Ortho Views controls, if needed.
When using an orthographic view, you may notice that parts of the object you are viewing are getting cut off. Adjust the near and far ortho views. You gain more space to view the object, but lose some viewing precision.
In the Display section of the Action Setup menu, adjust the Near and Far fields.
 Note: The Ortho Views parameters in the Action Setup menu are only for viewing objects, and cannot be animated or saved. The Near and Far fields in the Camera menu are used to set clipping planes. See Moving the Near and Far Clipping Planes.