Activate the Stereoscopy feature using one of the following methods:
- Enable Stereoscopy in the project settings before entering the Lustre application. See Project Settings.
- Enable Stereoscopy while creating a new Flame project. See Setting Lustre Project Options.
Selecting a Raster for Stereoscopy
You want to only select a stereoscopic raster if you are connected to a proper stereoscopic device (e.g., Stereoscopy projectors (two projectors or one), or a 3D monitor). When you are playing out your footage to a dual link device, each eye is assigned to one link. The Left Eye always runs through the A Link and the Right Eye through the B Link. Refer to the Autodesk Lustre Hardware Setup Guide.
To select a stereoscopic raster:
- Click Editing in the main menu and then click Playout.
The Playout menu is displayed.
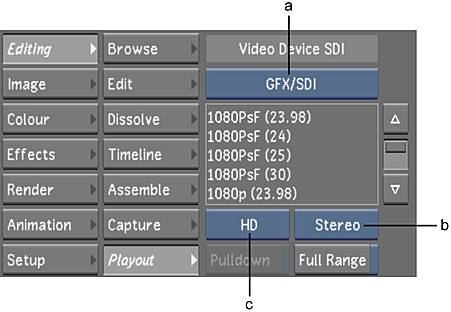
- In the Video Device SDI group, toggle the Video/Graphics Raster button to display GFX/SDI, toggle the format option button to HD, toggle the link type button to Stereo, and select a Stereo raster from the list. Note: The GFX/SDI raster outputs in 8-bit range when you are working in Stereo mode.

(a) Video/Graphics Raster button (b) Link Type button (c) Format button
Stereoscopic outputs are now enabled.
Enabling the Stereoscopy Button
You can disable and re-enable the Stereoscopy feature by using the Stereoscopy button. You would enable the Stereoscopy button when you are assembling an EDL independently for each eye to create a two-layer timeline. You would then convert it to a Stereo timeline.
To enable the Stereoscopy feature:
- Click Setup in the main menu and then click Grade.
The Grade menu is now displayed.
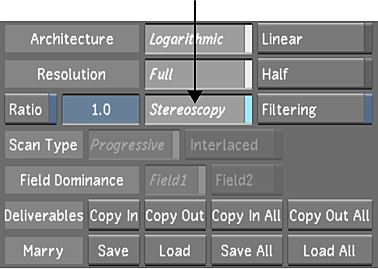
- Enable the Stereoscopy button.

The Stereoscopy feature is now enabled.
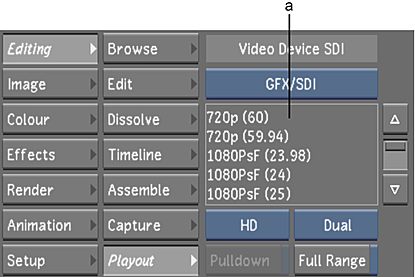
- (Optional) Click Editing and then click Playout. Within the Playout menu, select a raster from the Video Device SDI group

(a) Raster list