To use the interoperability features between different Creative Finishing applications and workstations, you must be running the same version of Wiretap Server on each workstation.
File Path Translation
File path translation ensures that different workstations running different operating systems are able to convert file paths from other operating systems to a file path in their native file structure. This ensures compatibility between Linux, Mac OSX and Windows workstations in a collaborative workflow, as the different workstations send and receive commands to exchange media to and from shared storage.
- Init.config: located in: /usr/autodesk/lusterpremium_2013.1/
- wiretap_path_translation_db.xml: located in: /usr/discreet/wiretap/current/cfg/
To make sure Lustre is able to read media files from its direct connection to a shared storage, you must edit the PathTranslationTable portion of the init.config file, as follows:
<PathTranslationTable>
<PathTranslation src="172.16.129.101@wtg:/Volumes/QASAN01" dst="localhost@wtg:/QASAN01"/>
This example translates a Mac Wiretap Gateway mountpoint to its corresponding Linux Lustre mountpoint, which allows Lustre to read the media from its own storage mount point, rather than from the remote workstation.
It is possible to render media files on a shared storage and write the sequence and clips metadata in the Smoke / Flame Premium Media Library or Shared Folder (Wiretap Render). If the shared volume does not have the same mount point on the two workstations, you must add the corresponding mount points to the wiretap_path_translation_db.xml file, as follows:
Add the corresponding mount points:
<map src_os="Linux" src_path="/QASAN01" dst_os="MacOSX" dst_path="/Volumes/QASAN01" />
<map src_os="MacOSX" src_path="/Volumes/QASAN01" dst_os="Linux" dst_path="/QASAN01" />
Save the file and restart Stone+Wire
Performing a Wiretap render writes the files and the generated clips and sequence(s) that will reference the translated path.
- Lustre is able to read & write to any folder in a Workspace that is not Read-Only.
- Flame Premium Batch Snapshots cannot be accessed in Lustre.
Compressed Intermediates
Lustre can read & write compressed intermediates from a Flame Family project (i.e. Apple QuickTime ProRes and Avid DNxHD). However, for collaborative workflows in which multiple workstations are connected over a high speed network and/or Shared Storage (SAN), there is a limitation to the media access, in that compressed intermediates are not directly read from the Shared Storage but from the Wiretap Server network connection. For example, two workstations connected to a SAN can share media, but compressed intermediates will not be read directly from the shared storage on the Lustre station since Lustre does not natively support Apple QuickTime or DNxHD). To get around this, do the following:
- First, make sure Wiretap server network interface is defined using InfiniBand or 10-GIgE. By default, the wiretap configuration file defines the house network but for SD/HD and higher resolution workflows, it is better to use the fastest network connection available. Make sure to always restart the Wiretap server after modifying the configuration file.
- Create your content through a Remote Connection (this requires the presence of Flame, Flame Assist or Flare on the Lustre workstation): By selecting the Lustre workstation, from the Host Computer drop-down menu, when you start your project, you can use Flame or Flame Assist for conform and sequence preparation for media that will ultimately end up in Lustre. By generating the media for grading using Compressed Intermediates on the Lustre workstation, Lustre sees the media as local and playback performance is good. This is the ideal workflow for high resolution work (HD, Film, UHDTV, etc).
BatchFX
You must render BatchFX segments and BatchFX on gaps prior to importing the sequence into Lustre.
- Rendered effects are seen as source media by Lustre and can be graded along with the rest of the sources.
- Unrendered BatchFX are displayed as black frames in Lustre.
Transitions
All transitions are preserved by Lustre.
- Only dissolves (with or without animation) are displayed.
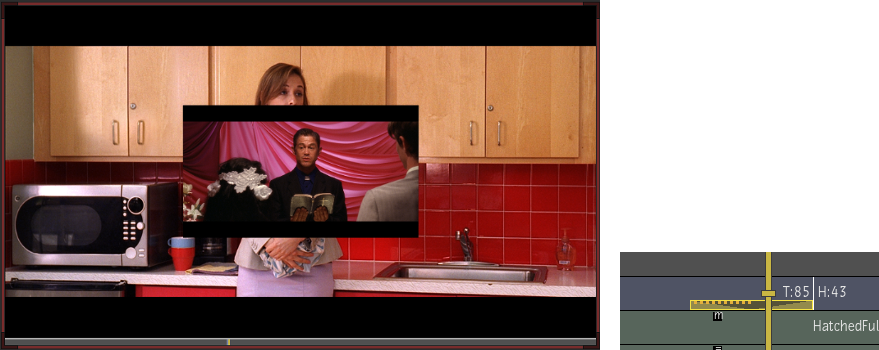
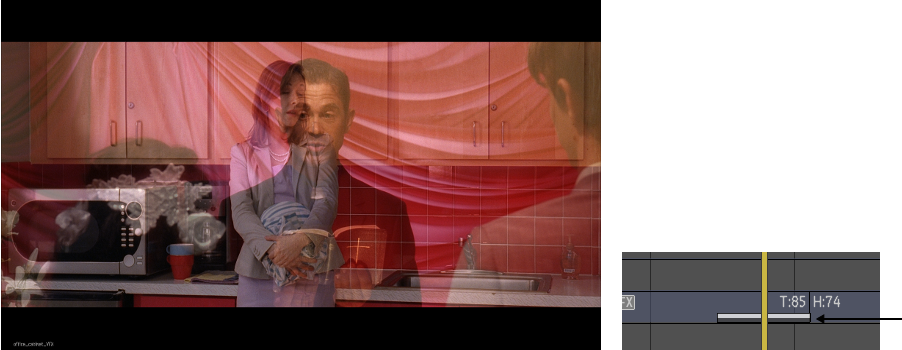
- Action and Wipe transitions are displayed as dissolves. The original Wipe/Action transitions are preserved in Lustre and are recreated in Smoke/Flame upon reimport. A special icon is displayed in the timeline in Lustre whenever Action and Wipe transitions occur.

Action Transition in Smoke/Flame (Image courtesy of EVN PRODUCTIONS)

Action Transition displayed as a dissolve in Lustre (Image courtesy of EVN Productions)
Custom Transitions
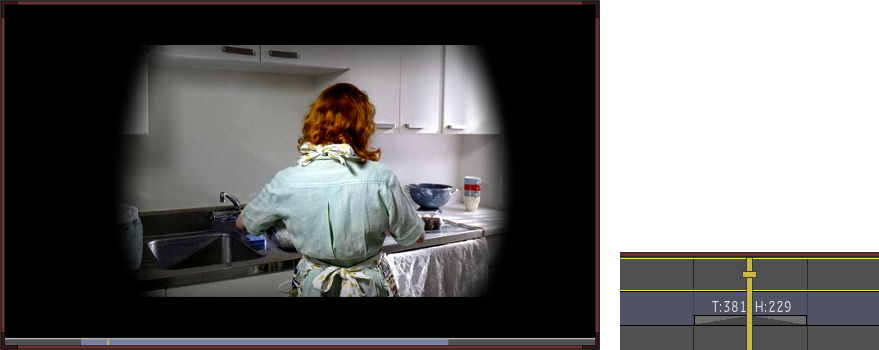
Custom transitions are rendered media and appear as a clip in Lustre. This clip is maintained in Smoke/Flame when you reload the sequence after it is rendered in Lustre. It is recommended to create your custom transitions after the source media has been graded and replaced in Smoke/Flame.

Custom Transition in Smoke/Flame (Image courtesy of EVN PRODUCTIONS)

Custom transition in Lustre

Custom transition in Smoke/Flame after render from Lustre
Timeline FX
-
TimeWarp
-
Resize
-
Text
-
Colour Correct
-
Spark
-
GMask
-
Action
-
Stereo Toolbox
-
Flip
-
Colour Warper
-
Blur
-
2D Transform
-
Composition parameters
-
Format options
-
Pre-processing parameters
-
Containers
-
Matte Containers
Note: Format Options and Pre-Processing parameters are only available in Lustre on clips for which the media is not cached.

Adjustment layers are supported like any other Timeline FX. However, they are not displayed when scrubbing or playing back in Lustre and cannot be graded. The original adjustment layer is restored in Smoke/Flame when you reload the sequence after it has been rendered in Lustre.
- If there is media under the adjustment layer, that media is displayed in the viewport.
- If there is no media under the adjustment layer, a red "X" is displayed in the viewport.

Containers and Matte Containers
- By default, Flame renders only the timeline effects required for the sequence. Effects located inside Containers & Matte Containers that are not required are not rendered. Since exchanging content with Lustre might require rendering more content, it is now possible to render all timeline effects located inside containers and matte container. The Full Container Render option located in the Flame preferences menu in PreferencesTimeline Rendering ensure that all effects are rendered. This option also works foreground rendering, Burn and Background Reactor. This preference is saved on a project basis.
- Before rendering, make sure to select the Container or Matte Containers. If the Containers are not explicitly selected, only the visible effects will be rendered. This behavior happens when selecting an empty top video track and clicking Render. In this case, the rendering is optimized to only render the required effects, even if the Full Container Render option is enabled.
- Matte Containers can be used in Lustre when a sequence is imported from
Flame Premium. Matte Containers availability is not limited to the Source Grading import method, but prior to importing sequences with Matte Containers in Lustre, make sure to:
- Render any timeline effects to avoid ending up with missing media in Lustre.
- Disable any Comp effects applied on Matte Containers. If the Comp effect is not disabled, only the output of the Comp will be available to Lustre.
- To add a matte to the first frame of a source clip in a matte container/multi-channel clip in Lustre, press Ctrl and drag and drop the matte to the container.
- To insert the matte at the first frame of the In point of the timeline segment, press Ctrl+Alt and drag and drop the matte to the container.
See:
Multi-channel Clips
Multi-channel clips created in the Lustre sequence are recreated as matte containers in Smoke/Flame.
See: