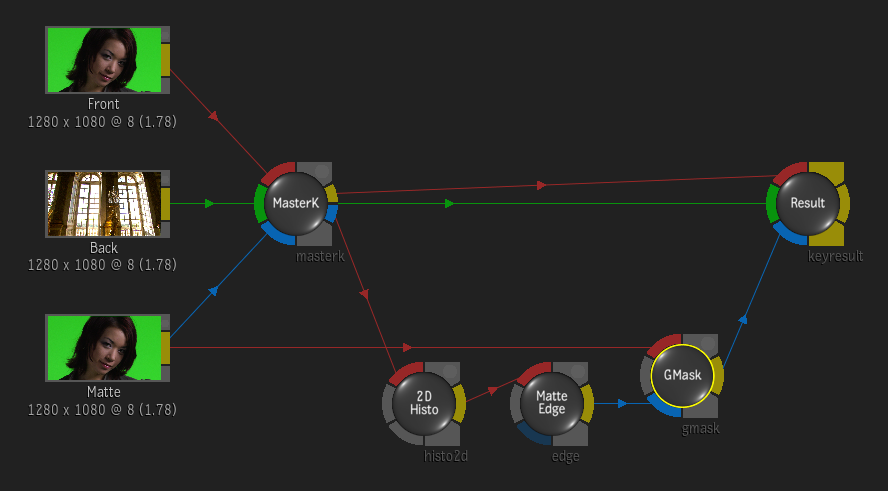
You can create chroma keys directly on the timeline using the Modular Keyer in Action. When you enter the Modular Keyer, the clip loaded as the Front and Matte (or Key In) is the clip with the Action Timeline FX, and the clip loaded as the Back is the next available track on the timeline.
To key on the timeline:
- Build a multitrack timeline with a front layer and a background.

- Select the track you want to key, and add an Action Timeline FX (in the example above, select the GreenScreen clip).
- Double-click to Action entry in the FX ribbon, or click the Editor button to enter Action.
- In Action, click the Media button to display the Media menu.

- Double-click the K field in the front/matte row to enter the Modular Keyer. Use the desired Start Mode, and create your key. The following example uses the Master Keyer start mode:
 Tip: You can set up the viewports in 2-up mode using the Viewport Layout box. In this case, you can use one View box to set one viewport to the modular keyer schematic view, and the other viewport to Result or Action Context view.
 - When you are finished creating the key, click Return to return to Action. Notice that the K field in the front/matte row of the Media menu now has an MK displayed.

- Perform any other Action tasks, as needed, then click Exit to return to the timeline.