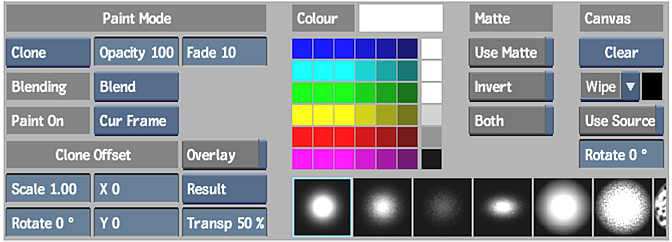
You can paint with either a pen or a mouse, and access various pressure settings.

To apply a brush stroke:
- Select an option from the Paint Tools box.
- Select an option from the Paint On box to apply the stroke to the current frame, all frames in the sequence, or the current frame and subsequent frames.
- Select the Result (F4) or Output Matte (F4 F4) to set the view where you are painting.
- If you want to paint on the result and output matte simultaneously, enable Both.
- Click a brush to select it.
- Set brush attributes. See Brush Attributes and Attribute Modes.
- If you will reveal a source on the image, select the source in the Sources list. See Revealing Sources.
- To change the colour, click a colour pot. If you are painting on the output matte, the brush colour is grey with an equivalent luminance value. Tip: As an alternative to using the colour pots, you can designate the colour under the pointer as the current brush colour by pressing the left Ctrl key and clicking on the canvas.
- Click and drag on the canvas to draw a stroke. Note: Downstream context views are not automatically updated as you add strokes, since this would cause performance degradation. To force an update, click the Update button.
- Use the eraser end of the pen if you are using the stylus to erase strokes that you have created.