Reach
The concept of Reach is slightly different for inverse kinematics and retargeting.
Inverse kinematics
When using the inverse kinematics solver, Reach controls the blending between the original FK stance of your character and the target points you define in the HIKEffectorSetState.
Each Effector has two Reach values: one that controls translation, and one that controls rotation.
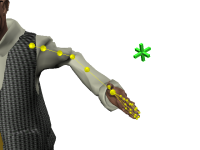
Reach Translation
Reach Translation controls whether the position of a joint generated by the inverse kinematics solver is at the original FK position, the position of the Effector, or a position in between those extremes.
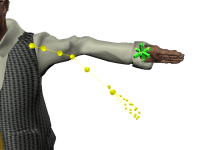
Reach Rotation
Reach Rotation is exactly analogous to Reach Translation, but it controls whether the rotation of a joint generated by the inverse kinematics solver uses the orientation of the joint from the original FK pose, the orientation of the Effector, or an orientation in between those extremes.
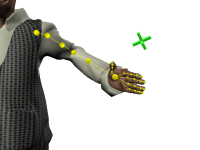

Combining Reach Translation and Reach Rotation
By combining Reach Translation and Reach Rotation, you can pin your character’s joints either to their original FK positions or to specific locations or item in your scene.
If you set both the Reach Translation and Reach Rotation values for an Effector to their maximum values, the inverse kinematics solver will not take the original position and rotation of the joint into account at all when calculating the new stance for the character. You can use this setting to effectively pin the joint to the position and rotation of an item or location in your game.
If you leave both the Reach Translation and Reach Rotation values for an Effector at zero, the inverse kinematics solver will not attempt to move the corresponding joint toward its Effector at all, no matter what the position and rotation of that Effector may be. You can use this setting to effectively pin the joint its original position and rotation.
Note however that in both cases the joint may be moved due to the pull of other joints. See Pull.
Animating Reach
Many typical uses of HumanIK involve adjusting an animation over time in order to have a character’s limb reach a certain point or interact with a certain item at a specific time—for instance, the character reaching out its hand to grasp a doorknob.
A typical approach to this situation is to set the translation and rotation of the appropriate Effector—in this case, the right hand—to the final desired position, and to animate the Reach settings, increasing them at each frame. At the first frame, the Reach values should start out at zero, leaving the original forward-kinematics animation unchanged. At the final frame of the character’s movement, the Reach controls should reach their maximum values, drawing the character’s hands to the final goal. At each frame in between, the Reach controls should be set to values interpolated between zero and maximum, producing a smooth movement towards the goal.
Retargeting
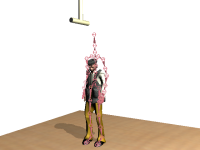
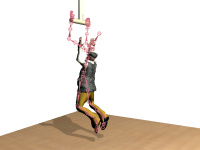
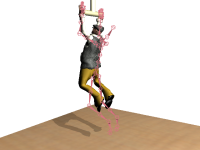
When using the retargeting solver, Reach determines the most important points of contact between the source animation and the target character—i.e., the joints that should be synchronized between the two characters in three-dimensional space. These points of contact are sometimes at the hips, or, when retargeting an animation to a character of a different size or scale, the feet. By default, the HumanIK retargeting solver uses the feet as the point of contact between source and target.
Animating Reach
You can set Reach settings for the position and orientation of multiple different Nodes in your character. The retargeting solver balances the competing requirements of all these Reach settings to determine how it aligns the final generated pose to the placement of the original animation. This balancing between different Reach settings allows you to blend the points of contact over time. For example, if the character in the example above starts out in a standing pose and jumps up to grasp the trapeze, the Reach settings must start out by prioritizing foot contact, and must gradually shift to prioritizing hand contact at the time that the animation is supposed to grasp the trapeze.
 Except where otherwise noted, this work is licensed under a Creative Commons Attribution-NonCommercial-ShareAlike 3.0 Unported License. Please see the Autodesk Creative Commons FAQ for more information.