Import point data to use for a camera path. Each point becomes a camera path keyframe that shows users the path along a particular feature.
For example, bring in points along a road to simulate a drive along that road. Try out a data source that is already part of the model to get a feeling for this feature. For example, re-use street data to see predictable results.
- Open the model.
- Click


 .
. - In the Storyboard Creator, click the point at which to insert the imported camera path.
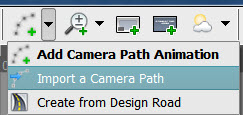
- Chose Import A Camera Path from the Add a New Camera Path animation tool menu:

- Open the point file.
You can open a DB, SHP, SDF, or SQLite file.
- In the Import Camera Path dialog box, specify the coordinate system and the following:
- Keyframe Settings: Indicate the attributes of the data source that will determine the name and order of the keyframes created from the imported points.
- Camera Height: If the geometry attribute of the data source specifies the Z value of the point, you can add that value to the camera height. For Expression, specify a value in the model's units or specify an attribute to use for the camera height.
- Camera Orientation: Specify the angle values for the camera tilt and rotation.
- Timing Control: Specify one of the following:
- Set Speed — Maintains the same speed, regardless of distance. Set a Path Speed in kilometers per hour. Changing this setting affects the overall duration of the sequence.
- Set Duration — Specifies the time you want it to take to get from the current shot to the next. Indicate the duration between each shot and the amount of time to pause at each shot. Changing this setting affects the overall duration of the sequence.
Each point in the data source is inserted as a keyframe in the camera path.