Follow these steps to create a re-combination of your render passes and preview them in the Render View.
- In the
Hypershade, select
Maya > Other Textures > Layered Texture.
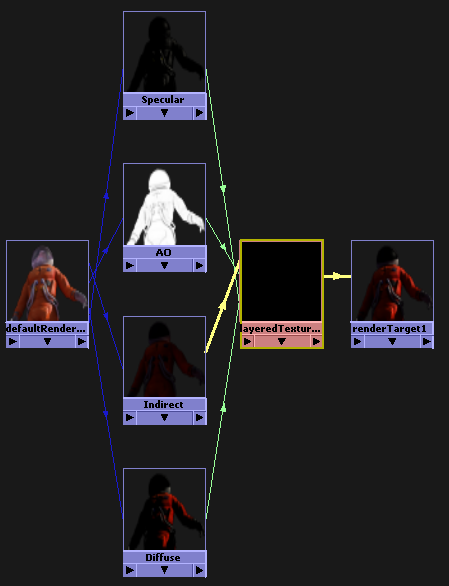
Your re-combination is created using a Layered Texture node.
- Add your
Indirect pass to your
Layered Texture node. Remove the original default layer.
Note: You can find your render passes under the Rendering tab of your Hypershade top tabs.
- Middle-drag the Indirect pass node to the Alpha attribute of the Indirect pass layer of the Layered Texture node to connect the alpha attribute.
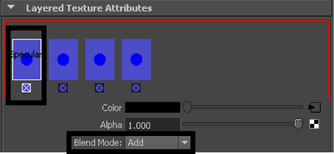
- Add your Ambient Occlusion pass to your Layered Texture node, on top of Indirect. Select Multiply as your Blend Mode.
- Add your Diffuse pass to your Layered Texture node, on top of Ambient Occlusion. Select Add as your Blend Mode.
- Add your
Specular pass to your
Layered Texture node, on top of
Diffuse. Select
Add as your
Blend Mode.
 Note: Ensure that the correct layer is selected before dragging and dropping a node to its Alpha attribute in the Layered Texture to avoid inadvertently connecting the Alpha to the incorrect layer.
 - Ctrl + middle-drag your
Layered Texture node to your
Render Target to connect them via the
color and
alpha attributes.

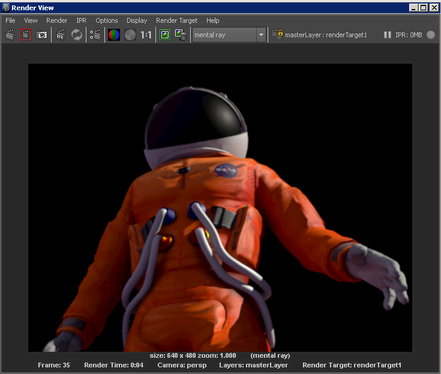
- In the
Render View window, select
.
In addition, in the Render View window, lock the
 button . By locking this button, only the 2d compositing graph is rendered. Your render pass results are already up to date and it is not necessary to re-render them again. For more information regarding this button, see
Render View toolbar.
- Click
 . This renders the output of your
Render Target node, which is your
Layered Texture that encompasses a re-combination of your render passes.
Tip: Select Display > Render Info > Render Target Name to include the name of your render target in the render information. The render target name is also displayed in the Render View toolbar.
Note: You may want to turn off final gather when you render your
Render Target to increase efficiency.